14 Creative Backyard Landscaping Ideas for Every Budget
Creative backyard landscaping ideas are design-led approaches to transforming outdoor spaces — using planting, hardscaping, lighting, water features, and spatial planning — to create backyards that feel genuinely considered, functionally generous, and personally expressive regardless of their size, condition, or the budget available to work with. This article gives you exactly 14 creative backyard landscaping ideas for every budget, spanning low-cost DIY interventions to more significant structural investments, with specific guidance on plants, materials, construction, and styling for every idea.
There is a particular quality that separates a backyard that has been landscaped from one that has merely been maintained — a sense of spatial intention, of surfaces and plantings arranged with genuine consideration for how the space will be used and experienced at every time of day and every season of the year. The best backyard landscaping is not about spending the most money but about making the most considered decisions — choosing the right plant in the right position, defining the right zones for the right activities, and selecting the materials that will look better in ten years than they do on the day of installation. These ideas range from a weekend DIY planting project to a multi-element garden transformation of genuine landscape design quality. Here are 14 ideas worth planning — and saving.
Why Creative Backyard Landscaping Ideas Work So Well
Backyard landscaping as a design discipline has roots in the long tradition of garden design that stretches from the formal gardens of Renaissance Italy and the landscape parks of 18th-century England through the Arts and Crafts garden movement of the late 19th century (which integrated domestic architecture with naturalistic planting in a way that still informs the most enduring residential garden design) to the contemporary sustainable garden movement that prioritizes native planting, water conservation, biodiversity, and the creation of garden spaces that function as genuine ecological habitats rather than purely decorative outdoor rooms. The creative backyard landscape draws from all these traditions while adding the specific requirements of contemporary domestic life: outdoor dining and entertainment, children’s play, productive vegetable growing, and the need for spaces that work as extensions of the indoor living environment rather than separate, formal garden compositions.
The materials and plants that define the most successful and most enduring creative backyard landscapes share specific qualities: they improve with age rather than deteriorating (natural stone, weathered timber, and established planting all look better after five years than on the day of installation, while composite decking, synthetic turf, and tender bedding plants do not); they are appropriate to the local climate and soil conditions (native and climate-appropriate plants require significantly less maintenance and input than exotic alternatives); they provide multiple seasons of interest (structural plants, seasonal flowering, autumn color, and winter form all contribute to a landscape that rewards year-round attention); and they create genuinely usable outdoor spaces rather than merely decorative ones. Color palettes for creative backyard landscaping lean toward the naturalistic and ecologically appropriate — the warm terracotta of local sandstone, the silver-grey of weathered oak, the varied greens of native plantings, and the seasonal color of locally appropriate flowering plants.
Creative backyard landscaping has become one of the most engaged home improvement categories across all platforms, driven by the post-pandemic acceleration of investment in outdoor living and the growing understanding that a well-designed backyard genuinely extends the home’s habitable area rather than merely providing an outdoor version of indoor aesthetics. The most consistently popular backyard landscaping content — across Pinterest, garden design publications, and landscape architecture platforms — shows designs that combine strong spatial structure (defined zones, clear pathways, and considered planting) with naturalistic, ecologically rich planting that supports local biodiversity while looking genuinely beautiful.
Small urban backyards gain the most from creative landscaping ideas because thoughtful design can make a 30-square-meter urban backyard feel significantly larger and more functionally generous than its actual dimensions suggest — through careful use of vertical planting, diagonal sight lines, layered planting depths, and the psychological effects of a clear spatial structure that gives every area of the garden a defined purpose and identity.
Style at a Glance
| Element | Trait 1 | Trait 2 |
|---|---|---|
| Philosophy | Spatial intention over maintenance | Naturalistic beauty over formal control |
| Materials | Natural stone, weathered timber, gravel | Native plant, seasonal perennial, structural shrub |
| Color Palette | Warm terracotta, silver-grey, botanical green | Seasonal flower, autumn amber, winter structure |
14 Creative Backyard Landscaping Ideas for Every Budget
1. Define Zones with a Curved Gravel Path
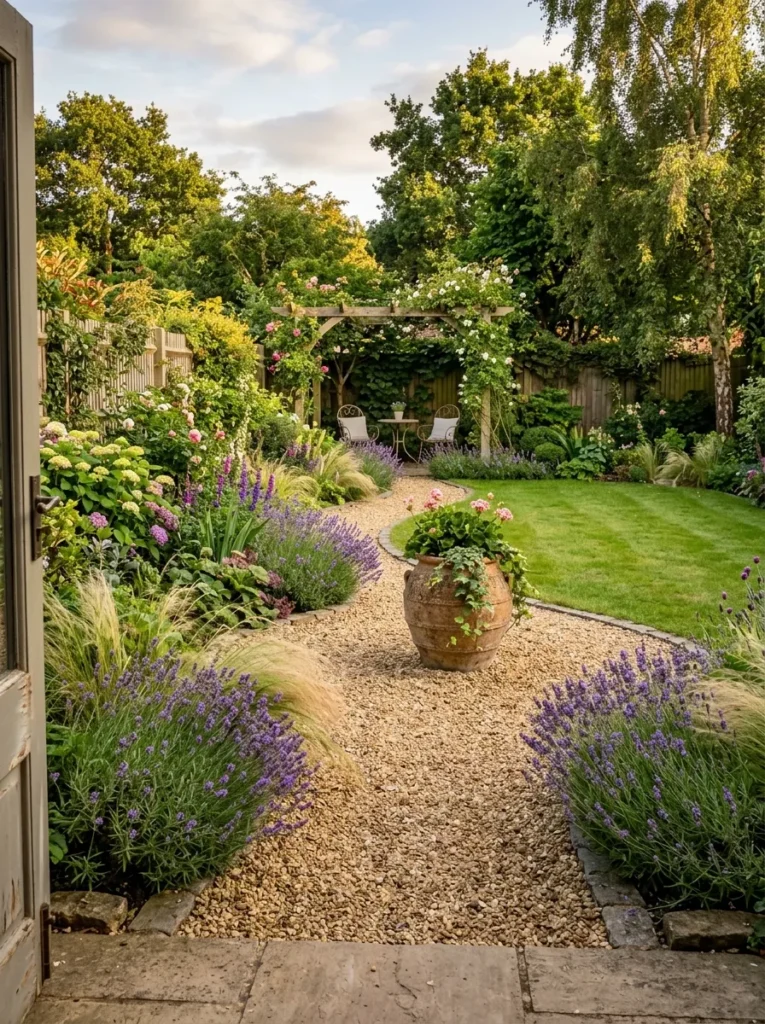
Vibe: The curved gravel path feels invitingly journeyed — a simple path that transforms a flat rectangular garden into a space with genuine narrative and spatial depth.
Why it works: A curved gravel path is the lowest-cost, highest-impact single landscaping intervention available in a flat rectangular backyard because it simultaneously solves the garden’s most fundamental spatial problem — the static, undifferentiated quality of a lawn or paved surface seen in its entirety from a single viewpoint — by creating a journey through the space that reveals different views and areas progressively rather than all at once. The design principle is revealed discovery: a path that curves out of sight before reaching its destination implies that there is more garden beyond the visible section, creating the perception of greater garden size than the actual dimensions justify. The gravel surface is the most appropriate material for a garden path because it is inexpensive ($2–$5 per square meter in materials), requires no specialist installation skills, allows rain water permeation (important for sustainable drainage), and produces a satisfying auditory quality (the crunch of footsteps on gravel) that hard-paved surfaces cannot replicate.
How to get it: Mark the path’s curved centerline using a garden hose laid on the ground in the desired curve — step back and view from the house window to assess the curve’s quality before committing. Excavate to 100mm depth along the full path width. Lay a weed-suppressing membrane over the excavated base. Pour 80mm of compacted crushed stone base, then 20mm of warm pea gravel or decomposed granite as the surface layer. Edge both sides of the path with natural steel edging (cor-ten steel develops a warm rust patina) or pressure-treated timber edging to contain the gravel. Plant the borders immediately alongside the edging — lavender and ornamental grass are the most appropriate, as their soft, billowing growth quality makes the hard path edge read as organic rather than constructed.
Quick Win: A single large terracotta pot planted with a structural standard bay tree or clipped topiary sphere placed at the path’s first curve creates an immediate focal point that draws the eye along the path and signals the garden’s design intention to anyone standing at the back door — the most impactful single object investment available for under $50.
Shop The Look
| Product |
|---|
| Warm pea gravel 20mm bag garden path |
| Cor-ten steel path edging roll landscape |
| Weed suppressing membrane path underlay |
| Lavender plant bare root border set |
| Large terracotta pot focal point path curve |
Also view: 14 Stylish House Interior Design Ideas
2. Create a Raised Vegetable Garden Bed System (LAYOUT / MATERIAL)
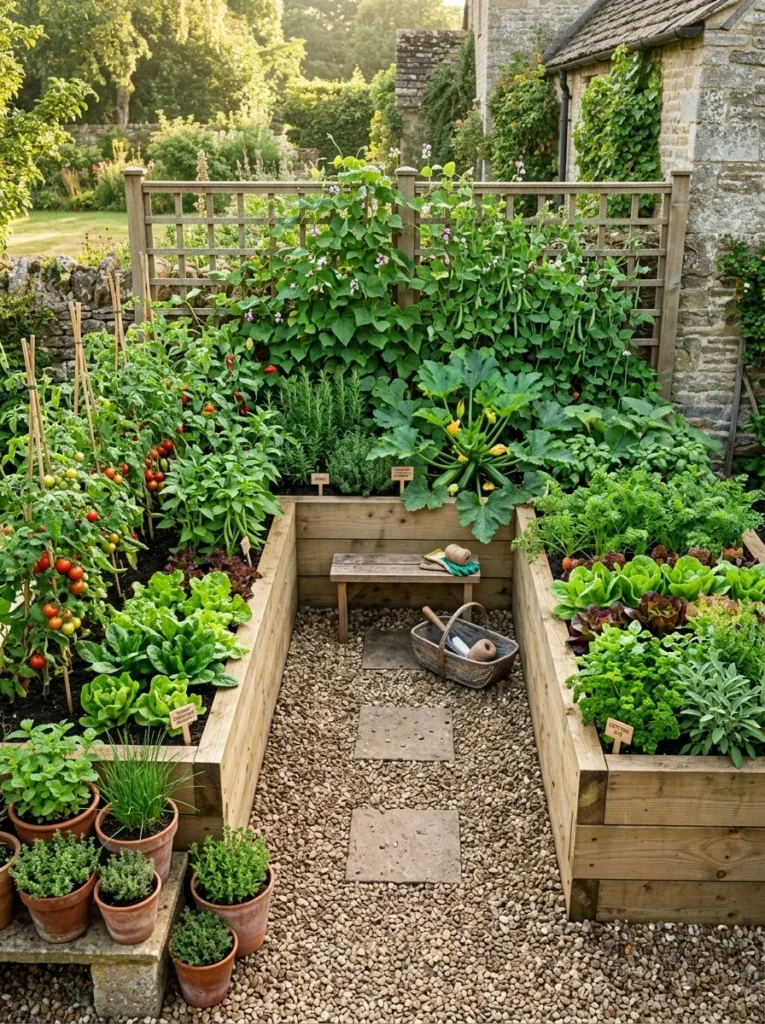
Vibe: The raised bed system feels productively beautiful — the kitchen garden that makes growing food as visually satisfying as it is practically rewarding.
Why it works: A raised vegetable bed system is the backyard landscaping project that simultaneously delivers the greatest functional return (fresh produce) and the greatest visual transformation (a structured, productive garden area with defined form and seasonal interest) from a single project investment. The raised format is specifically advantageous because it creates defined, ergonomically accessible growing spaces that are easier to maintain and manage than in-ground beds, improves drainage and soil quality control, elevates the planting to a height where it becomes visually prominent from the house rather than invisible at ground level, and creates the defined spatial structure that gives a productive garden area a designed quality rather than an ad-hoc appearance. The U-configuration of three beds around a central working space is the most ergonomically efficient arrangement — every inch of all three beds is accessible without stepping onto the growing medium.
How to get it: Build each raised bed from 200x50mm structural timber in lengths of 240cm and 120cm, jointed at corners using 90mm galvanized corner brackets. Use pressure-treated or naturally rot-resistant timber (cedar, oak, or larch) rated for ground contact. Fill with a 60:40 mix of quality topsoil and composted organic matter. Position the three beds with 60cm minimum spacing between them for comfortable working access. Install a trellis panel (bamboo cane horizontal frame or timber panel with wire horizontals at 20cm intervals) on the sunniest wall beside the bed system for vertical growing — climbing beans, tomatoes, and cucumbers on the trellis dramatically increase the productive area without increasing the footprint.
Shop The Look
| Product |
|---|
| Structural timber 200x50mm raised bed |
| Galvanized corner bracket set 90mm |
| Quality topsoil bag raised bed filling |
| Trellis panel timber wall climbing plant |
| Bamboo cane set climbing vegetable support |
3. Establish a Native Wildflower Meadow Area (COLOR / MATERIAL)
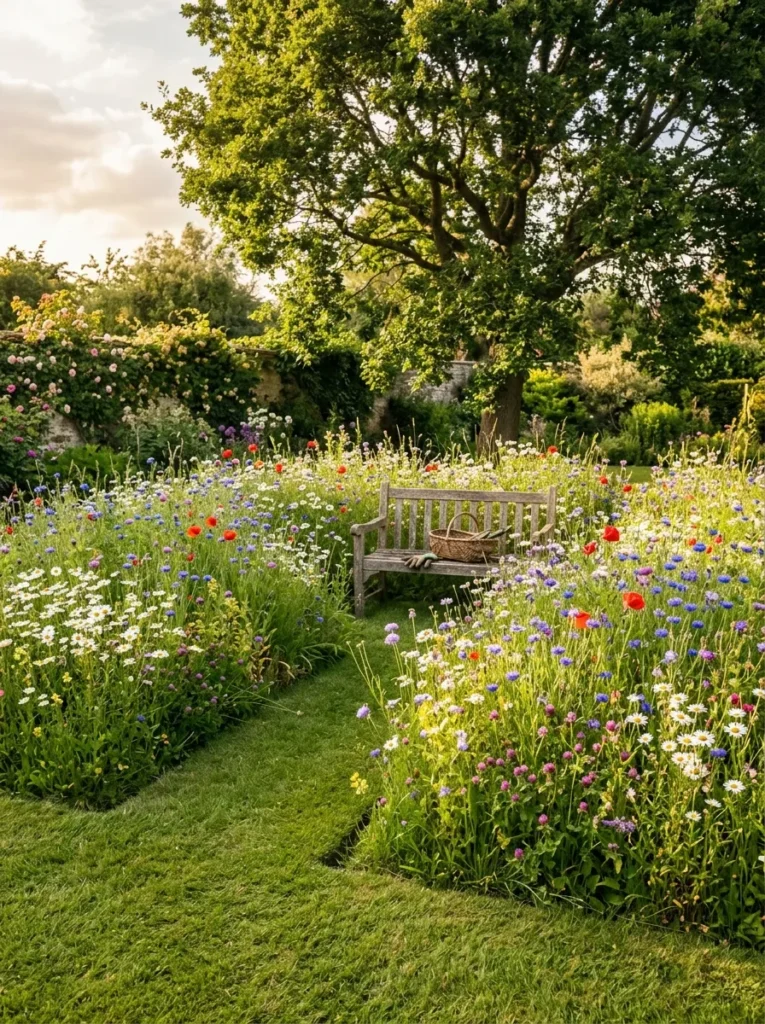
Vibe: The wildflower meadow feels naturistically abundant and quietly remarkable — the garden area that hums with bees and butterflies and makes the rest of the garden feel more connected to the natural world.
Why it works: A native wildflower meadow section is the backyard landscaping intervention with the highest ecological impact because it converts a typically species-poor lawn area into a diverse flowering habitat that supports native pollinators, birds, and invertebrates — creating a measurable positive biodiversity contribution within the domestic garden. The design principle is managed naturalism: the wildflower meadow requires less maintenance than a conventional lawn once established (one or two cuts per year rather than weekly mowing), but the key to success is the clear boundary definition — a neat mown edge around the meadow signals that this is a deliberate design decision rather than an area of neglect, which is the critical perceptual distinction that makes a wildflower meadow read as beautiful rather than unkempt.
How to get it: In autumn, remove existing turf and topsoil from the chosen area to a depth of 100mm — wildflowers require low-fertility soil to thrive (high-fertility soils favor competitive grass species that swamp wildflower seedlings). Rake the exposed subsoil to a fine tilth and sow a native wildflower meadow mix at the recommended rate (typically 1–3g per square meter). In spring, additional yellow rattle seed (Rhinanthus minor) — a native annual that parasitizes grass roots, reducing grass competition — can be overseeded to support the meadow’s floral diversity. Cut the meadow to 5cm height in September after seeds have set, removing all cuttings to maintain low soil fertility. The meadow will improve in diversity for the first 3–5 years as the perennial component establishes.
Shop The Look
| Product |
|---|
| Native wildflower meadow seed mix 100m2 |
| Yellow rattle seed Rhinanthus minor pack |
| Garden fork soil preparation meadow |
| Simple hardwood garden bench natural |
| Lawn edging steel border meadow define |
4. Install a Simple Water Feature (ACCESSORIES / LAYOUT)
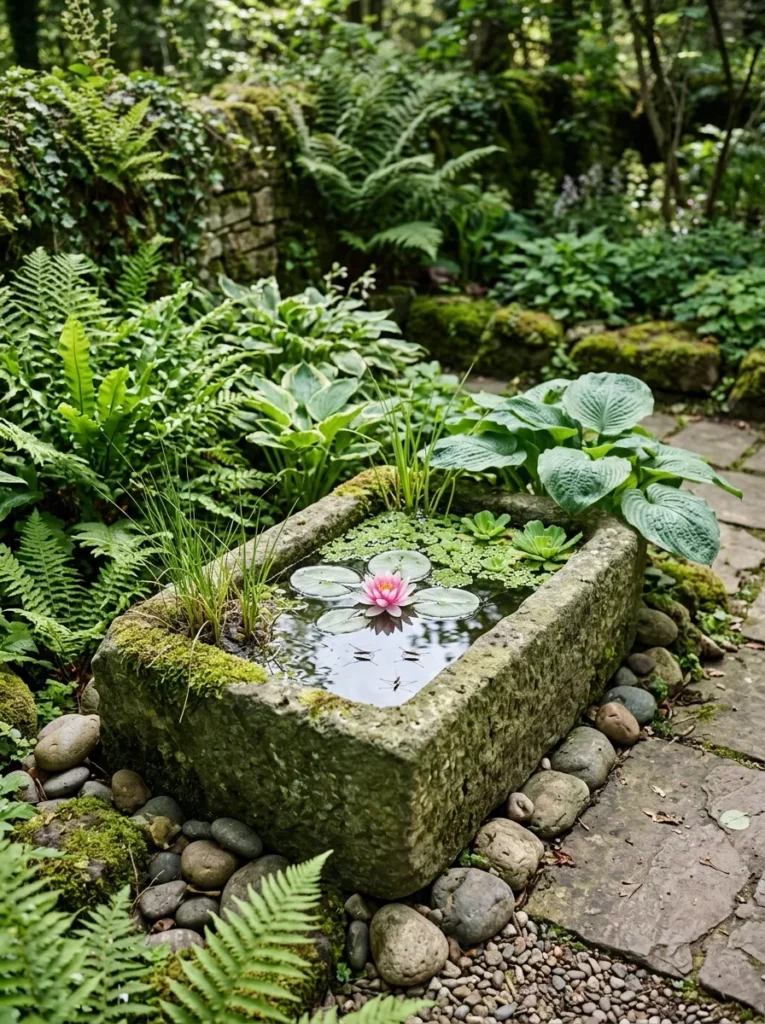
Vibe: The water feature feels quietly alive — the garden element that brings a completely new quality of life (actual life) into the backyard through wildlife, sound, and reflection.
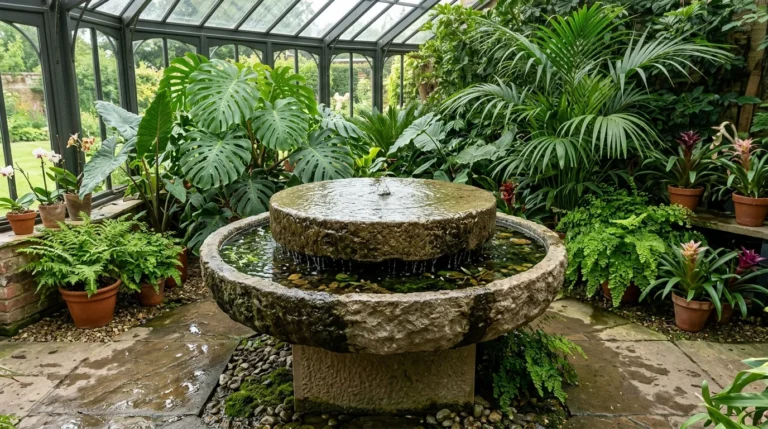
Why it works: A self-contained water feature is the backyard landscaping addition with the greatest effect on the garden’s sensory richness because water introduces three qualities that no other garden element provides simultaneously: sound (the gentle movement of water creates the white-noise masking of urban background sound that makes a garden feel more secluded than its location warrants), light reflection (still water reflects sky and surrounding planting, creating a luminous element that is entirely different from all surrounding surfaces), and biodiversity (even a small body of water attracts frogs, newts, dragonflies, and birds within weeks of installation). The design principle is ecological magnetism: a body of water in a garden becomes the focal point of local wildlife activity, making the garden’s ecological quality dramatically more apparent and more rewarding to observe.
How to get it: A galvanized stock tank, a half-oak barrel, or a large stone trough all make excellent self-contained water features requiring no liner, no pump, and no electrical supply. Fill with rainwater rather than tap water — tap water’s chlorine and mineral content inhibits the establishment of the aquatic ecosystem that makes wildlife ponds ecologically valuable. Plant a dwarf waterlily (Nymphaea pygmaea) and two or three bunches of oxygenating plants (hornwort or water milfoil) to establish water clarity naturally. Add river stones at the base and around the container edge to allow wildlife entry and exit from the water surface. Position in a spot that receives morning sun and afternoon shade — full sun promotes algae growth; heavy shade prevents plant establishment.
Shop The Look
| Product |
|---|
| Galvanized stock tank water feature small |
| Dwarf waterlily Nymphaea pygmaea aquatic |
| Oxygenating pond plant bunch hornwort |
| River stone large bag water feature |
| Hosta plant shade perennial border |
5. Build a Patio with Natural Stone Paving (MATERIAL)
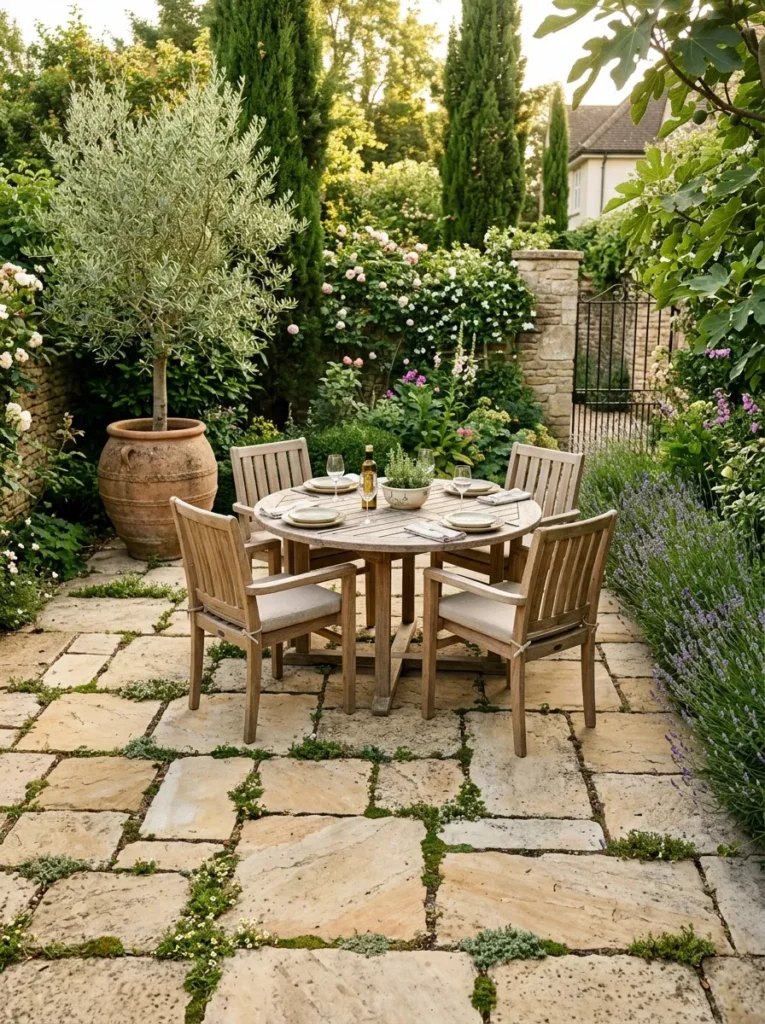
Vibe: The natural stone patio feels warmly permanent — the outdoor surface that looks better after ten years of weathering than it does on the day it is laid.
Why it works: Natural stone paving is the outdoor surface material that most significantly increases a backyard’s visual quality and long-term value because it is simultaneously the most beautiful, the most durable, and the most ecologically appropriate hard surface material available — natural stone does not fade, does not delaminate, does not require sealing to maintain appearance, and becomes more beautiful as lichen and weathering develop over time. The design principle is material permanence: investments in high-quality natural materials (stone, oak, copper) appreciate visually over time rather than depreciating, making them the highest-value long-term investment despite their higher initial cost relative to manufactured alternatives. Thyme planted in the stone joints is the design detail that most transforms a stone patio from a hard surface into a living landscape feature — the fragrance released when footsteps crush the thyme is one of the most rewarding sensory experiences available in any garden.
How to get it: Lay natural stone on a prepared sub-base of 100mm compacted crushed stone, a 40mm mortar bed, and 10mm flexible tile adhesive — the mortar and adhesive system is necessary for stability and weather resistance. Use reclaimed natural stone (Yorkstone, Cotswold limestone, or local equivalent) rather than new-quarried stone for both lower cost and more immediate weathered character. Specify irregular random coursing (varied stone sizes in random arrangement) rather than regular coursing (uniform-sized stones in rows) for the more naturalistic quality. Plant thyme (Thymus serpyllum) in the joints rather than pointing with mortar — leave 20mm wide joints between stones and fill with sandy soil mix for planting.
Shop The Look
| Product |
|---|
| Natural Yorkstone paving reclaimed irregular |
| Flexible tile adhesive outdoor frost proof |
| Creeping thyme Thymus serpyllum joint plant |
| Teak outdoor dining table round natural |
| Large terracotta olive tree pot 50cm |
6. Create a Drought-Tolerant Mediterranean Garden (COLOR / MATERIAL)
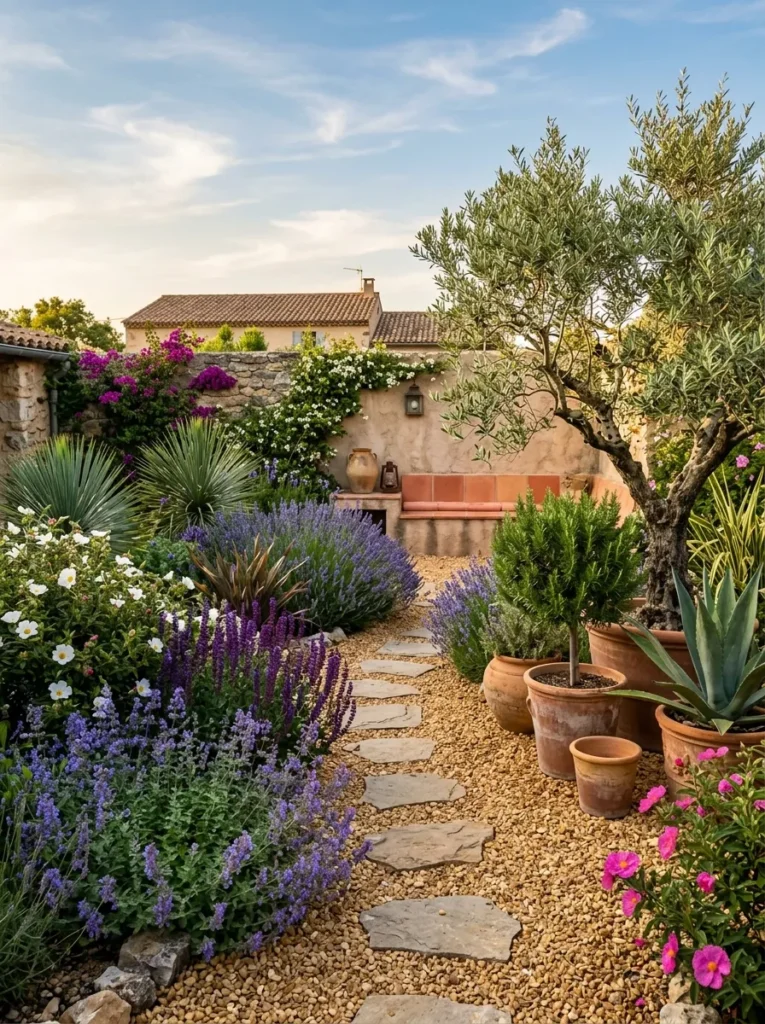
Vibe: The Mediterranean garden feels warmly sun-baked and genuinely low-maintenance — the garden that looks its best in the heat of summer when every other garden is wilting.
Why it works: A drought-tolerant Mediterranean garden is the backyard landscaping approach that creates the greatest long-term maintenance reduction while maintaining or improving visual quality — because Mediterranean climate plants (lavender, rosemary, cistus, agave, olive) are specifically evolved for the dry, sunny conditions that most temperate gardens experience in summer, making them genuinely self-sufficient once established rather than requiring the irrigation, fertilizing, and replacement that tender bedding plants demand. The design principle is climate appropriateness: plants matched to the garden’s actual climate conditions outperform mismatched exotic plants not just economically (lower inputs) but aesthetically (they look healthy and beautiful rather than stressed and struggling). The warm honey gravel mulch — used in place of bark or bare soil — is the Mediterranean garden’s defining material, retaining soil warmth that Mediterranean plants need, suppressing weeds effectively, and creating the warm, sun-baked visual quality of a Provençal or Tuscan landscape.
How to get it: Spread a 80mm layer of warm honey-toned decorative gravel over a weed-suppressing membrane across the full garden area, cutting planting holes in the membrane for each plant. Plant through the membrane and gravel using a bulb planter to create the exact planting hole needed without disturbing the wider membrane. Choose the five key plant genera — lavender, rosemary, cistus, phormium, and salvia — as the garden’s structural backbone, supplementing with smaller quantities of other Mediterranean species as the budget allows. Use gravel rather than bark mulch — Mediterranean plants dislike the moisture retention and organic acidity of bark mulch, while gravel’s free drainage and warmth suits them perfectly.
Shop The Look
| Product |
|---|
| Honey decorative gravel 20mm large bag |
| Lavender plant Hidcote bare root set |
| Rosemary standard topiary architectural |
| Cistus shrub pink flowering drought tolerant |
| Phormium architectural structural plant |
7. Install a Pergola for Outdoor Living (LAYOUT / ACCESSORIES)
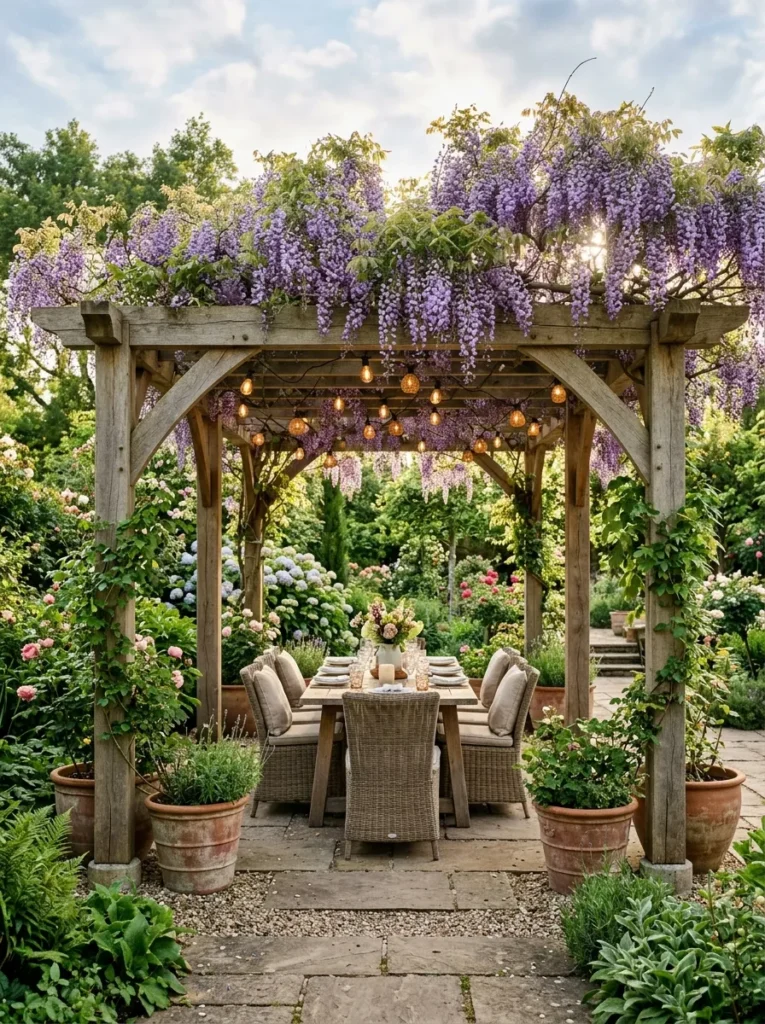
Vibe: The pergola dining area feels warmly outdoor-room quality — the backyard structure that most completely creates a genuine sense of outdoor inhabitation rather than mere outdoor presence.
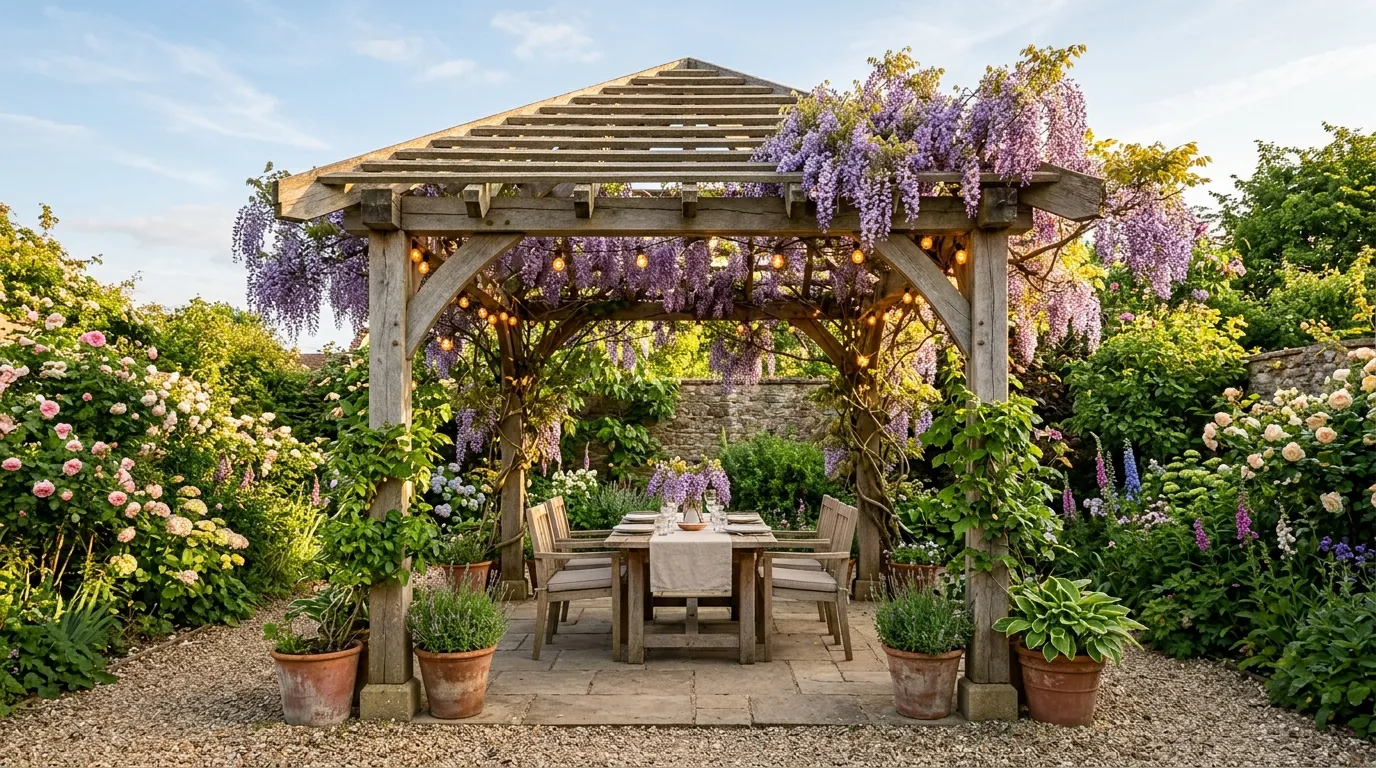
Why it works: A timber pergola is the backyard landscaping structure that most effectively creates the psychological quality of an outdoor room — the overhead structure of beams and rafters, even without walls or a full roof, creates the sense of enclosure and defined territory that transforms an outdoor dining area from a space that happens to be in the garden into a room that exists in the garden. The design principle is overhead definition: the human brain’s perception of space as a room rather than an open area is primarily determined by overhead structure rather than walls — a pergola’s beams provide the overhead reference that triggers the perception of a defined, sheltered space even in the complete absence of side walls. Wisteria or climbing roses trained over the pergola structure are the most important single plant decision — within five years they create the sense of an established, permanent garden feature that new construction cannot achieve.
How to get it: Set 90x90mm posts in concrete footings 450mm deep (minimum) — the footing depth is the critical structural requirement, as wind loads on a mature wisteria-covered pergola can be substantial. Use structural timber rated for outdoor use — cedar and oak both have adequate natural durability; treated pine is the lower-cost alternative. Size the overhead beams at 150x50mm for a 400cm span without intermediate support. Plant wisteria (Wisteria sinensis or W. floribunda) at each post base immediately after construction — the plant’s first three years of growth will begin to establish the covered quality that makes the pergola its most atmospheric by year five.
Shop The Look
| Product |
|---|
| Cedar structural post 90x90mm outdoor |
| Pergola beam 150x50mm structural timber |
| Post anchor spike concrete footing set |
| Wisteria climbing plant bare root |
| Outdoor string lights warm white 10m |
8. Layer a Mixed Shrub and Perennial Border (COLOR)
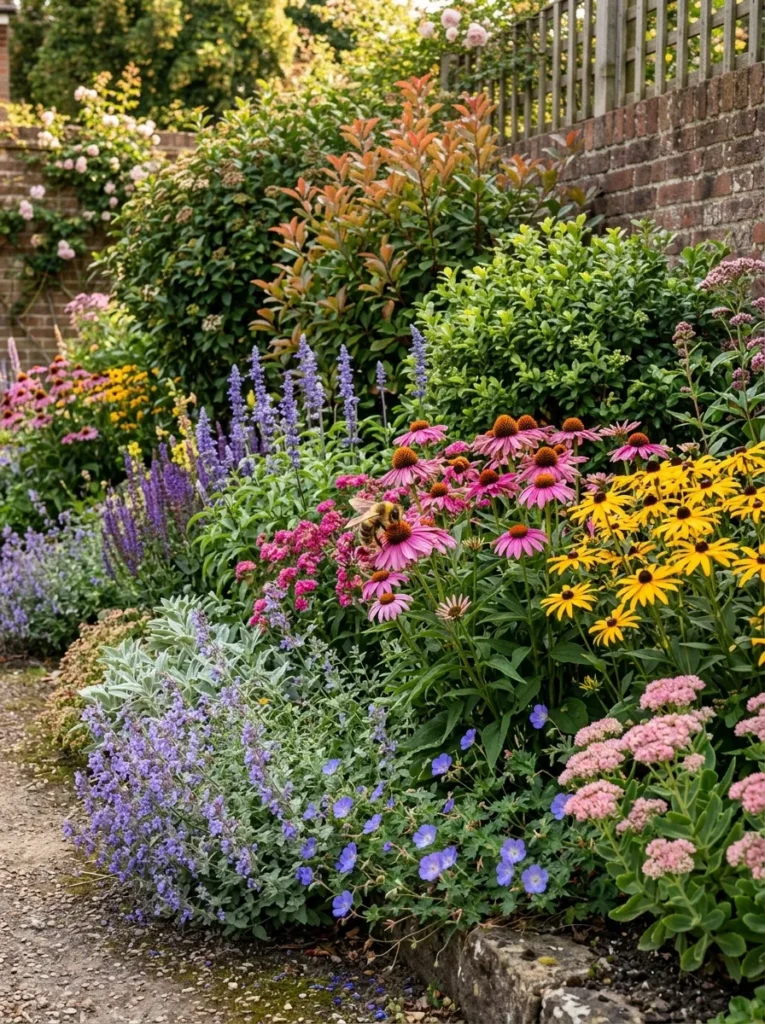
Vibe: The layered border feels botanically abundant and genuinely alive — the planting that makes every walk past it different from the last as different elements come into and pass out of bloom.
Why it works: A deeply layered mixed shrub and perennial border is the backyard landscaping project that creates the most sustained seasonal interest over the longest period because it uses the variation in growth habit, flowering time, and seasonal character of multiple plant genera to create a planting that is never the same for more than a few weeks at a time — from early spring bulb emergence through late summer perennial peak to autumn seed head structure and winter shrub form. The design principle is temporal layering: in the same way that three-dimensional spatial layering creates depth in a planting’s visual cross-section, temporal layering creates depth in a planting’s seasonal timeline — something always happening, something always interesting. The three-layer structure (back: structure shrubs, middle: tall perennials, front: ground-level perennials) is the foundational border design template because it ensures the border reads as complete and considered at every viewing angle and at every stage of growth.
How to get it: Prepare the border by removing all existing vegetation, deep-digging to a spade depth (300mm), and incorporating 100mm of garden compost or well-rotted manure into the full bed. Plant the back structural shrubs first (50cm from the back boundary to allow mature spread), then the middle-layer perennials at 40cm centers, then the front-layer ground cover perennials at 30cm centers. Water thoroughly and apply a 75mm bark mulch layer to suppress weeds and retain moisture. The border will look sparse in its first year and increasingly impressive in years two and three as the perennials establish — resist the temptation to overfill in year one.
Shop The Look
| Product |
|---|
| Echinacea purpurea bare root perennial set |
| Salvia nemorosa perennial border plant |
| Rudbeckia fulgida perennial golden summer |
| Nepeta catmint front border low ground |
| Garden fork border preparation digging |
9. Create a Sunken Garden Seating Area (LAYOUT / SMALL SPACE)
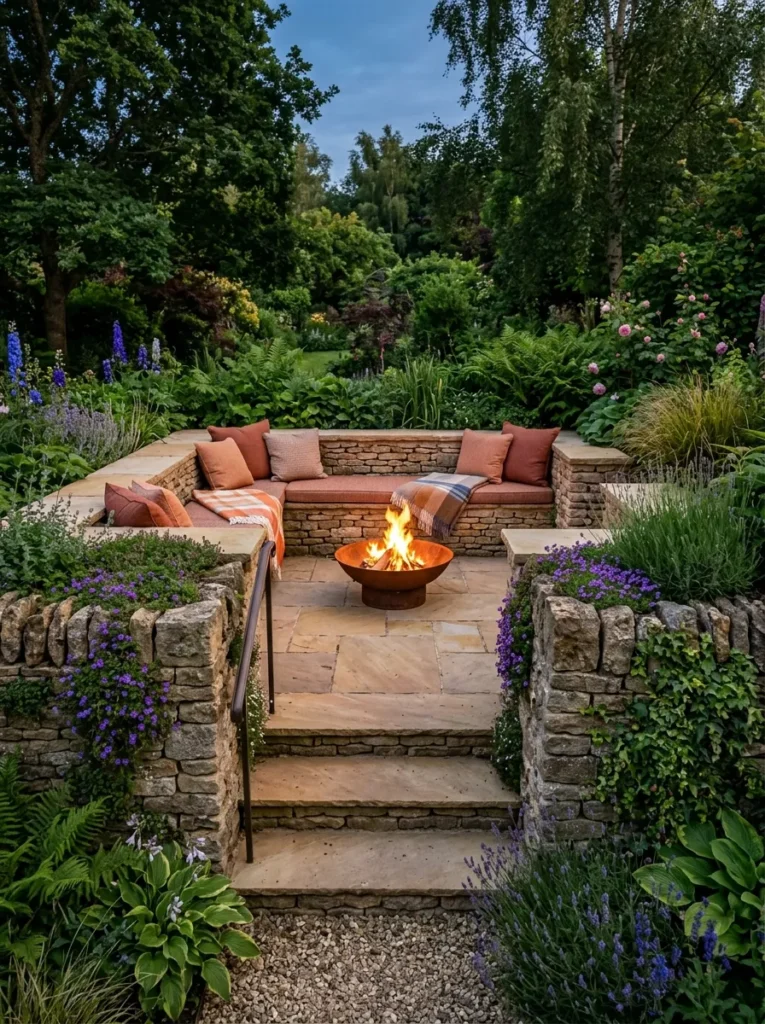
Vibe: The sunken garden feels warmly sheltered and private — the outdoor seating experience that makes the surrounding garden feel like walls rather than open space.
Why it works: A sunken garden seating area is the backyard landscaping project that creates the greatest improvement in outdoor seating comfort per square meter of garden space because the lowered floor level — even just 50–60cm below the surrounding garden — creates natural wind shelter that makes the seating area usable in weather conditions that would make a surface-level seating area uncomfortable. The design principle is topographic shelter: wind speed at ground level is significantly lower than at standing height, meaning that a seating area lowered below the general garden level sits in a natural wind shadow that makes it warmer, quieter, and more protected than its location would suggest. The dry-stone retaining walls serve the additional function of a warm, absorbent mass that stores daytime heat and releases it slowly in the evening, extending the comfortable seating period beyond sunset.
How to get it: Excavate the sunken area to 60–80cm below the surrounding garden level, retaining the removed soil for use in raised planting areas elsewhere in the garden. Construct retaining walls from dry-stone walling (no mortar, using natural local stone in the traditional dry-stone construction) — the dry-stone technique requires no specialist masonry skills and is genuinely appropriate to any domestic garden context. Pave the floor in natural sandstone or limestone. Build the three entry steps from the same stone as the retaining wall for material continuity. Fit stone capping slabs on the two side retaining walls to create the built-in seat, and add 75mm thick outdoor foam cushions in performance fabric for comfort.
Shop The Look
| Product |
|---|
| Natural sandstone paving slab warm tone |
| Dry stone walling stone natural local |
| Stone capping slab built-in seat top |
| Outdoor foam cushion 75mm thick performance |
| Small fire pit portable garden bowl |
10. Install Solar Garden Lighting (LIGHTING)
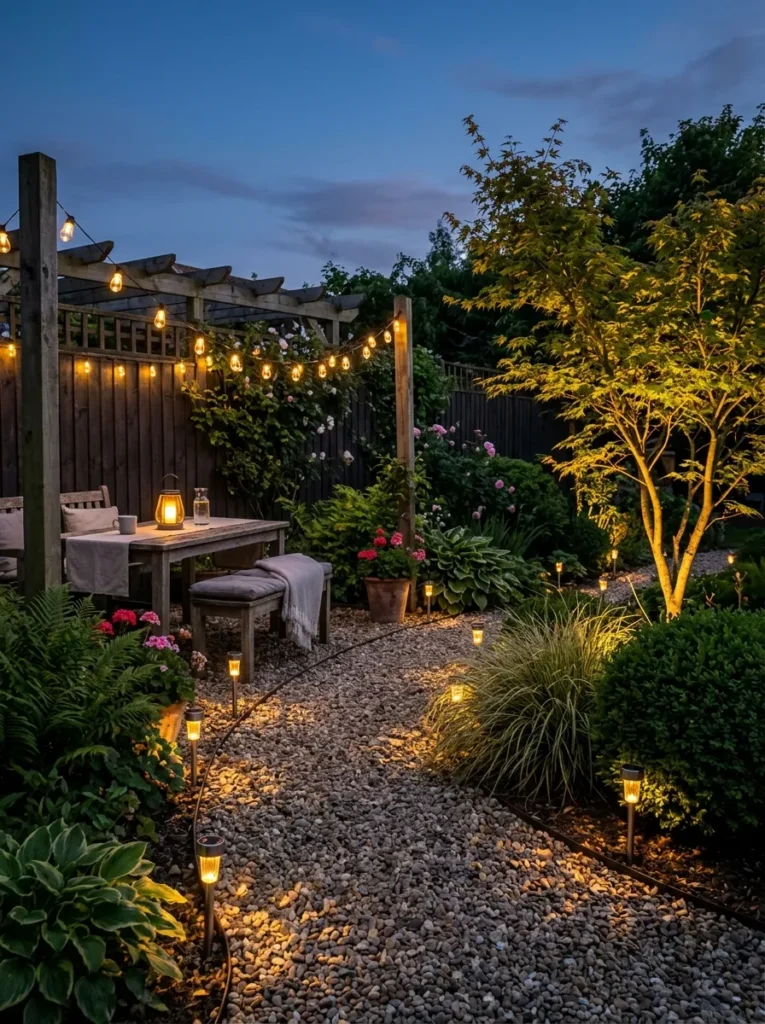
Vibe: The solar-lit garden at dusk feels warmly magical — the discovery that the garden at night can be more beautiful than during the day when lighting is thoughtfully layered.
Why it works: Layered solar garden lighting is the backyard landscaping intervention that creates the most dramatic evening atmosphere improvement at zero electrical installation cost — solar technology has improved dramatically in the past five years, with current solar garden lighting providing sufficient brightness and battery duration for genuinely useful and attractive evening garden illumination. The design principle is lighting hierarchy: by using three distinct types of solar light at three distinct heights (path lights at low level, plant uplighters at mid level, string lights and lanterns at seated and table height), the designer creates the layered, multi-level lighting scheme that gives garden spaces their evening atmosphere quality. Uplighting structural plants from below is the single lighting technique that most dramatically reveals the garden’s botanical quality at night — the underlit canopy of a tree or large grass creates a visual experience completely different from any daytime view.
How to get it: Choose solar lights with a minimum 6-hour battery life after a full day’s charge — budget solar lights with shorter battery life provide only brief evening illumination that is insufficient for genuine evening garden use. Specify warm white (2700–3000K) LED solar lights throughout — cool white solar lights produce a harsh, institutional light quality that undermines the garden’s evening atmosphere. Position solar panels for path and uplights in the sun’s path for maximum charging efficiency — partly shaded positions significantly reduce charge efficiency and battery duration. Install path lights at 100cm centers along the curved path for the most atmospheric lighting density.
Shop The Look
| Product |
|---|
| Solar path light warm white set of 8 |
| Solar uplighter garden plant set of 3 |
| Solar string lights warm white outdoor 10m |
| Solar garden lantern table outdoor |
| Solar spotlight uplighting large plant |
11. Design a Children’s Play Garden Zone (SMALL SPACE / LAYOUT)
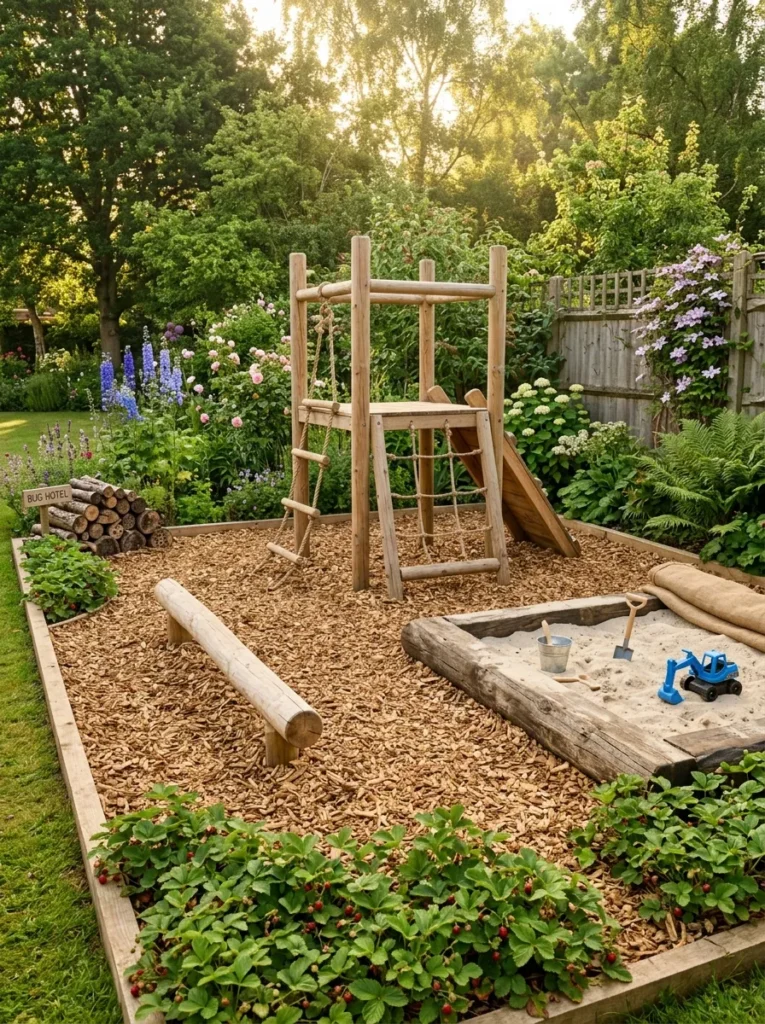
Vibe: The natural play garden feels warmly adventurous and child-appropriately wild — the play zone that invites genuine exploration rather than prescribing specific play behaviors.
Why it works: A natural play garden zone designed around natural materials (timber, sand, logs, plants) rather than plastic play equipment is the children’s outdoor area that delivers the greatest developmental benefit because natural, open-ended play materials (sand, logs, natural surfaces, plants) support the widest range of creative, physical, and investigative play behaviors compared to fixed-function plastic equipment. The design principle is open-ended materiality: sand, logs, and natural surfaces support the exploratory, sensory, and imaginative play modes that are most developmentally beneficial for children of all ages, while fixed-function play equipment (slides, climbing frames with prescribed routes) tends to support a narrower range of physical play. The inclusion of a bug hotel log pile and wild strawberry plants introduces genuine ecological content — actual living insects, actual fruits — that adds educational richness no manufactured play element can provide.
How to get it: Surface the full play zone with 150mm depth of certified wood chip play surface (no bark or shredded material — play-grade wood chip specifically manufactured and certified for play area use). Install the climbing frame from larch or sweet chestnut round poles, which have adequate natural durability for outdoor ground contact without chemical treatment. Construct the sand pit from 200x50mm timber sides on a firm base, allowing drainage through the base and fitting a cover (timber frame with shade fabric) to prevent wildlife contamination when not in use. Plant wild strawberry (Fragaria vesca) as ground cover at the play zone edges — it is low, robust, non-toxic, and produces edible fruits that provide genuine discovery and reward for children.
Shop The Look
| Product |
|---|
| Larch round pole climbing frame natural |
| Play grade wood chip surface bark 50L |
| Timber sand pit surround natural treated |
| Wild strawberry plant Fragaria vesca set |
| Sand pit cover shade fabric timber frame |
12. Establish a Productive Herb Spiral (MATERIAL / ACCESSORIES)
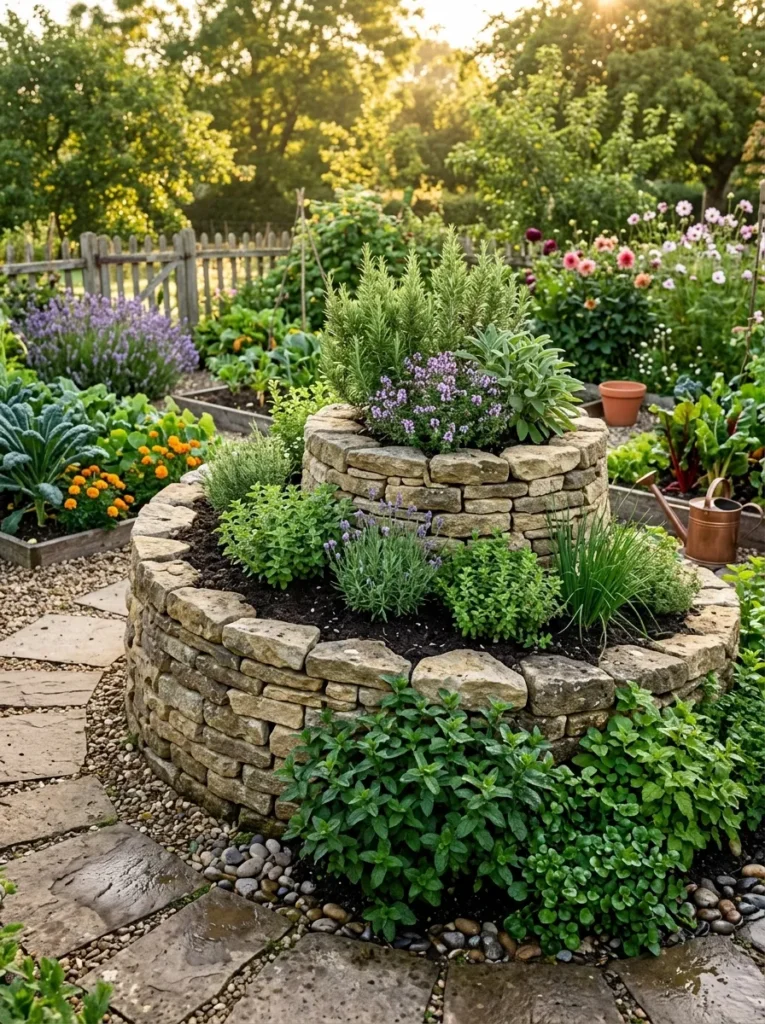
Vibe: The herb spiral feels productively sculptural — the garden feature that works as a kitchen garden, a wildlife habitat, and a genuine piece of garden design simultaneously.
Why it works: A herb spiral is the most space-efficient and ecologically sophisticated form of productive garden feature because its three-dimensional spiral structure creates multiple distinct microclimates within a 1.5-meter diameter footprint — the hot, dry, south-facing upper positions suit Mediterranean herbs (rosemary, thyme, oregano), the mid-level positions suit temperate herbs (parsley, chives, sage), and the cool, moist base positions suit moisture-loving herbs (mint, coriander, watercress). This microclimate diversity means a single herb spiral can grow more herb species successfully than a flat herb bed three times its size, because the varied growing conditions match each species’ specific requirements rather than providing a single uniform environment. The spiral form also creates a garden feature of genuine sculptural interest — it is one of the few productive garden elements that is as visually attractive as any ornamental garden feature.
How to get it: Mark the spiral plan on the ground using a garden hose. Build the outer wall first from dry-stone walling or reclaimed brick, constructing the spiral to rise from ground level at the outer start point to 90cm height at the center peak. Fill the spiral interior with layers of rubble at the base (for drainage at the top section), compost-rich growing medium in the middle sections, and water-retentive growing medium at the lowest base section. Plant immediately after construction using starter plants rather than seeds — the established herb plants integrate visually and begin producing within weeks of planting.
Shop The Look
| Product |
|---|
| Natural stone dry wall building stone bag |
| Herb plant collection mixed culinary set |
| Rosemary plant upright Tuscan Blue |
| Spearmint plant culinary herb starter |
| Compost bag garden grade 40L quality |
13. Create a Fire Pit Entertainment Area (LAYOUT / ACCESSORIES)
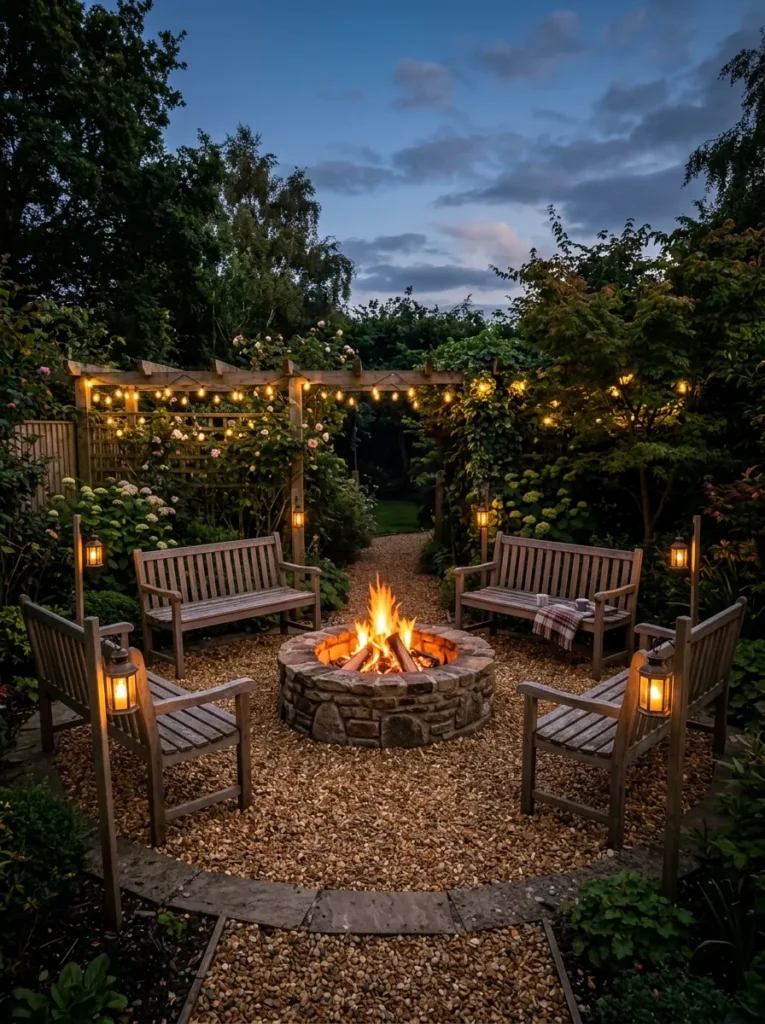
Vibe: The fire pit area feels warmly convivial — the outdoor destination that keeps people outside and in conversation long after the sun has set and the temperature has dropped.
Why it works: A dedicated fire pit entertainment area is the backyard landscaping addition that most extends the useful season of the outdoor space — by providing a heat source and focal gathering point, the fire pit makes an outdoor seating area genuinely comfortable on cool spring and autumn evenings when unheated outdoor seating becomes uncomfortable, effectively extending the garden’s social season by 4–6 weeks at each end of summer. The design principle is thermal destination: the fire pit creates a specific, warm focal point that draws people to gather and stay, functioning for the outdoor social experience exactly as a fireplace functions for indoor social experience — as the warm, light-giving center around which social activity naturally organizes. The circular gravel area surrounding the pit creates the defined zone that signals the fire pit area as a separate, dedicated destination rather than a fire bowl placed incidentally in the garden.
How to get it: Construct the fire pit bowl from engineering brick or natural stone in a circular form approximately 80cm internal diameter and 35cm high — the raised bowl height keeps the fire at a comfortable height for warmth and visibility while seated. Line the interior of the fire pit with fire-rated clay bricks rather than standard brick, as the high temperatures of an active fire can crack standard bricks over time. Lay the surrounding gravel area on a membrane underlay, edged with a circular steel lawn edging to create a clean circular boundary. Always check local fire regulations and distance requirements from structures before installing any permanent fire pit.
Shop The Look
| Product |
|---|
| Fire resistant clay brick fire pit lining |
| Natural stone engineering brick fire bowl |
| Warm pea gravel fire pit surround large |
| Low teak garden bench seat natural |
| Outdoor garden lantern stake set 4 |
14. Establish a Pollinator-Friendly Flower Garden (COLOR / ACCESSORIES)
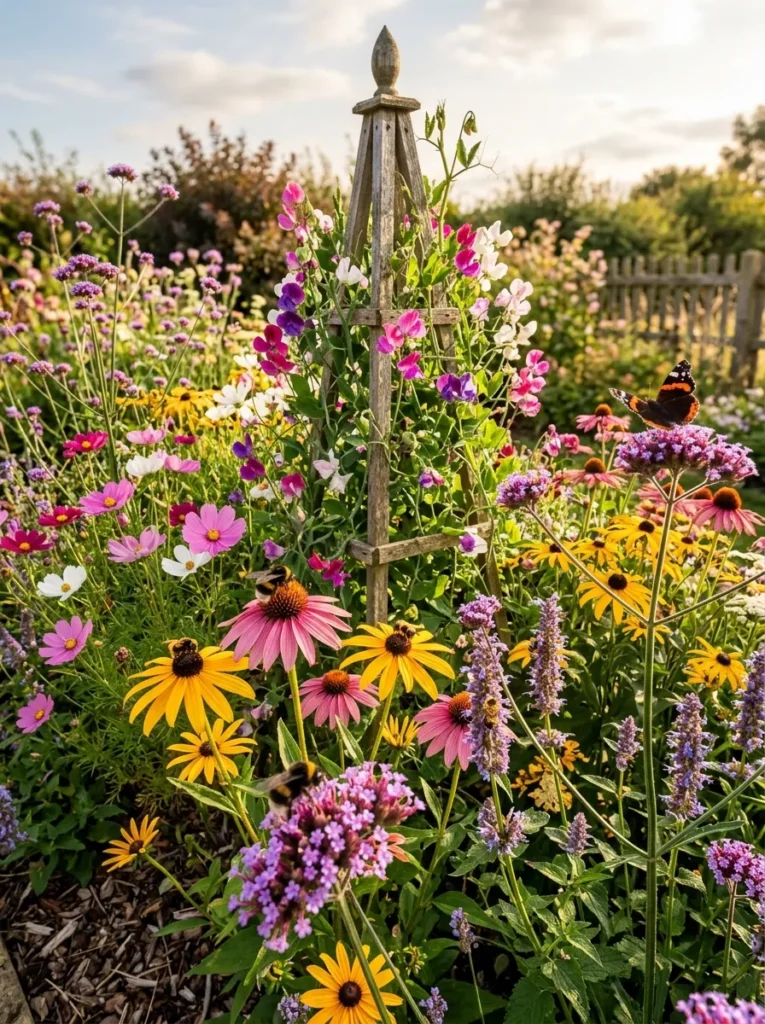
Vibe: The pollinator garden feels warmly ecologically alive — the flower garden that gives back to the ecosystem as much as it takes from the gardener’s attention.
Why it works: A dedicated pollinator-friendly flower garden is the backyard landscaping project that creates the highest ecological return per square meter of planting because it specifically selects plant species for their nectar and pollen value to native bee, butterfly, and hoverfly populations — creating a genuine feeding resource for declining pollinator species that makes a measurable positive contribution to local biodiversity. The design principle is ecological generosity: by choosing plants primarily for their pollinator value rather than their purely visual qualities, the designer creates a garden that is simultaneously beautiful (the most pollinator-attractive plants are typically also the most visually beautiful flowers) and genuinely ecologically productive. Verbena bonariensis is the single most valuable pollinator plant available for this type of garden — its open, accessible flowers are visited by over 30 pollinator species throughout its long flowering season.
How to get it: Prepare the border soil with garden compost and avoid any soil improvement with peat-based products. Sow annual species (cosmos, cornflower, sweet pea) directly in the prepared border in spring, supplementing with purchased perennial starter plants (verbena, echinacea, agastache, rudbeckia) for immediate impact in the first season. Install the wooden obelisk before planting to avoid root disturbance later — position at the border’s center and plant sweet peas at its base. Deadhead regularly throughout summer to extend the flowering period and maintain the border’s nectar supply for late-season pollinators. Leave seed heads standing through winter — the seed heads of echinacea and rudbeckia provide food for seed-eating birds through the cold months.
Shop The Look
| Product |
|---|
| Verbena bonariensis plant purple tall |
| Echinacea purpurea perennial pink set |
| Cosmos plant seed mix annual summer |
| Rudbeckia fulgida perennial golden |
| Wooden obelisk garden stake trellis natural |
How to Start Your Backyard Landscaping Transformation
Your single best first move is to spend one month observing your backyard rather than changing it — noting where the morning sun falls and where shade develops in the afternoon, which areas of the garden you actually use and which you walk through without pausing, where water pools after rain and where soil dries first, which existing plants are thriving and which are struggling, and which views from the house windows are pleasant and which are disappointing. This observation period is the garden design research phase that professional landscape designers conduct before making a single planting or construction decision — and it is the information that makes the difference between a landscaping project that addresses the garden’s actual character and opportunities and one that imposes an aesthetic vision onto conditions it does not suit.
The most common mistake in backyard landscaping is tackling multiple elements simultaneously without establishing the spatial structure first — planting before paths are defined, adding ornamental features before the primary use zones are established, and purchasing plants before soil condition, light levels, and moisture regime have been assessed for each proposed planting position. The consequence is a garden that accumulates elements without ever cohering into a designed whole. Fix this by completing the landscaping work in a specific sequence: first the hard landscaping (paths, paving, structures), then the planting of structural elements (large shrubs, trees, hedging), then the planting of perennials and seasonal elements, and finally the addition of ornamental features and accessories. Each phase provides the spatial framework within which the next phase’s decisions make more sense.
Three specific items under $50 that create the most immediate backyard landscaping improvement: a roll of natural cor-ten steel lawn edging ($20–$35) that immediately defines the boundary between any existing lawn or path and adjacent planting areas, giving the garden a crisp, considered edge quality that makes all existing plantings look more deliberate; a bag of warm pea gravel ($15–$22 per 25kg bag) that can instantly improve the visual quality of any bare or weedy area by creating a clean, permeable ground surface while longer-term planting establishes; and a set of five solar path lights ($18–$30) that transforms the garden’s evening quality immediately without any electrical installation.
A low-budget backyard landscaping project — a gravel path, a wildflower meadow section, and solar lighting — costs $150–$400 in materials and takes 2–3 weekends. A mid-level project adding a raised bed system, a mixed border, and a fire pit area costs $800–$2,500 depending on material choices and site conditions. A comprehensive backyard transformation including natural stone paving, a pergola, a sunken seating area, and mature planting throughout costs $8,000–$25,000 professionally installed, or $3,000–$8,000 in materials for a confident DIY approach — producing a garden that adds genuine property value and creates genuinely transformative daily quality of life for every year of its established life.
Frequently Asked Questions About Creative Backyard Landscaping Ideas
What is the most impactful backyard landscaping idea for a limited budget?
Establishing a layered mixed border along one garden boundary is consistently the highest-impact landscaping project for a limited budget because it transforms the garden’s primary visual surface — the boundary wall or fence that forms the backdrop to every view of the garden from the house — from a hard, bare structure into a layered, living green backdrop that immediately makes the whole garden feel more established and more considered. The material cost of a 6-meter mixed border (structural shrubs, medium perennials, and ground-cover perennials) is $80–$200 in plants, with the labor being DIY planting rather than skilled construction. A curved gravel path is the second highest-impact budget project — $30–$80 in materials for a standard garden path — because it immediately improves the spatial organization of the garden by creating defined zones and a sense of journey.
How do I choose plants that will thrive in my specific backyard conditions?
The most reliable approach to plant selection for backyard landscaping is to observe what is already growing well in your garden and in neighboring gardens before purchasing any plants — established, healthy plants in the immediate vicinity are the most accurate indicator of what will succeed in your specific soil, light, and climate conditions. The second most reliable approach is to visit a local independent garden center in spring and autumn and ask which plants they see most consistently thriving locally — local garden center staff have accumulated observational knowledge about local conditions that is more immediately applicable than any general horticultural guidance. Native plants are always the safest starting point because they are specifically adapted to your local climate, soil, and moisture conditions and require the least ongoing intervention once established.
How do I make a small backyard feel larger through landscaping?
Five specific landscaping techniques reliably create the perception of greater space in a small backyard: diagonal orientation of major design elements (a diagonal path or diagonally laid paving draws the eye along the longest available diagonal dimension, which is always longer than either the length or width of the space); tall vertical planting along boundaries (plants that rise above eye level from a seated position create a sense of enclosure that implies a larger space within); partial visual concealment of the garden’s extent (planting or structure that interrupts the sightline to the garden’s far boundary prevents the eye from immediately reading the full garden extent, implying more garden beyond the visible section); a single focal point at the garden’s far end that draws the eye across the full garden length; and the avoidance of too many different surface materials, colors, and ornamental features — visual simplicity and material consistency make small spaces read as larger and more resolved.
What is the most sustainable approach to backyard landscaping?
The most sustainable backyard landscaping approach prioritizes three principles: native and locally appropriate plant selection (which requires the least irrigation, fertilizer, and pest management intervention while providing the greatest ecological benefit to local wildlife); water-permeable hard surfaces (gravel, permeable paving, and planted areas rather than solid concrete and tarmac, which cause run-off and flooding); and soil health management through composting and organic matter addition rather than chemical fertilizers and pesticides (which improve soil structure and biodiversity while reducing chemical inputs). Collecting rainwater in a large water butt or underground cistern for garden irrigation is the single most impactful water sustainability measure available to most domestic gardens — a 500-liter water butt can supply the majority of a small garden’s supplementary irrigation needs through the growing season.
How long does backyard landscaping take to look established?
The honest answer is that genuine garden establishment takes three to five years for most landscaping projects — this is the timeline within which structural shrubs reach mature size, perennials develop into generous clumps, hedging plants thicken to provide privacy, and climbing plants cover their structures. Year one typically looks sparse and slightly disappointing regardless of how well the design was conceived and how high the quality of materials used. Year two shows meaningful progress as plants begin to fill their allocated space. By year three, a well-planned mixed border or naturalistic garden begins to look genuinely established. By years four and five, the original design intent becomes fully readable. This timeline means that landscaping investments made today are best understood as long-term quality-of-life investments rather than immediate gratification — the gardens that look most spectacular today are almost invariably those planted five or more years ago, not those installed last spring.
Ready to Transform Your Backyard?
These 14 ideas span the full range of creative backyard landscaping possibility — from the immediately achievable curved gravel path and the solar lighting transformation, through the productively beautiful raised bed system and the herb spiral, to the ecologically rich wildflower meadow and the pollinator garden, the structurally ambitious natural stone patio and the sunken seating area, and the entertainingly social pergola and fire pit — covering every budget from $30 weekend projects to multi-thousand-pound structural investments, every garden size from urban pocket gardens to generous suburban plots, and every priority from ecological richness to social entertainment to productive growing. Begin with the observation month — not a design decision, not a plant purchase, but thirty days of genuinely paying attention to how your specific backyard performs, where its light falls, where its problems concentrate, and what it is that makes you feel the garden is not yet what it should be — because the landscaping project that responds to your garden’s actual character and your life’s actual patterns of outdoor use will reward you every day for every year of the garden’s established life. Today’s specific action: stand at your house’s back window and identify the single view that most consistently disappoints you — the bare fence, the dark corner, the unloved lawn — and choose the one idea from this list that most directly improves that specific view. When your backyard finally has the quality of a genuinely considered outdoor space — when you find yourself going outside simply to be there, not to maintain it or improve it but to inhabit it — you will understand exactly why creative backyard landscaping earns its devoted community and the permanent place it holds at the top of every outdoor living Pinterest board. Save your favorites now, especially the mixed perennial border and the fire pit entertainment area — they are the two ideas that, once established, make the backyard feel as genuinely liveable as the most comfortable room in the house.