13 Creative Wooden Wall Art Ideas for Stylish Spaces
Wooden wall art is any decorative wall element made primarily from wood — including carved panels, laser-cut designs, reclaimed wood installations, burned pyrography pieces, woven wood sculptures, driftwood compositions, and three-dimensional wood relief works — that brings the warmth, texture, and organic quality of natural material into a room’s vertical surfaces. Here are 13 ideas for using wood as a wall art medium in ways that are genuinely beautiful, genuinely considered, and genuinely worth the wall space they occupy.
Wood on a wall does something that canvas, paper, and metal cannot — it brings the actual natural world into the room rather than representing it. The grain pattern in a slice of walnut, the weathered surface of reclaimed barn wood, the dimensional shadow of a carved relief panel — these are not representations of natural material warmth but the thing itself, presented vertically and lit by whatever light the room provides at whatever hour. Getting wooden wall art right is less about finding the right piece and more about understanding what each wood form offers that no other wall art category can. Here are 13 ideas worth building — and hanging.
Why Wooden Wall Art Works So Well
What makes wooden wall art distinct from other wall art categories? Wooden wall art occupies a unique position in the wall art spectrum because it is simultaneously a natural material object and a visual composition — it brings the biological specificity of individual wood pieces (no two boards, slices, or driftwood pieces are identical) into a decorative context where that specificity reads as authentic and unrepeatable. This combination of natural material warmth and visual uniqueness is what distinguishes wooden wall art from printed, painted, or photographed alternatives: a wooden wall piece is not a representation of something natural — it is the natural thing itself, reconfigured for vertical display. The design principle operating across all wooden wall art categories is material authenticity as aesthetic value: the wood’s grain, color variation, texture, and dimensional surface are not effects applied to a neutral substrate but the substrate itself.
Core materials and approaches. Wooden wall art draws from an exceptionally broad material vocabulary: solid hardwood slabs in walnut, oak, maple, and cherry for their figure and color depth; reclaimed barn wood, pallet wood, and architectural salvage for their weathered surface character; driftwood for its sculptural, water-worked forms; cork bark and natural cork panels for their textural warmth; thin plywood for laser cutting and geometric design work; live-edge slabs for their natural boundary; and commercial MDF or plywood as substrates for paint, carving, and applied finish treatments. The most successful wooden wall art pieces consistently use the wood’s natural qualities — its grain, its color range, its dimensional surface — as the primary aesthetic rather than attempting to impose a design onto the wood.
Why wooden wall art is experiencing sustained design relevance. The sustained appeal of wooden wall art across contemporary interior design reflects several converging forces: the broader material shift toward natural, organic, and honest materials in domestic interiors; the growing preference for wall art that is unique and unrepeatable rather than mass-produced and reproducible; and the specific warmth that wood contributes to the increasingly hard-surfaced contemporary interior (concrete, glass, painted drywall, tile). In a room with cool, reflective surfaces, a piece of warm wood on the wall changes the room’s material register as immediately and completely as a fire in a fireplace.
Can wooden wall art be DIY-created at quality levels that compete with purchased pieces? For many wooden wall art categories — reclaimed wood installations, driftwood compositions, wood slice arrangements, pyrography pieces, and geometric patterned assemblages — yes, completely. The material is accessible, the techniques required are learnable, and the resulting pieces often exceed commercial alternatives in character precisely because they are made from specific materials with specific histories rather than from standardized commercial stock.
Style at a Glance
| Element | Detail |
|---|---|
| Philosophy | Let the wood be the design — work with its natural qualities, not against them |
| Key Materials | Walnut, reclaimed wood, driftwood, live-edge slab, thin plywood, cork |
| Key Approaches | Carving, burning, assembly, arrangement, laser cutting, relief |
13 Creative Wooden Wall Art Ideas for Stylish Spaces
1. Reclaimed Wood Plank Geometric Installation
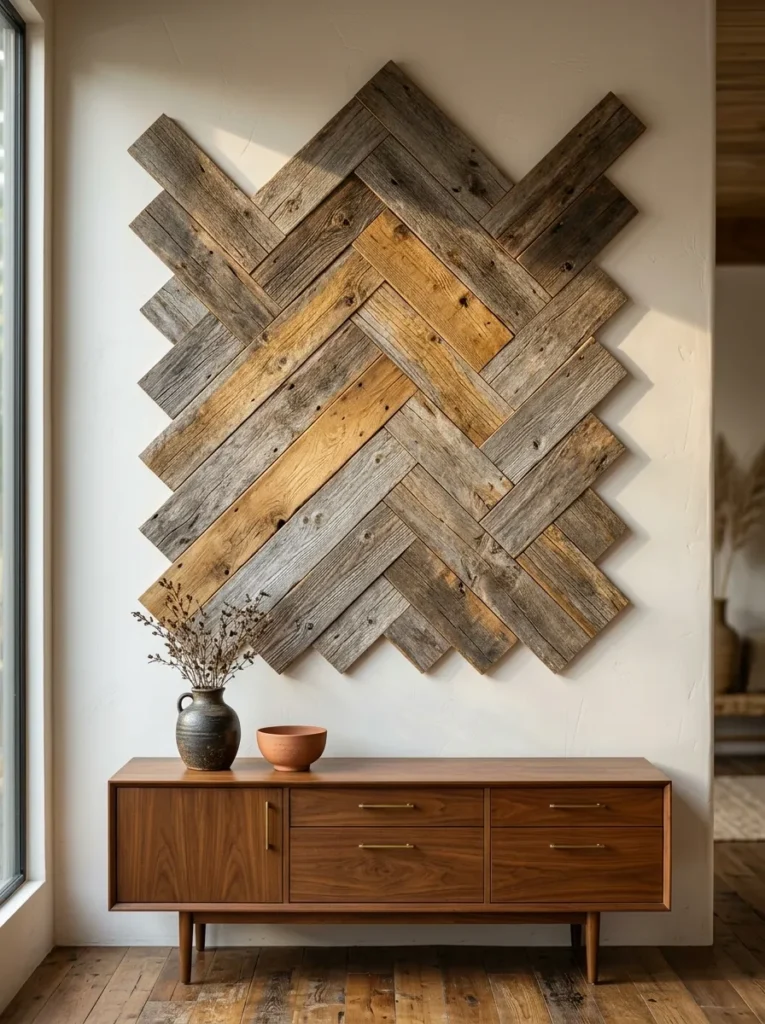
Vibe: A reclaimed wood geometric installation feels warmly complex — the wall piece that reveals more surface detail the closer you approach it.
Why it works: Arranging reclaimed wood planks in a geometric pattern (herringbone, chevron, or diagonal) converts individual boards with varied weathering character into a composed installation where the pattern provides visual structure and the material variation provides visual richness. The design principle is geometric order containing organic variation: the strict geometric pattern creates the compositional clarity that allows the eye to settle on the installation as a unified work, while the varied weathering tones, grain directions, and surface textures of individual planks create the visual complexity within that structure that makes the piece genuinely interesting at close range. No two reclaimed wood plank installations are visually identical because no two assemblages of reclaimed wood are tonally identical.
How to get it: Source reclaimed barn wood, pallet wood, or architectural salvage planks in varied widths. Sand lightly with 80-grit sandpaper to remove loose material without eliminating the weathered surface character. Cut planks to consistent length using a miter saw, maintaining the varied widths. Arrange on a flat surface in the chosen geometric pattern before mounting — photograph the arrangement for reference. Mount using construction adhesive applied to the wall and finishing nails at each plank end for security. Apply a thin coat of matte water-based polyurethane if desired for dust resistance.
Quick Win: A herringbone reclaimed wood installation using deconstructed pallet wood costs $0–$20 in materials (pallets are often free) and takes one weekend — producing a wall piece that reads as considerably more expensive and considered than its material cost suggests.
Shop The Look
| Product |
|---|
| Reclaimed barn wood plank set natural |
| Construction adhesive for wood to wall |
| Brad nail gun finishing for plank mounting |
| Matte polyurethane clear for wood finish |
| Miter saw for consistent plank cutting |
Also view: 15 Affordable Home Decorating Ideas for Every Room
2. Live-Edge Wood Slab Statement Piece
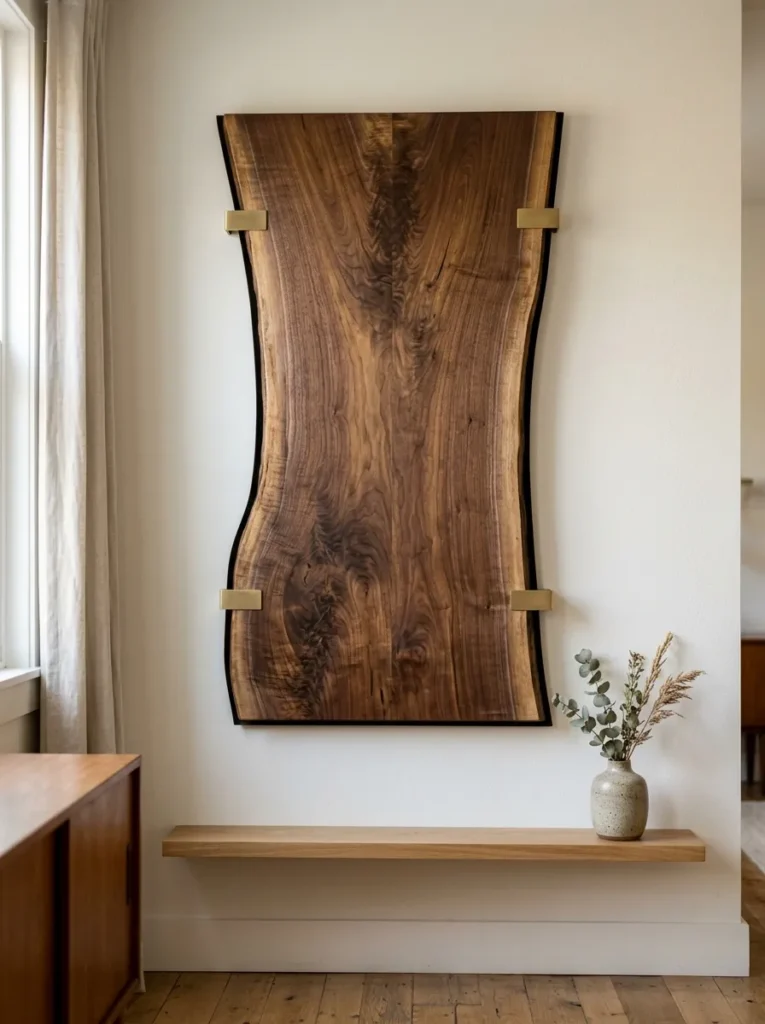
Vibe: A live-edge walnut slab on a wall feels singularly authoritative — the piece that makes the room stop and attend to it before attending to anything else.
Why it works: A large live-edge wood slab mounted as wall art is the wooden wall art choice that most completely expresses the material authenticity principle — the slab’s live edge (the natural boundary between the wood and the bark, preserved in its organic form) is the direct physical evidence of the tree from which the slab came, which gives the piece a biological specificity and singularity that no produced or manufactured wall art can approximate. The design principle is natural boundary as design element: the live edge’s irregular, organic profile is the slab’s primary aesthetic feature — it is what makes the piece unmistakably of the natural world rather than manufactured in a factory, and it is what makes every live-edge slab unique. Walnut specifically is the most prized live-edge material for wall art because its deep chocolate-to-honey grain figure, its tight figure complexity, and its dramatic color range create a visual richness that the wood itself provides without any additional surface treatment.
How to get it: Source live-edge walnut slabs from specialty lumber yards, woodworking suppliers, or online marketplaces (Etsy and Craigslist are both reliable sources for regional slab availability). A slab appropriate for wall art (90×50 cm) typically costs $80–$250 depending on species, figure quality, and thickness. Finish with two coats of oil-based penetrating finish (Danish oil or Rubio Monocoat) rather than a film finish — oil finishes enhance the grain’s depth without creating the plastic-like surface quality of polyurethane. Mount on two brass or matte black floating shelf brackets at equal height, creating the shadow gap between the slab and wall that allows the live edges to read as three-dimensional.
Shop The Look
| Product |
|---|
| Live edge walnut slab wall art natural |
| Danish oil natural finish for slab |
| Brass floating shelf bracket set of 2 |
| Sandpaper set 120 220 for slab finishing |
| Wall anchor set for bracket mounting |
Also view: 15 Living Room Wall Decor Ideas for Every Style
3. Pyrography (Wood Burning) Botanical Panel
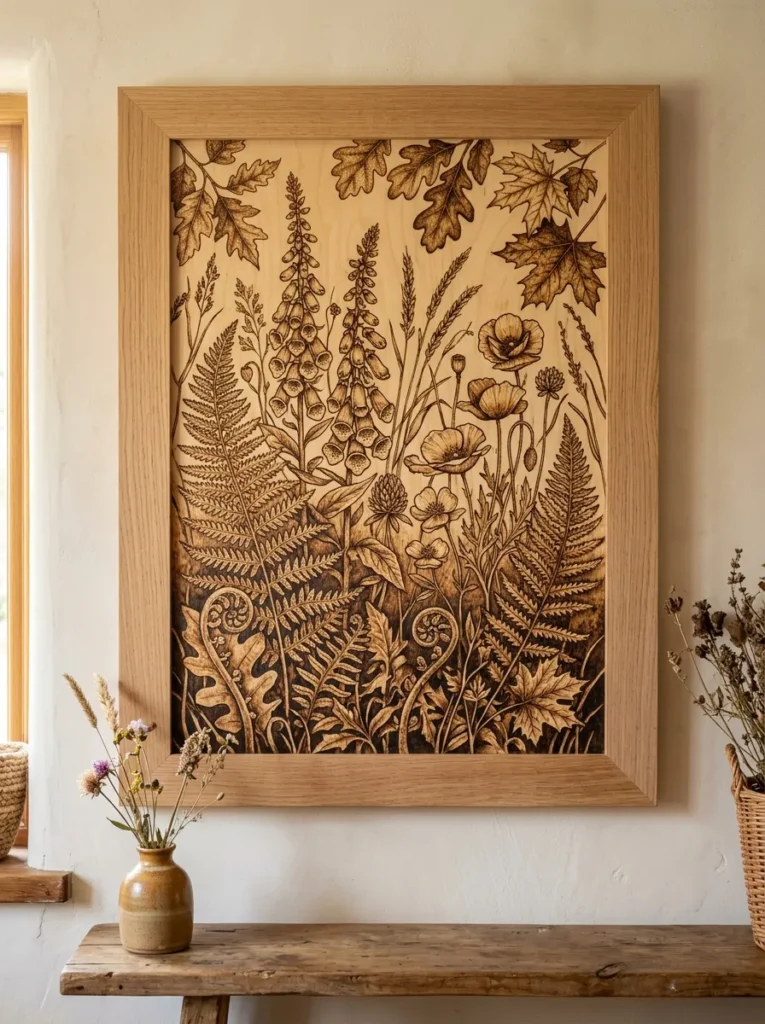
Vibe: A pyrography botanical panel feels warmly precise — the wall piece that takes weeks to make and is immediately understood as having taken weeks to make.
Why it works: Pyrography — drawing with heat on wood — produces wall art with a tonal warmth that no other drawing or painting medium can replicate, because the marks are made in the wood’s own material rather than applied over it. The design principle is material-integrated mark-making as warmth: a pyrography line is not pigment applied to a substrate — it is the substrate itself, transformed by heat into a darker tone that reads as organically part of the wood’s surface rather than sitting on top of it. Botanical subjects are the most commonly chosen pyrography subject for wall art because the fine line quality required for leaf veins, petal edges, and stem details exploits pyrography’s most precise capability, and because the natural subject matter aligns with the natural material in a way that feels compositionally coherent.
How to get it: Use smooth birch plywood (not pine — pine’s resin pockets create unpredictable burn behavior) at 6–9mm thickness for panels up to 60×80cm. Trace the botanical design lightly in pencil before burning. Use a variable-temperature pyrography tool with a fine wire-nib tip for detail work and a wider shader tip for tonal areas. Work from light to dark — you can always burn darker but cannot lighten a burned area. Seal the finished panel with a light coat of matte spray polyurethane to prevent the burned surface from smudging during handling. Frame in a simple wide natural oak frame.
Shop The Look
| Product |
|---|
| Pyrography wood burning tool variable temp |
| Smooth birch plywood panel 6mm |
| Wire nib tip set for pyrography detail |
| Botanical illustration reference book |
| Matte spray polyurethane for panel sealing |
4. Driftwood Sculptural Wall Composition
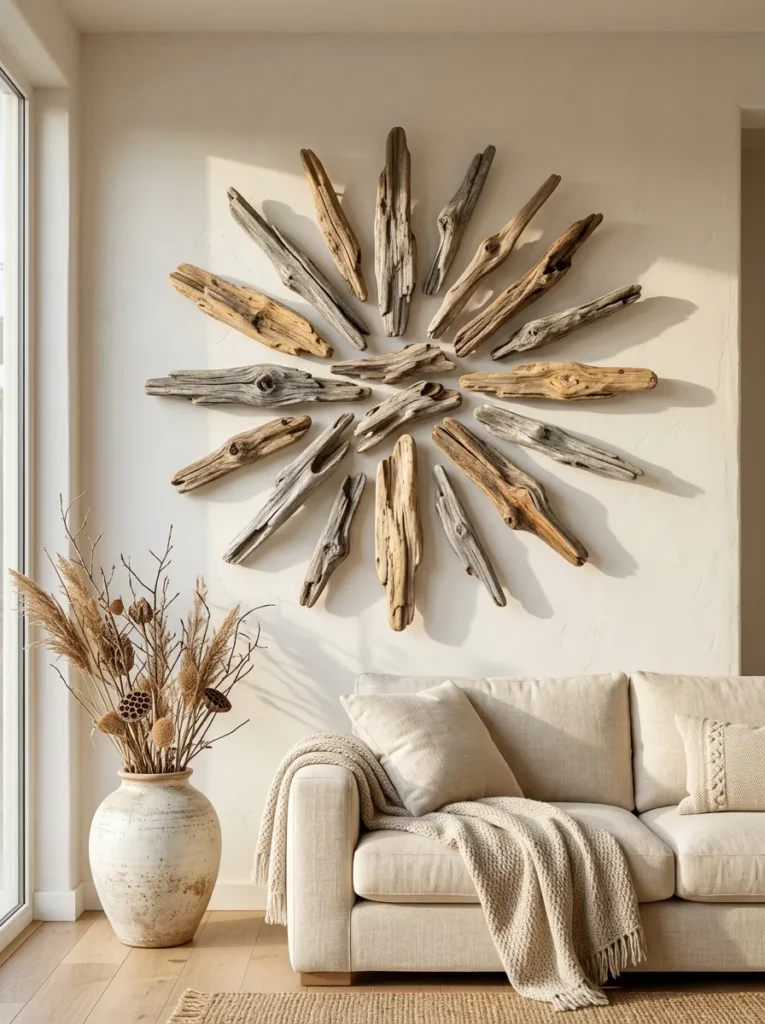
Vibe: A driftwood wall composition feels organically assembled — art that looks as though the sea brought the materials and intention arranged them.
Why it works: Driftwood is the wooden wall art material with the most naturalistic visual character — its water-worked surface, silver-grey bleached tones, and sculptural dimensional forms are the direct result of its specific natural history (the particular body of water that shaped it, the specific weathering duration, the mineral content of the water). The design principle is arranged found objects as composed installation: individual driftwood pieces are not art objects independently, but arranged on a wall as a composed group — with deliberate attention to the visual relationship between their varied lengths, diameters, tones, and surface textures — they become a wall installation with the visual authority of commissioned sculptural work. The individual mounting of each piece at slightly varied wall depths creates the shadow play that makes a dimensional installation more visually interesting than a flat arrangement.
How to get it: Collect driftwood on beach or riverbank walks, selecting pieces with varied forms, lengths, and surface textures. Bake collected driftwood at 120°C for one hour to eliminate any organisms. Clean with a dry brush to remove loose material. Arrange on the floor in the intended composition before mounting — photograph the arrangement for reference. Mount each piece individually using two-part epoxy adhesive on keyhole mounting hardware attached to the back of each piece, or drill small mounting holes and use stainless screws directly through each piece into wall studs or drywall anchors. Vary the mounting depth by using different screw lengths — this creates the shadow variation that makes the composition three-dimensional.
Shop The Look
| Product |
|---|
| Natural driftwood piece set varied sizes |
| Two part epoxy adhesive for mounting |
| Keyhole mounting hardware set |
| Picture hook set wall mount |
| Stainless screw set for driftwood mount |
5. Laser-Cut Geometric Wood Panel
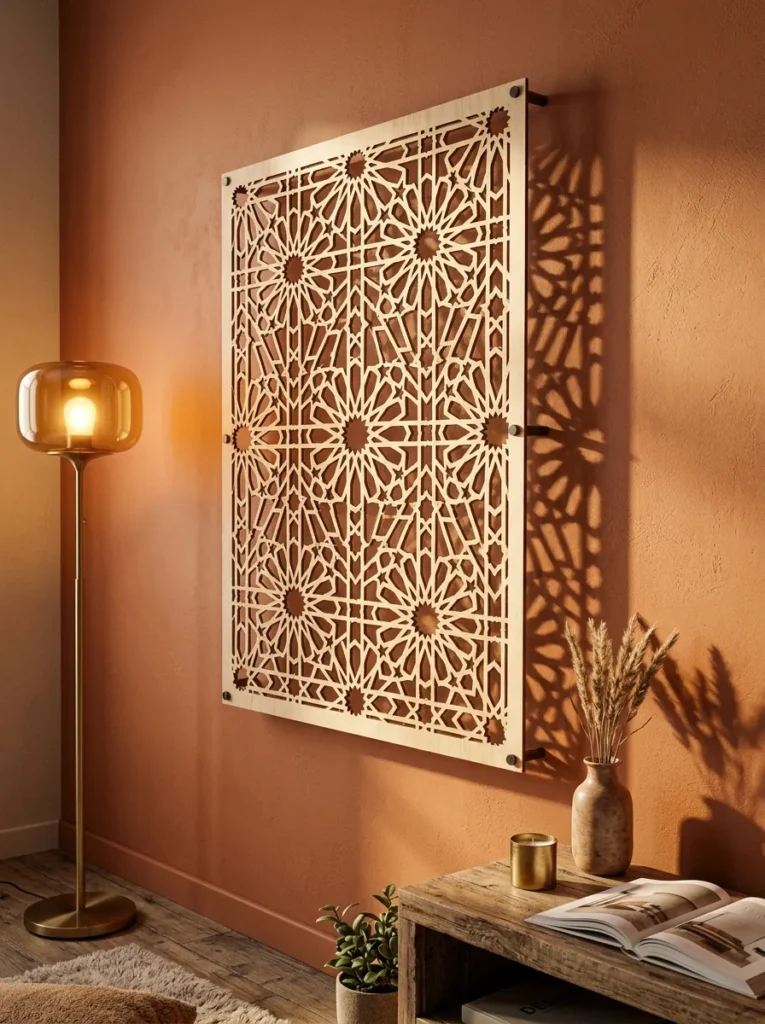
Vibe: A laser-cut geometric panel with shadow projection feels architecturally beautiful — the wall art that changes its appearance completely as the day’s light shifts.
Why it works: A laser-cut geometric wood panel mounted with a gap from the wall exploits the principle of shadow as design element — the cut pattern in the panel projects its negative form as a shadow onto the wall behind, creating a secondary, constantly shifting artwork that is as visually significant as the panel itself. The design principle is light transmission as dynamic decoration: the geometric pattern provides the shadow-casting structure, and the light source’s position determines the shadow’s scale, sharpness, and direction — making the overall installation visually different at every time of day and with every light source configuration. The warm tone of birch or basswood plywood gives the shadow a warm amber quality that cool materials (metal or glass) cannot produce.
How to get it: Commission a laser-cut panel from an online laser cutting service (Ponoko, SendCutSend, or local makerspaces) — provide a vector design file and specify 3–4mm birch plywood as the material. Alternatively, use a desktop CNC router or laser cutter if available. Mount the panel on four small standoffs (M4 brass standoffs, 10–15mm length) that hold the panel 10–15mm from the wall surface — this gap is sufficient for dramatic shadow projection. Position a warm directional light source (a floor lamp or wall sconce) at a 45-degree angle to the panel for maximum shadow contrast.
Shop The Look
| Product |
|---|
| Laser cut wood panel geometric design |
| Brass standoff mounting set 15mm |
| Birch plywood 3mm for laser cutting |
| Warm floor lamp directional for panel |
| Vector design file laser cut pattern |
6. Wood Slice Mosaic Wall Arrangement
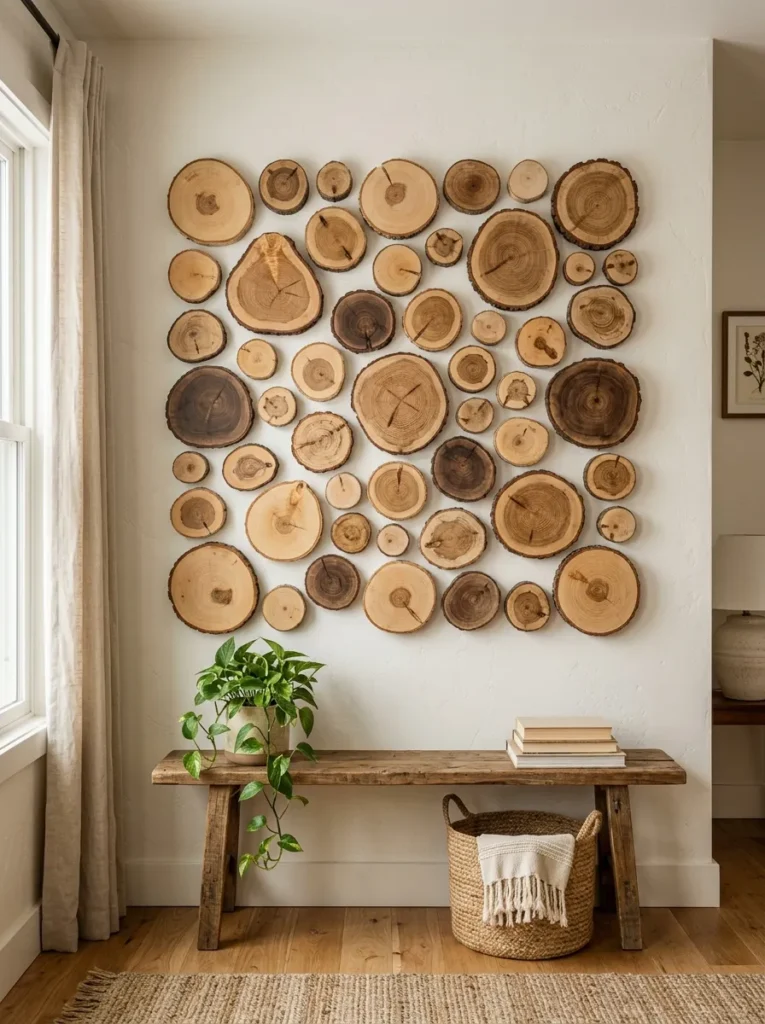
Vibe: A wood slice mosaic feels endlessly interesting — the wall composition that offers a different visual experience at every viewing distance.
Why it works: A wood slice mosaic wall arrangement exploits the specific visual quality of cross-cut end-grain wood — the concentric ring pattern visible in a cross-cut slice is the direct visual record of the tree’s annual growth, which gives each slice a natural pattern of extraordinary complexity and warmth that no manufactured surface can replicate. The design principle is natural pattern density as visual richness: forty to fifty wood slices displaying their end-grain patterns collectively create a wall composition of extraordinary visual complexity, where each individual slice contributes its specific ring pattern and bark edge to the overall texture. The composition reads as a unified wall element at distance and as a collection of individual, biologically specific objects at close range.
How to get it: Cut wood slices from branches and small logs using a chainsaw or handsaw — species with interesting bark (birch, poplar, or any rough-barked hardwood) are most visually compelling. Allow to dry slowly for several weeks (rapid drying causes splitting). Apply a thin coat of wood stabilizer or matte polyurethane to the cut faces to prevent checking. Arrange on the floor in the intended composition before mounting. Mount each slice using a sawtooth hanger or keyhole bracket on the back, or simply use two-part adhesive for lighter pieces directly to the wall.
Shop The Look
| Product |
|---|
| Wood slice set natural bark edge varied |
| Wood stabilizer for end grain sealing |
| Sawtooth hanger set for slice mounting |
| Matte polyurethane for slice face |
| Varied wood log set for DIY slicing |
7. Carved Wood Relief Panel
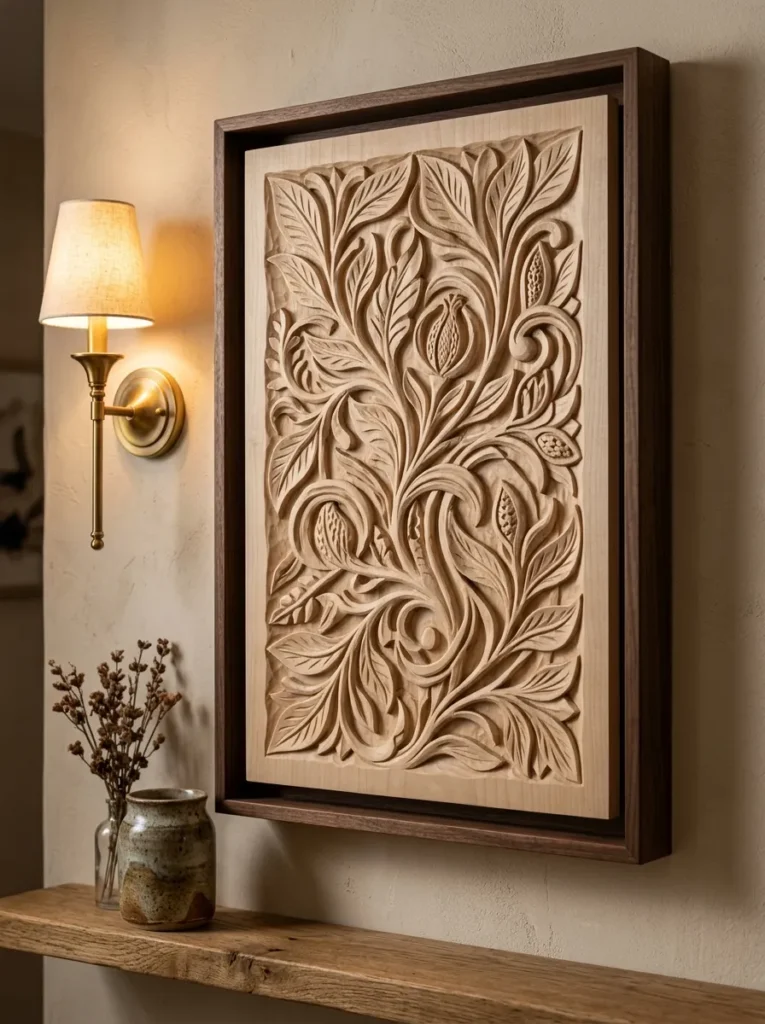
Vibe: A hand-carved wood relief panel feels definitively handmade — the wall piece that carries the evidence of the tool marks and hours that produced it.
Why it works: Wood carving is the wooden wall art technique that most directly communicates human presence and skill — the tool marks, the relief depth variations, and the slight surface irregularities that characterize hand carving are evidence of a specific person’s hand moving through a specific piece of wood over an extended period. This evidence of making gives carved wood relief panels a quality of authentic human presence that no laser-cut, CNC-routed, or machine-produced piece can replicate. The design principle is directional light activation of carved surface: a relief panel requires directional light to reveal its full depth — flat overhead lighting flattens the carving; directional side lighting (from a wall sconce, a directional floor lamp, or natural side light) creates the shadow depth that defines each carved element and transforms the panel from a flat surface into a dimensional composition.
How to get it: Carve on basswood (the most accessible hardwood for beginning carvers due to its consistent, knot-free texture) using a set of wood carving gouges and a mallet. For a first relief panel, trace a simple botanical design onto the wood surface in pencil and carve to a consistent 5mm depth using a flat gouge for the background removal and a V-tool for outline definition. The background removal is the most time-intensive step — work systematically in small sections. Finish with Danish oil or leave unfinished for the pale, natural look that shows the carving’s details most clearly. Mount in a shadow box frame to protect the carved surface and provide the deep reveal that frames relief work appropriately.
Shop The Look
| Product |
|---|
| Basswood carving panel blank set |
| Wood carving gouge set beginner |
| V-tool carving chisel for outline |
| Danish oil for carved panel finishing |
| Deep shadow box frame for carved panel |
8. Macramé on Driftwood Branch
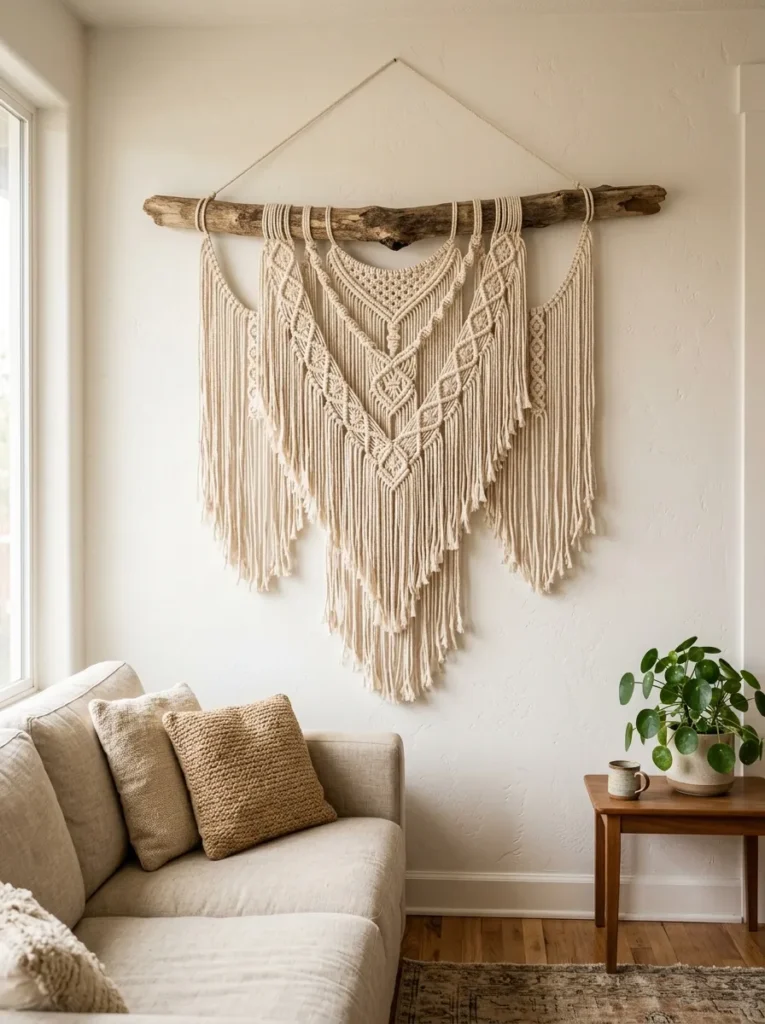
Vibe: Macramé on driftwood feels organically warm — textile and wood in a dialogue that makes both materials more interesting than either would be alone.
Why it works: Combining macramé textile with a driftwood branch hanging rod creates a material dialogue between two natural materials with complementary visual qualities — the driftwood’s rigid, sculptural, water-worked form and the macramé’s soft, flexible, hand-knotted textile create a visual tension that makes the installation more dynamic than either material independently. The design principle is material contrast through natural materials: the driftwood and cotton cord share the same natural material origin (organic, unprocessed, non-synthetic) while presenting completely different physical qualities (rigid versus flexible, grey-silver versus warm cream, found versus made). This shared natural origin with contrasting physical expression is the aesthetic logic that makes the combination feel coherent rather than arbitrary.
How to get it: Select a thick driftwood branch (minimum 3–4 cm diameter for structural stability when supporting cotton cord weight) at a width that suits the wall space. Collect and clean as described in idea 4. Attach a hanging cord at each end of the branch. Cut macramé cotton cord in lengths 2.5–3× the desired finished hanging length plus the width of the knot pattern. Attach to the branch using lark’s head knots. Work square knots, spiral knots, and alternating square knot patterns to the desired length and fringe. The irregular natural form of the driftwood branch should inform the macramé’s width and hanging approach — work with the branch’s specific form rather than imposing a standardized hanging on it.
Shop The Look
| Product |
|---|
| Natural driftwood branch thick for hanging |
| Natural cotton macramé cord 3mm |
| Macramé knot pattern reference card |
| Natural jute cord accent for macramé |
| Tapestry needle for weaving ends |
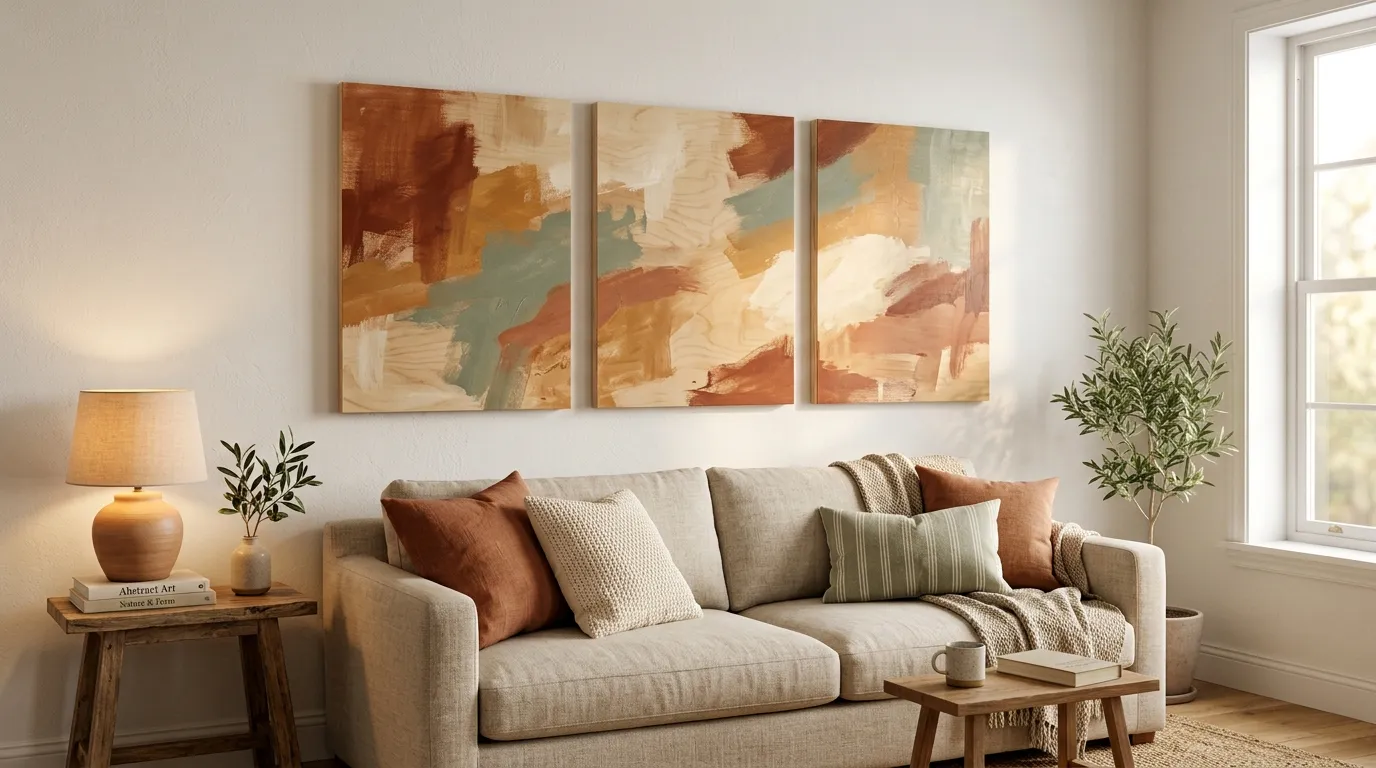
9. Painted Abstract Wood Panel Series
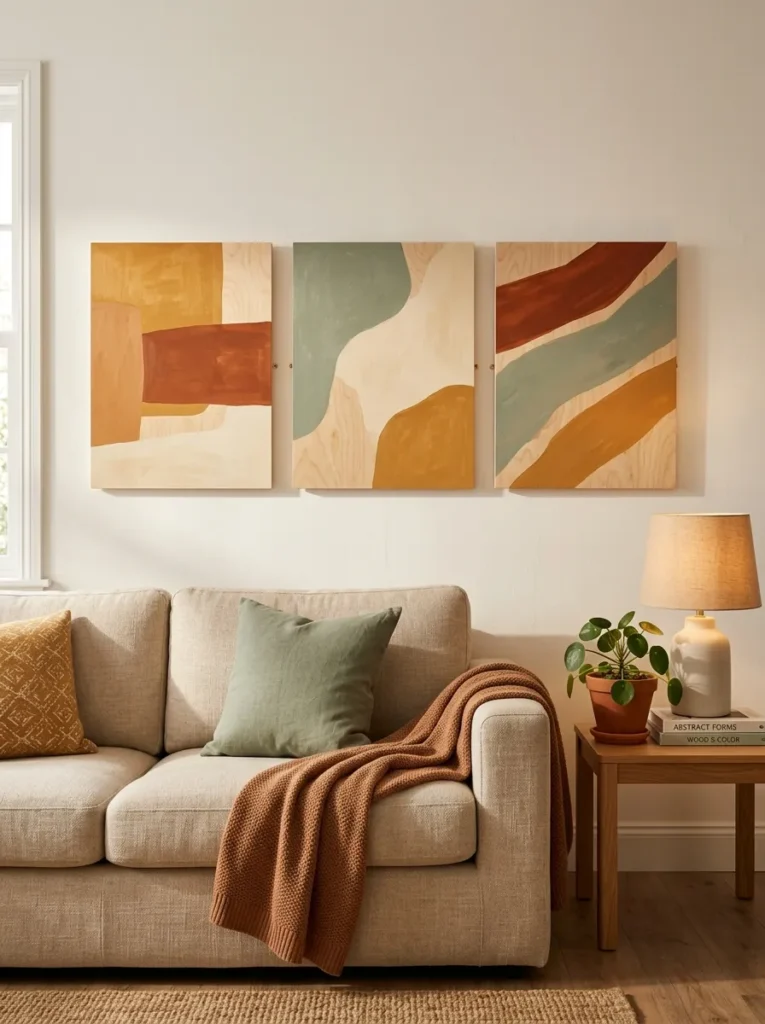
Vibe: A painted abstract wood panel series feels warmly layered — paint and wood grain in a conversation where the natural surface shows through the applied color.
Why it works: Painting abstract color fields on wood rather than canvas creates a surface quality unavailable on any fabric or paper substrate — the wood grain shows through thinly applied paint, creating a warm, organic underlayer that gives the painted surface depth and warmth that a purely opaque painting on canvas cannot achieve. The design principle is substrate visibility as painting medium: allowing the wood grain to show through the paint application converts the substrate from a neutral backing into an active participant in the painting’s visual content. The warm ochre, burnt sienna, and dusty sage earth tone palette works particularly well on birch plywood’s warm base tone — the colors warm further against the birch than they would against a white canvas ground.
How to get it: Cut birch plywood panels to a consistent size (30×40 cm triptych is versatile for most living room walls). Sand to 220 grit for a smooth surface that allows paint application control. Apply acrylic paint in thin, translucent washes rather than opaque coverage — a ratio of 1 part paint to 2 parts water creates the translucency that allows grain to show through. Layer washes in the earth tone palette, allowing each layer to dry before adding the next. Leave some areas with only one wash layer (grain very visible) and build up additional layers in focal areas (grain less visible). The triptych format distributes the abstract composition across three panels that read as a unified horizontal statement.
Shop The Look
| Product |
|---|
| Birch plywood panel 12mm cut to size |
| Acrylic paint set earth tones warm |
| Flat brush set for wash application |
| Matte varnish for panel finishing |
| Panel mounting hardware triptych set |
10. Cork Bark Textural Wall Panel
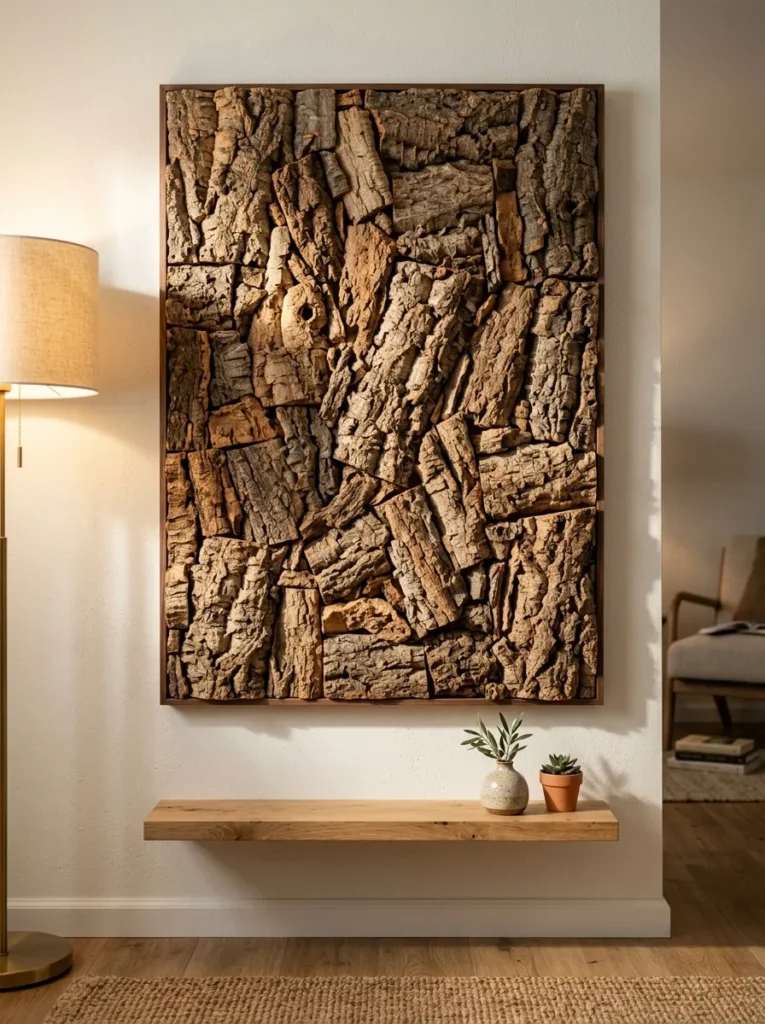
Vibe: A cork bark textural panel feels dimensionally warm — the wall surface that makes every other surface in the room feel flatter by comparison.
Why it works: A composed cork bark panel is the wooden wall art choice that most completely foregrounds texture as the primary visual element — the varied depths of natural cork bark pieces (some 5mm, some 30mm, some irregular) create a surface with three-dimensional complexity that is genuinely sculptural rather than merely decorative. The design principle is relief depth as primary visual content: under directional lighting, a cork bark panel’s varied depths create shadows of proportionally varied darkness and shape — shallow pieces create thin shadow lines while deep pieces create broad shadow areas — which together produce a continuously shifting composition of light and shadow that changes throughout the day as natural light angles change. No two cork bark arrangements are visually identical because no two assemblages of natural cork bark pieces are tonally or dimensionally identical.
How to get it: Purchase natural cork bark pieces in varied sizes and thicknesses from terrarium and reptile suppliers. Cut a backing panel from 12mm MDF to the desired panel dimensions. Arrange cork bark pieces on the backing panel in a composition that varies depth, size, and orientation — aim for a surface with at least three distinct depth levels. Attach each cork bark piece using construction adhesive, pressing firmly and allowing full cure time before mounting the completed panel. Mount the finished panel using D-ring hangers on the back of the MDF backing.
Shop The Look
| Product |
|---|
| Natural cork bark piece set varied |
| 12mm MDF backing panel cut to size |
| Construction adhesive for cork mounting |
| D-ring hanger set for panel back |
| Natural cork bark mixed thickness set |
11. Laser-Engraved Map or Topographic Art
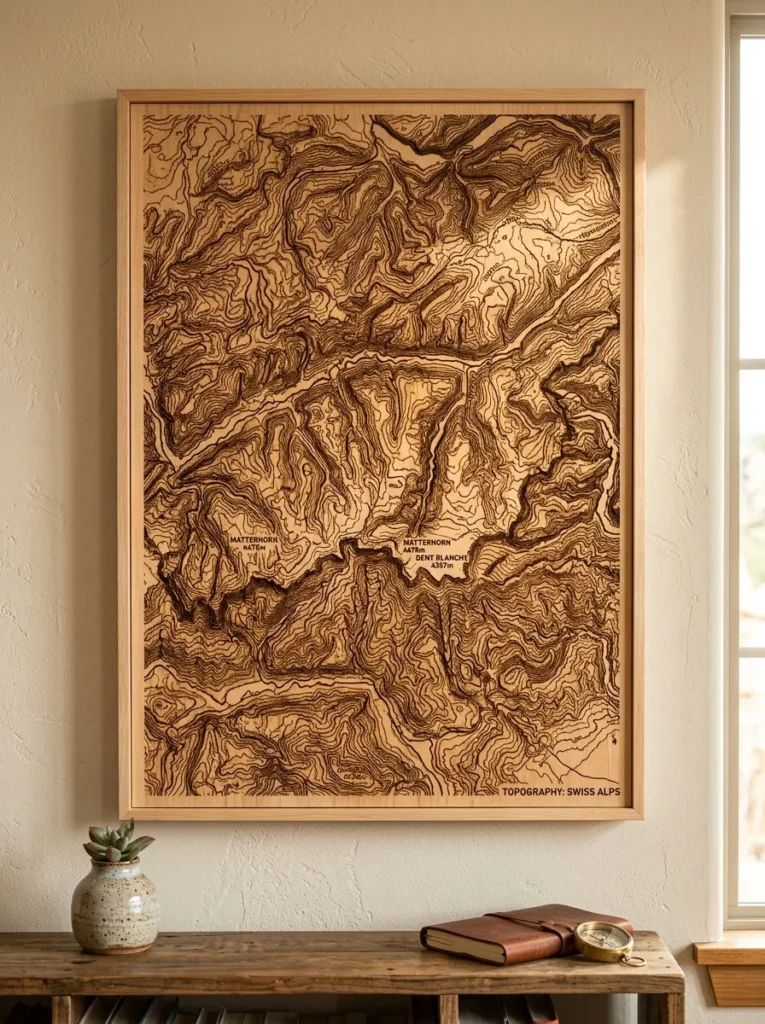
Vibe: A laser-engraved topographic map on wood feels personally geographic — wall art that is simultaneously technically precise and warmly material.
Why it works: A laser-engraved topographic map on wood occupies the specific aesthetic territory where cartographic precision meets natural material warmth — the computer-generated contour lines of a specific landscape, translated into laser engraving on natural wood, create an object that is both intellectually specific (it depicts a real place with geographic accuracy) and materially warm (the wood grain interacts with the engraving to create a surface where the topographic information and the natural material are genuinely integrated rather than one applied to the other). The design principle is meaningful geographic content as personal wall art: a topographic map of a place with personal significance — a mountain climbed, a coastline explored, a hometown watershed — gives the wall piece an emotional specificity that decorative geometric laser work cannot carry.
How to get it: Source high-resolution topographic data from USGS (United States Geological Survey) or OpenTopography for US locations, or equivalent national mapping agencies for other countries. Convert to a vector or raster file suitable for laser engraving — several online tutorials and community resources exist for this conversion process. Commission engraving from an online laser service or local makerspace. Specify natural maple or birch as the substrate — both produce warm, readable engraving contrast. Frame in a slim natural wood frame without a mat for the most integrated, contemporary presentation.
Shop The Look
| Product |
|---|
| Maple wood panel 6mm for engraving |
| Laser engraving service commission |
| Slim natural wood frame for map panel |
| Matte wood oil for panel finishing |
| Topographic data download service |
12. Woven Wood Strip Wall Textile
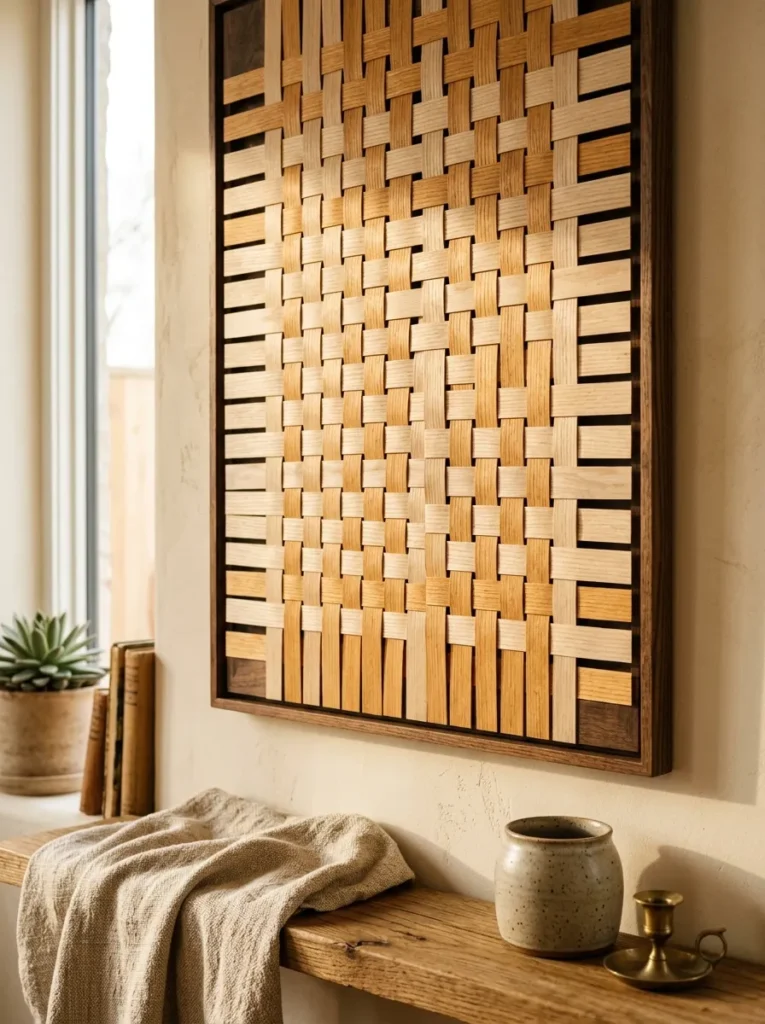
Vibe: A woven wood strip panel feels unexpectedly textile-like — wood behaving with the visual language of fabric, which makes the viewer look twice before understanding what the material is.
Why it works: Weaving thin wood veneer strips into a textile pattern converts wood from its expected rigid, structural material role into a flexible, woven surface that reads initially as a textile — the over-under pattern creates the same visual rhythm as woven fabric while the material’s warmth and grain maintain the wood’s specific identity. The design principle is material behavior subversion as visual interest: when a material (wood) is made to behave in a way associated with a different material category (textile), the viewer’s initial perception of the familiar pattern (weaving) is subverted by the closer recognition of the material (wood), which creates a sustained double-take that makes the piece genuinely engaging to look at. The directional light variation between warp and weft directions — where strips running in different directions reflect light differently — creates the visual rhythm that makes the woven surface dynamic rather than flat.
How to get it: Purchase flexible wood veneer in two complementary tones (natural maple and walnut veneer, for example, create a warm two-tone woven composition). Cut into 5–8mm wide strips using a craft knife against a steel rule on a cutting mat. Build a simple wooden frame at the desired panel dimensions and stretch warp strips at consistent spacing across the frame, securing at both ends with a staple gun. Weave weft strips under and over the warp strips in alternating rows, pressing each row snug against the previous. Secure the ends and frame the completed woven surface.
Shop The Look
| Product |
|---|
| Natural wood veneer sheet flexible |
| Walnut veneer sheet for two-tone weave |
| Craft knife set for veneer cutting |
| Steel rule for strip cutting guide |
| Staple gun for frame securing |
13. Small-Space Wooden Wall Art — Single Statement Piece in Compact Rooms
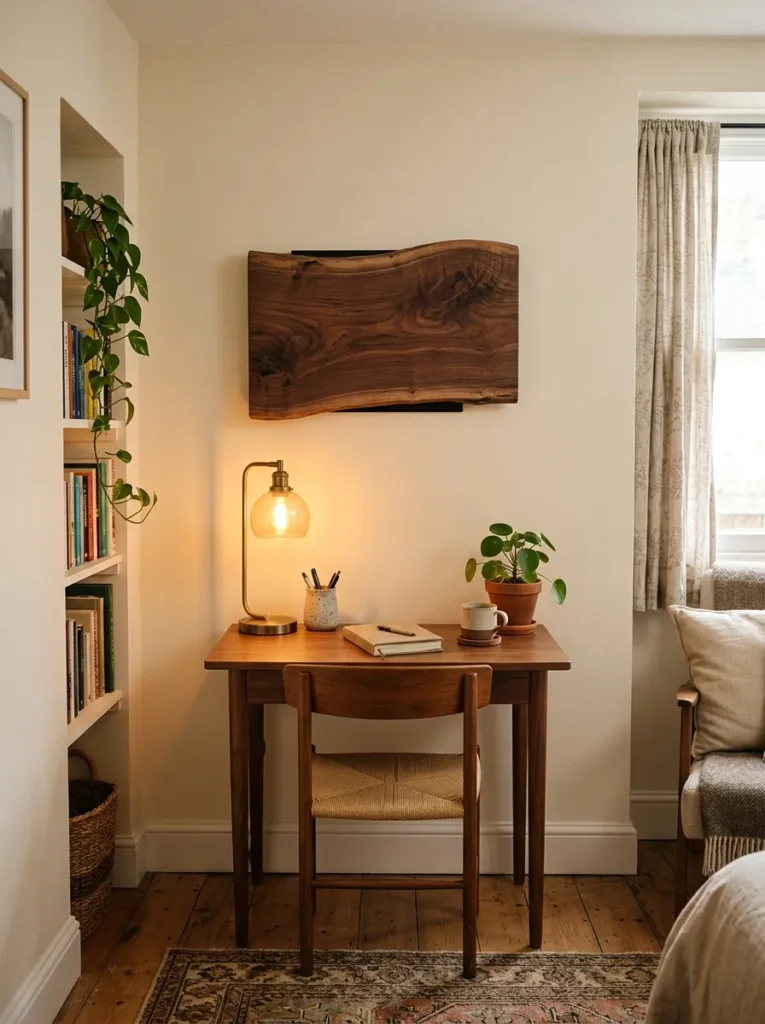
Vibe: A single well-chosen wooden piece in a small room feels confidently proportioned — the wall art that proves that scale-appropriate confidence is more powerful than ambitious over-scaling in compact spaces.
Why it works: The small-space wooden wall art principle is the same as the small-space interior design principle generally — one confident, correctly scaled piece commands a small wall more effectively than multiple smaller pieces competing for visual authority in limited space. The design principle is proportional scale confidence as small-space wall art strategy: a single walnut slab at 50×30 cm centered above a small writing desk maintains the correct scale relationship between art and furniture (the art should span approximately two-thirds of the furniture width below it) while providing the warmth and material specificity of wooden wall art in a footprint that a small room can accommodate. The matte black mounting bracket bridges the walnut’s warm tone and the room’s contemporary character without the visual interruption of a traditional picture frame.
How to get it: For small rooms, the critical sizing decision is the art-to-furniture width ratio — choose a piece that spans 55–70% of the width of the furniture below it. A desk 80 cm wide calls for a piece 44–56 cm wide — a medium live-edge slab or a single pyrography panel at this width is proportionally correct. Mount on a floating bracket that positions the piece 15–20 cm above the furniture surface — close enough to read as compositionally related to the furniture rather than floating independently on the wall. A single piece of genuinely high-quality wooden wall art (a real walnut slab, a well-executed pyrography panel, or a quality cork relief) consistently outperforms a collection of smaller, lower-quality wooden pieces in any room size.
Shop The Look
| Product |
|---|
| Small walnut live edge slab 50x30cm |
| Matte black floating bracket small |
| Danish oil for small slab finishing |
| Small writing desk for below art |
| Desk lamp warm for art illumination |
How to Start Your Wooden Wall Art Journey
The single first move is to identify which of the 13 wood wall art approaches in this list most closely matches your home’s existing material palette and your own making confidence level — and to start there rather than with the most ambitious project. A home with warm walnut furniture and warm white walls will be most immediately served by a live-edge walnut slab (idea 2) or a pyrography botanical panel (idea 3) rather than a driftwood composition that might introduce a tonally inconsistent material. A beginning maker with basic tools is better served by a reclaimed wood geometric installation (idea 1) or a painted abstract wood panel series (idea 9) than by a hand-carved relief panel (idea 7) that requires specialist tools and developed technique. The starting point is the project that sits at the intersection of your room’s material need and your own current capability — that intersection is where the first wooden wall art project succeeds.
The most common mistake in wooden wall art is under-scaling — choosing a piece that is smaller than the wall and the furniture below it can support, which produces a wall element that floats without anchoring rather than commanding the space it occupies. The two-thirds rule applies consistently across all wooden wall art: the piece’s width should span at least two-thirds of the wall section or furniture piece it relates to. A piece that feels large when held in the hands almost invariably feels correctly scaled when hung on the wall — the instinct to go smaller is almost always wrong in wall art of any material, and wooden wall art’s material warmth does not compensate for insufficient scale.
Three wooden wall art investments under $50 that produce the most immediate impact: a set of mixed natural cork bark pieces assembled onto a small MDF backing panel ($15–$25 in materials) for immediate textural warmth on any wall, a single live-edge slice of any hardwood slab sourced from a local lumber yard or online marketplace and finished with Danish oil ($20–$45 depending on species and size) for singular natural statement, and a batch of reclaimed pallet wood deconstructed and arranged in a herringbone pattern on a wall section above a console table (often free in pallet materials plus $10–$15 in construction adhesive and finishing materials) for the most architecturally impactful wooden installation at the lowest material cost. All three are achievable in a single weekend and all three produce wall art with a warmth and material specificity that no framed print at equivalent cost can match.
Realistic expectations: the wooden wall art projects in this list range from one-afternoon beginner projects (painted abstract wood panels, wood slice mosaic, reclaimed plank installation) to multi-week intermediate projects (pyrography botanical panel, hand-carved relief panel) to professional-assistance projects (laser-cut geometric panels, laser-engraved maps). Material costs range from essentially free (collected driftwood, salvaged pallet wood) to $80–$250 for quality live-edge slabs. The enduring quality of wooden wall art — its inability to fade, its improvement with age as patina develops, and its material specificity that no reproduction can replicate — justifies investment at any price point because the pieces genuinely improve the room for the lifetime of the home.
Frequently Asked Questions About Wooden Wall Art
What type of wood is best for wall art?
The best wood for wall art depends on the specific art form and the interior’s existing material palette. For live-edge statement pieces and carved panels, walnut offers the deepest figure and most dramatic color range. For pyrography and painted panels, birch plywood provides the consistent, smooth surface that fine detail work requires. For reclaimed and assembled installations, barn wood, pallet wood, and architectural salvage provide the weathered surface character that new wood cannot replicate. For driftwood compositions, the specific water-worked form of collected driftwood is non-substitutable. The general principle is to use the wood species whose natural qualities — grain figure, color range, surface texture — most directly serve the intended art form rather than defaulting to a generic “best” species.
How do I hang heavy wooden wall art safely?
Any wooden wall art piece exceeding 5 kg requires mounting into wall studs rather than drywall anchors — locate studs with a stud finder and drive appropriate wood screws (2.5 inch minimum) directly into the stud. For pieces that do not align with studs, use heavy-duty toggle bolts rated for the piece’s weight. Large assembled installations (reclaimed plank herringbone, wood slice mosaics) should use construction adhesive in combination with mechanical fasteners rather than adhesive alone — the adhesive provides distributed load support while the mechanical fasteners provide redundant safety against adhesive failure. For live-edge slabs and single-piece heavy items, a French cleat system (two interlocking angled wood rails — one on the wall, one on the piece) provides the most secure and level mounting for heavy irregular-shaped objects.
How do I finish wooden wall art to protect it?
The appropriate finish depends on the piece’s intended visual quality and the room’s conditions. For pieces intended to show natural wood warmth with minimal surface film: penetrating oil finishes (Danish oil, tung oil, Rubio Monocoat) absorb into the wood surface, enhancing grain without creating a plastic-like film. For pieces requiring durability against handling or dusting: water-based matte polyurethane provides adequate protection while maintaining a relatively natural appearance. For pieces in humid rooms (kitchens, bathrooms): oil-based polyurethane or a dedicated exterior finish provides better moisture resistance. Pyrography panels specifically should be sealed with a matte spray varnish to prevent smudging of the burned surface during cleaning. Reclaimed wood installations typically benefit from no finish — or a very thin oil wash — to maintain the weathered surface character that is their primary aesthetic quality.
Can wooden wall art be made by beginners with no woodworking experience?
Several projects in this list are genuinely accessible to beginners with no prior woodworking experience: the reclaimed wood plank geometric installation requires only measuring, cutting with a handsaw or circular saw, and mounting; the wood slice mosaic requires only collecting, drying, and mounting; the cork bark textural panel requires only arranging and adhering; the painted abstract wood panel series requires only basic painting skills on a prepared plywood surface; and the macramé on driftwood requires only driftwood collection and basic macramé knot knowledge. Projects requiring specialist skills (pyrography, wood carving, laser cutting, veneer weaving) benefit from prior practice or commissioned execution, but the beginner-accessible projects in this list produce wall art of genuinely high visual quality without requiring prior woodworking knowledge.
How do I choose wooden wall art that fits my interior’s style?
The most reliable style-matching principle for wooden wall art is material palette alignment — choose wood species and surface treatments that complement the room’s existing wood tones rather than contrasting with them. A room with warm walnut furniture benefits most from walnut or similarly warm-toned wood art. A room with lighter oak or natural wood tones accommodates birch, maple, or light-toned reclaimed wood most harmoniously. Rooms with no existing wood elements can introduce any wood tone, but warm-toned species (walnut, oak, cherry) integrate most broadly across varied interior palettes. Style alignment is determined less by the wood’s species than by the art form’s visual character: geometric laser-cut panels read as contemporary, hand-carved relief panels read as artisanal and traditional, driftwood compositions read as coastal-organic, and live-edge slabs read as both contemporary and naturally grounded across most interior styles.
Ready to Bring Wood to Your Walls?
These 13 creative wooden wall art ideas span every making skill level, every interior style, every budget, and every wall size — from the beginner-accessible reclaimed wood geometric installation and the cork bark textural panel to the hand-carved relief piece and the laser-engraved topographic map, and from the small-space single walnut slab to the large driftwood sculptural composition that commands an entire primary wall. The most important thing to understand about wooden wall art is that the material does most of the work — the grain figure, the surface texture, the dimensional character, and the warmth of natural wood are qualities that the maker’s job is to reveal and compose rather than impose or manufacture. Find a piece of wood with a quality you find genuinely beautiful — a slice of walnut with extraordinary figure, a piece of driftwood with a sculptural form, a section of reclaimed barn wood with sixty years of weathering in its surface — and put it on the wall where you can see it every day. That single act of displaying natural material in a domestic context is the essential gesture of all wooden wall art, and everything else in this list is an elaboration of that gesture. Pin the ideas that made you look at wood differently, and let those be the ones you hang first.