16 Weekend DIY Home Projects Under $100
Weekend DIY home projects under $100 are achievable, budget-conscious home improvement and decorating projects that can be completed within a single weekend using accessible materials, basic tools, and beginner-to-intermediate skill levels — delivering genuine, lasting improvements to the visual quality, functionality, or atmosphere of a home without requiring professional labor, specialist equipment, or significant financial outlay. This article gives you exactly 16 weekend DIY home projects under $100, spanning every room from the living room to the garden, every skill level from absolute beginner to confident DIYer, and every project type from paint transformations to furniture builds to organizational systems, with specific step-by-step guidance and curated product tables for every project.
There is a specific satisfaction that comes from improving your own home with your own hands — a quality of ownership and pride in the result that hired work, however excellent, cannot fully replicate. A shelf you built, a wall you painted, a garden bed you dug and planted: these things carry a different relationship to their maker than objects and surfaces created by professionals, because the making process itself is part of the object’s ongoing meaning in the home. Weekend DIY projects are also the most financially efficient home improvement available — the ratio of visual or functional improvement to dollar spent is consistently higher for DIY than for equivalent professional work, because the labor component (typically 50–70% of any contractor’s quote) is provided by the homeowner. Here are 16 projects worth attempting — and saving.
Why Weekend DIY Home Projects Work So Well
The DIY home improvement tradition in English-speaking countries has roots in the post-World War II suburban expansion, when millions of new homeowners — many of them without family traditions of property ownership and its associated maintenance knowledge — were simultaneously confronted with homes that needed ongoing improvement and with the practical impossibility of affording professional labor for every project. The self-build and DIY culture that emerged from this period — documented in the proliferation of home improvement magazines, DIY hardware chains, and weekend project books of the 1950s through 1980s — established the foundational knowledge base that contemporary DIYers inherit. The maker movement of the 2000s and 2010s added design consciousness to this practical tradition, producing the contemporary DIY culture that simultaneously values craft quality, aesthetic consideration, and personal creative expression alongside functional achievement.
The projects that produce the most successful weekend DIY results share specific qualities: they are achievable within two full days of active work (or one day for the simplest projects) without requiring skills or equipment unavailable to a motivated beginner; they use materials available from mainstream hardware, craft, and garden suppliers; they deliver improvements that are genuinely visible and genuinely functional rather than marginal or invisible; and they remain within the $100 budget through deliberate material selection and scope management. The most successful weekend DIY projects are also those where the skill required is front-loaded into the planning and preparation phases rather than the execution phase — a project that is planned and prepared carefully almost always executes successfully, while a project begun without adequate planning almost always encounters preventable problems.
Weekend DIY home projects have maintained consistent cultural engagement across all home improvement platforms — Pinterest, YouTube, and specialist DIY communities consistently show that beginner-accessible projects with visible results generate the highest engagement and the most sustained community participation. The most successful beginner DIY projects are those that produce a finished result that looks significantly more expensive and more professionally executed than the effort and materials invested would suggest — the projects in this list have all been selected for this specific quality.
First-time homeowners and renters in modifiable properties gain the most from weekend DIY projects because the projects in this list cover the full spectrum from renter-appropriate temporary modifications (removable wallpaper, plug-in lighting, container gardens) to permanent improvements that add genuine property value (painted cabinetry, tiled surfaces, built shelving).
Style at a Glance
| Element | Trait 1 | Trait 2 |
|---|---|---|
| Philosophy | Personal craft over hired labor | Visible improvement over marginal change |
| Materials | Paint, timber, tile, fabric, hardware | Seeds, gravel, adhesive, lighting cable |
| Tools | Drill, paintbrush, jigsaw, trowel | Sandpaper, level, staple gun, saw |
16 Weekend DIY Home Projects Under $100
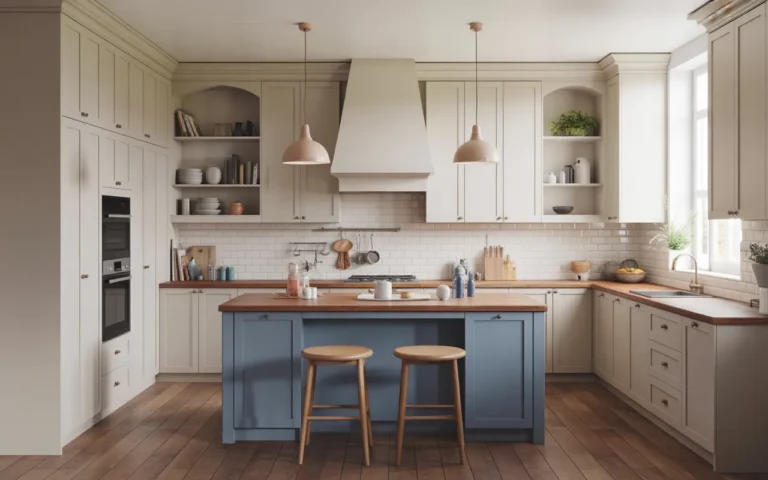
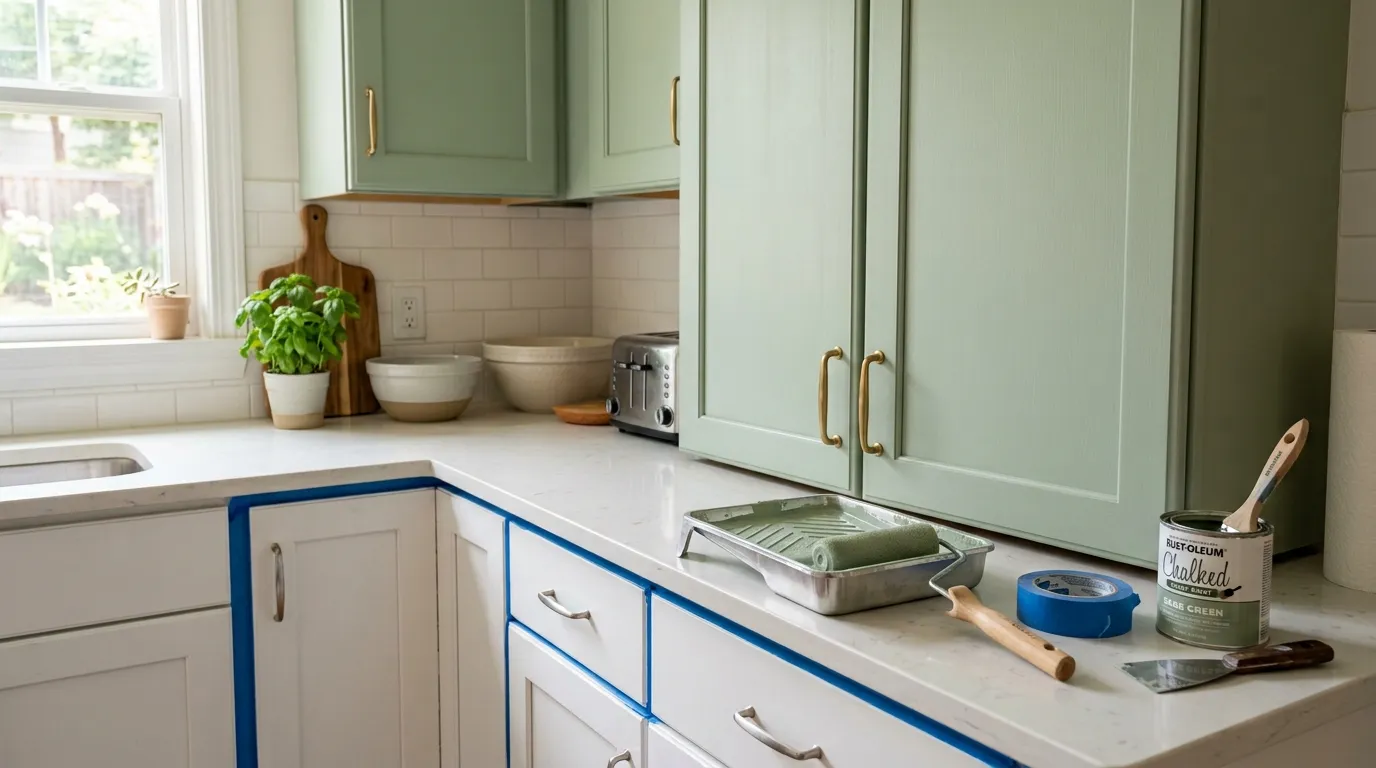
1. Painted Kitchen Cabinet Doors
Budget: $35–$85 | Time: Full weekend | Skill: Beginner–Intermediate
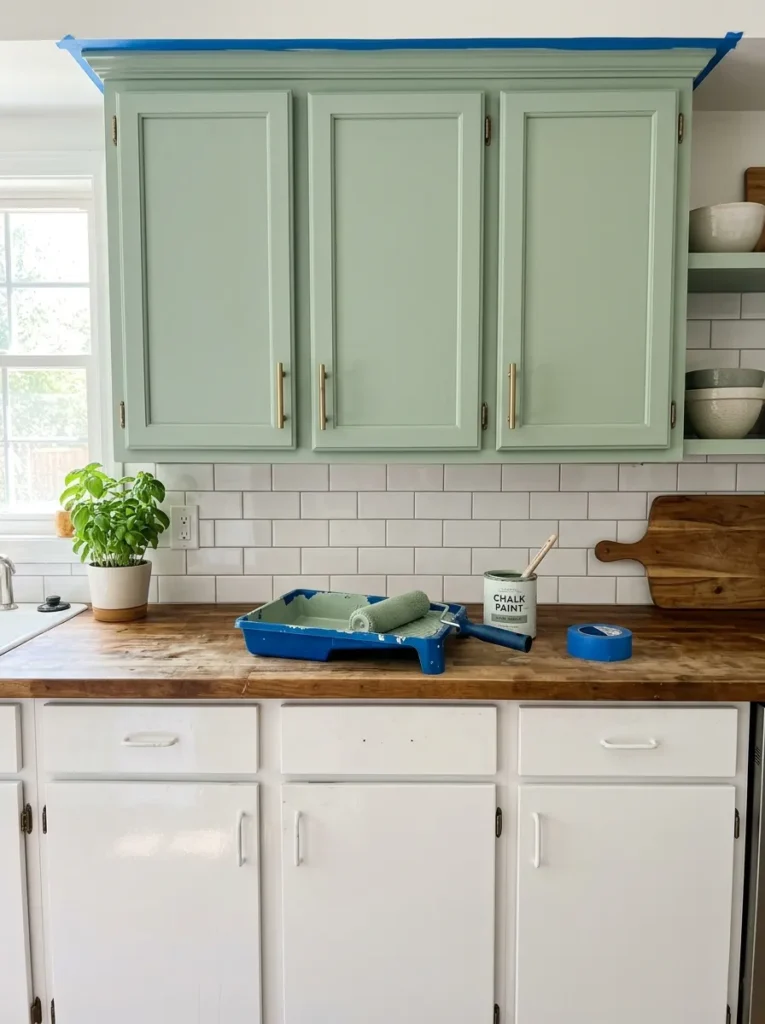
Vibe: Painted kitchen cabinet doors feel transformatively dramatic — the weekend project with the highest visual impact of any project in this list, changing the entire character of a kitchen for under $85.
Why it works: Repainting kitchen cabinet doors is the weekend DIY project with the highest visual-impact-to-cost ratio available because cabinet doors constitute 60–70% of the visible surface area in most kitchens — changing their color changes the entire visual character of the room. Chalk paint is the material that makes this project beginner-accessible: it adheres to previously painted, varnished, or laminated cabinet surfaces without sanding or priming, dries quickly between coats, and is available in the sophisticated, design-forward colors (dusty sage, deep forest green, warm terracotta, navy) that elevate a kitchen’s aesthetic most dramatically.
How to get it: Remove all cabinet doors using a screwdriver and lay flat on a clean, protected surface. Degrease all surfaces thoroughly with a kitchen degreaser — cooking oil film on kitchen cabinets prevents adhesion even through chalk paint’s no-prep reputation. Apply two coats of chalk paint using a foam roller for the flattest possible finish, cutting in at edges with a small brush. Allow 2 hours between coats. Replace all hardware with new pulls or handles in coordinating metal — brushed brass or matte black both create immediate uplift regardless of the chosen paint color. Rehang doors and seal with a water-based furniture wax for kitchen durability.
Quick Win: Replacing only the hardware on existing cabinet doors — no painting required — takes 30 minutes and costs $20–$40 for a full kitchen set of brushed brass bar pulls. The hardware change alone creates 40% of the visual improvement of a full repaint for 20% of the cost and effort.
Shop The Look
| Product |
|---|
| Chalk paint sage green kitchen cabinet |
| Foam roller set 4 inch small cabinet |
| Brushed brass bar pull set 10 piece |
| Kitchen degreaser spray cabinet prep |
| Water based furniture wax clear seal |
Also view: 18 Excellent Storage Beds for Small Spaces for Tiny Rooms
2. DIY Floating Shelves (LAYOUT / MATERIAL)
Budget: $25–$65 | Time: Half day | Skill: Beginner
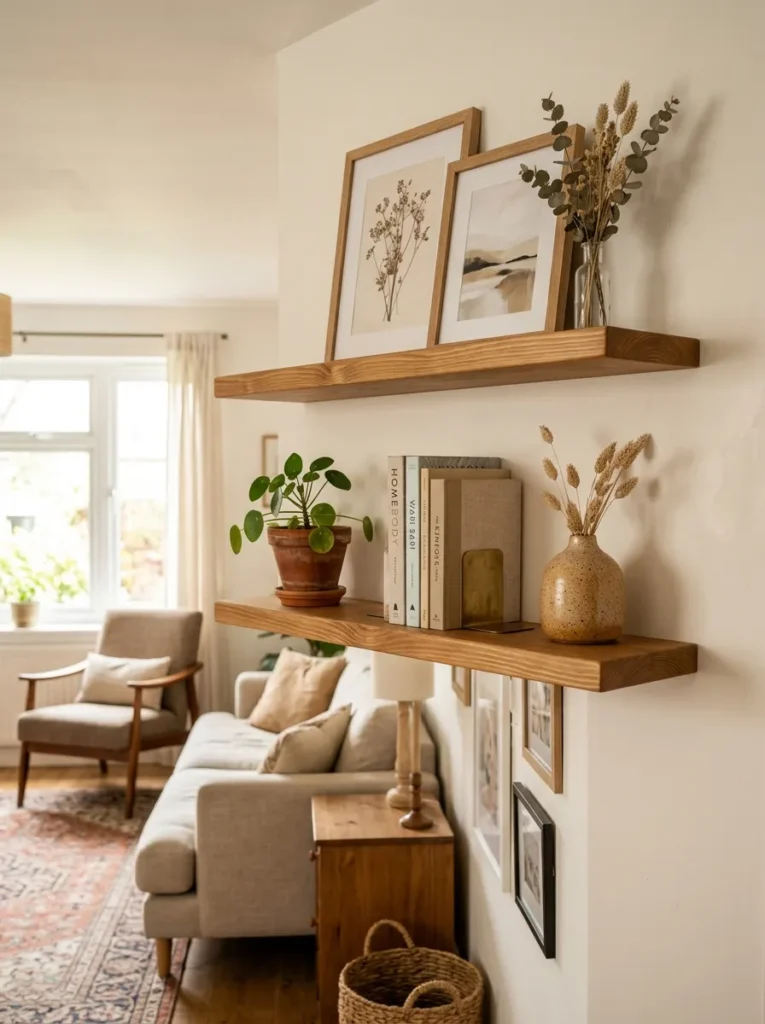
Vibe: DIY floating shelves feel warmly accomplished — the project that most clearly demonstrates that furniture-quality results are available to anyone with a drill, a level, and one morning’s attention.
Why it works: Floating shelves are the most universally applicable DIY home improvement project because every room in every home benefits from additional display and storage surface — and because a well-installed floating shelf in quality natural timber is visually indistinguishable from a professionally sourced and installed equivalent that costs 3–4 times as much. The design principle is material quality over installation complexity: choosing solid pine or oak board (rather than MDF or composite) and finishing with hard-wax oil (rather than varnish) produces a shelf of genuine warmth and quality, and the installation — drill, wall anchor, bracket, shelf — is achievable by any beginner who can use a spirit level.
How to get it: Source solid pine board at 25mm thickness and 200mm depth from a timber merchant or DIY superstore — cut to length with a hand saw or request cutting at the store. Sand through 120–180–240 grit and apply two coats of hard-wax oil for a food-safe, warm surface. Find wall studs using a stud finder and mark at the two installation heights. Install concealed floating shelf brackets into studs (or appropriate wall anchors if studs are not accessible) using the bracket manufacturer’s specified screw size. Slide the shelf onto the brackets and check for level before tightening the locking screw.
Shop The Look
| Product |
|---|
| Solid pine board 25mm 200mm wide natural |
| Hard wax oil clear natural wood shelf |
| Concealed floating shelf bracket heavy |
| Stud finder electronic wall tool |
| Spirit level 60cm accurate install |
Also view: 17 Classy Bedroom Designs That Look Expensive
3. Removable Wallpaper Accent Wall (COLOR / SMALL SPACE)
Budget: $40–$90 | Time: Half day | Skill: Beginner
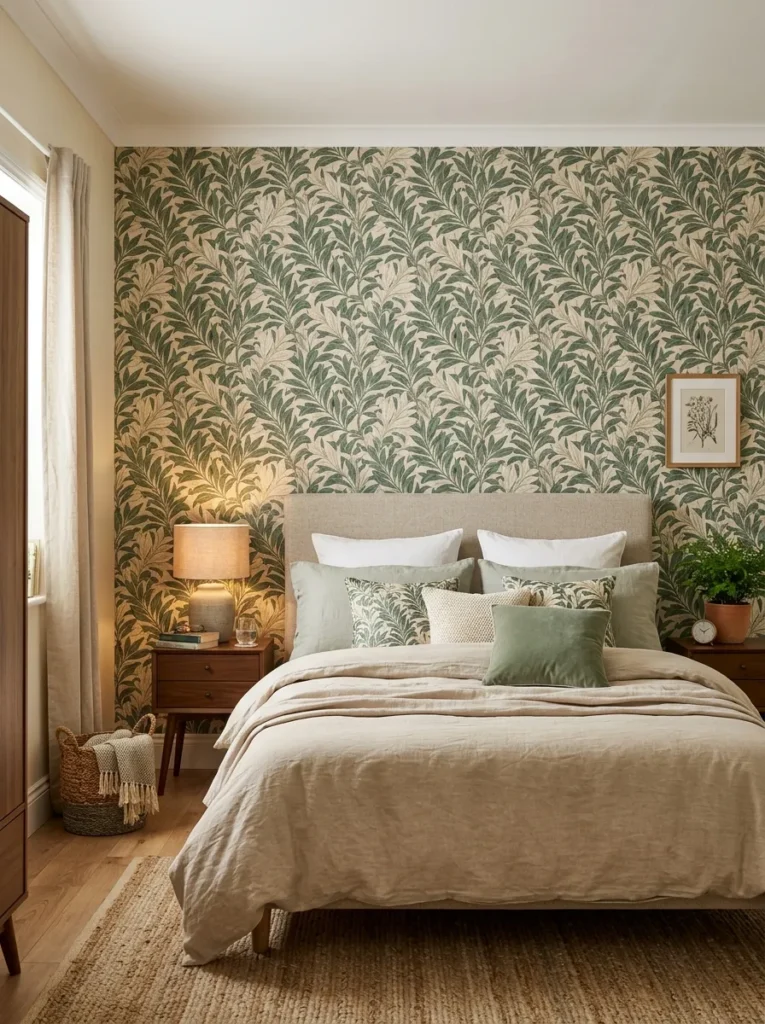
Vibe: The removable wallpaper wall feels pattern-richly dramatic — the renter-friendly project that delivers the most decorative impact of any non-permanent modification.
Why it works: Removable peel-and-stick wallpaper is the single most impactful DIY project available to renters because it delivers the visual drama of a full wallpapered feature wall — the decorating intervention with the highest impact-per-surface-area of any paint or material treatment — with zero permanent modification to the walls and complete reversibility at lease end. The design principle is reversible drama: the best renter-appropriate DIY projects are those that deliver permanent-quality visual results through temporary means, and removable wallpaper achieves this more completely than any other single product.
How to get it: Measure the wall’s height and width precisely. Order wallpaper in rolls sized for the full wall area plus 15% overage for pattern matching and trimming. Prepare the wall by cleaning thoroughly with a damp cloth and allowing to dry completely — any grease, dust, or moisture prevents adhesion. Begin at one end of the wall and apply the first strip from ceiling to floor, smoothing with a squeegee as you go. Apply subsequent strips with a 2mm overlap at the seam, smoothing each strip completely before proceeding to the next. Trim at ceiling and skirting board with a craft knife and metal ruler. To remove: peel from corner at a 45-degree angle slowly.
Shop The Look
| Product |
|---|
| Removable peel-stick wallpaper botanical |
| Squeegee smoothing tool bubble free |
| Craft knife precision blades trimming |
| Metal ruler 60cm straight edge trim |
| Wallpaper seam roller edge adhesion |
4. Garden Raised Bed Build (LAYOUT / MATERIAL)
Budget: $45–$95 | Time: Full weekend | Skill: Beginner
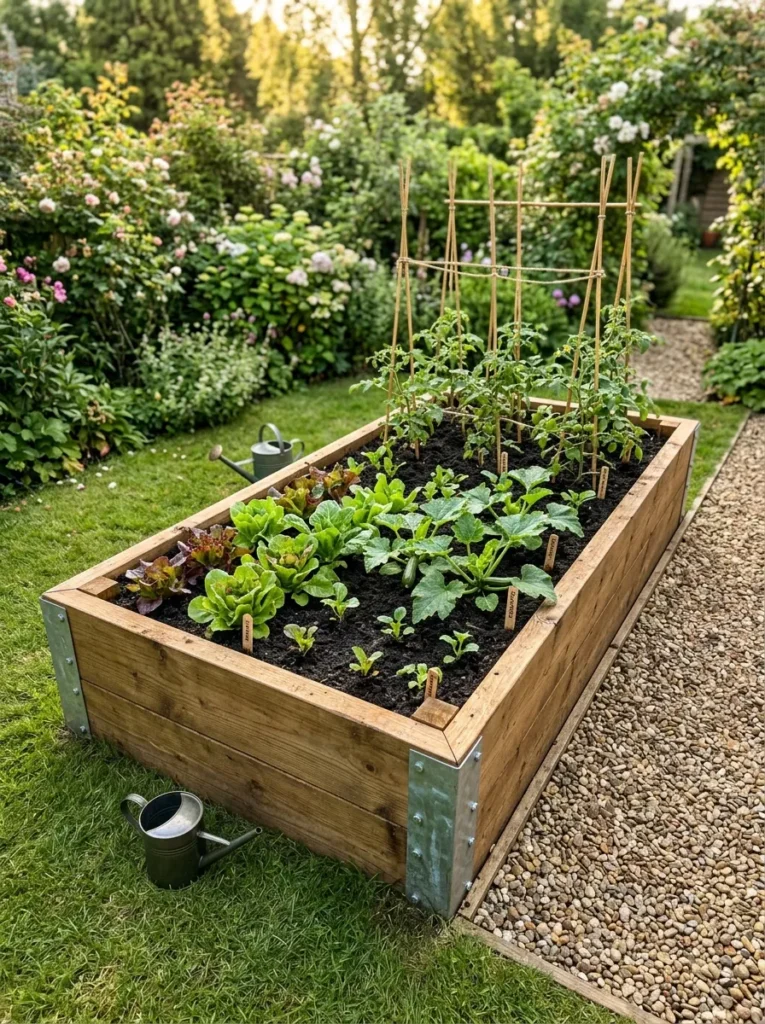
Vibe: The raised garden bed feels productively rewarding — the weekend project that most directly improves daily quality of life by producing food, beauty, and the specific satisfaction of growing things with your own hands.
Why it works: A DIY raised vegetable bed is the garden weekend project with the most sustained daily return — a well-built raised bed produces fresh vegetables across the growing season, improves the garden’s visual structure with clean timber lines, and creates the productive garden area that significantly reduces the cost of fresh produce over the seasons following construction. The design principle is productive investment: a raised bed built for $65 in materials that produces $200 worth of fresh vegetables in its first season is simultaneously a visual improvement, a functional addition, and a financial return.
How to get it: Cut 200x50mm pressure-treated structural timber into the bed dimensions: four lengths for the long sides and four for the short sides for a double-height bed (40cm). Join corners with 90mm galvanized angle brackets using a drill and appropriate screws. Line the base with cardboard (suppresses weeds, biodegrades within one season). Fill with a 60:40 mix of quality topsoil and compost from a garden supplier — a 120x240cm bed at 40cm height requires approximately 1.2 cubic meters of growing medium. Plant immediately or in the same weekend for immediate visual and productive impact.
Shop The Look
| Product |
|---|
| Pressure treated timber 200x50mm board |
| Galvanized corner bracket 90mm set 8 |
| Quality compost bag 60L growing medium |
| Vegetable seedling set mixed selection |
| Garden fork soil preparation bed |
5. DIY Limewash Feature Wall (COLOR)
Budget: $20–$50 | Time: Half day | Skill: Beginner
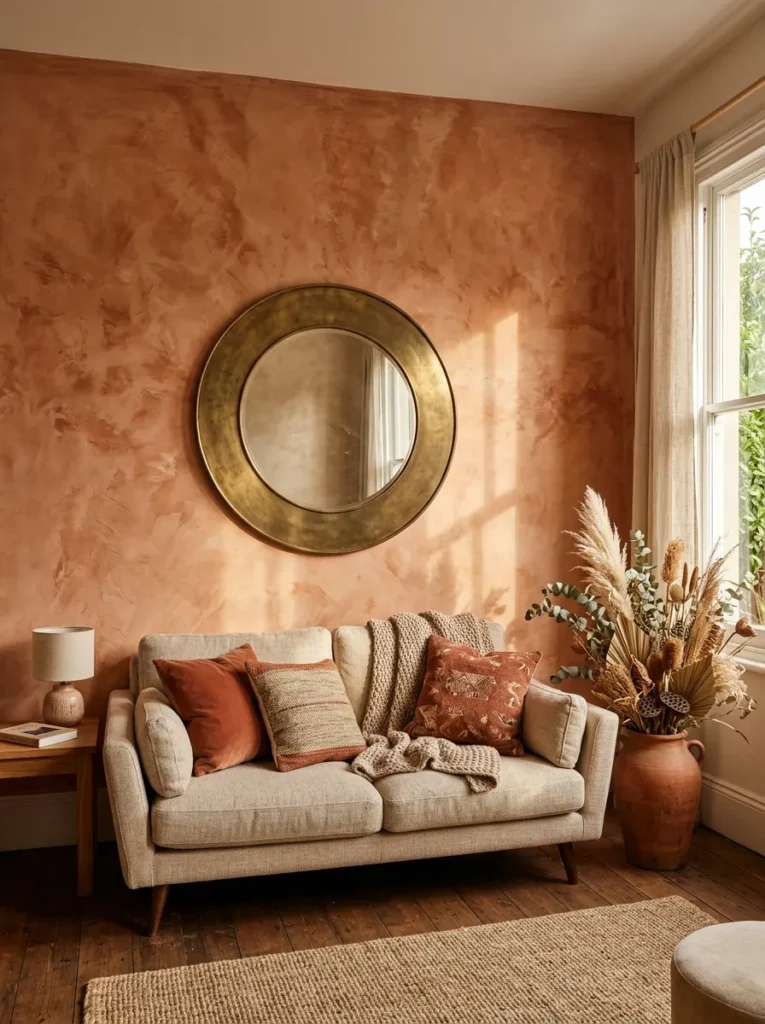
Vibe: The limewash feature wall feels warmly architectural — the paint technique that makes a standard plasterboard wall look like the walls of a 300-year-old Italian farmhouse for the cost of a single pot of paint.
Why it works: Limewash is the beginner-appropriate paint technique with the highest sophistication-to-skill ratio available — the application method (cross-hatch brushwork followed by partial wiping while wet) is genuinely straightforward but produces a surface of depth, variation, and organic beauty that no conventional paint finish can replicate. The slight variation in color across the limewash surface (lighter where more was wiped back, deeper where less was removed) creates the organic, aged-plaster quality that reads as architectural character rather than decorative application.
How to get it: Apply limewash in two coats using a wide natural-bristle brush in cross-hatch strokes — horizontal and vertical strokes crossing each other. While the first coat is still slightly wet (10–15 minutes after application), use a damp cloth to partially remove paint in random areas, revealing the base wall tone in patches. Allow full drying (minimum 3 hours) before the second coat. For a terracotta limewash, mix a natural iron oxide pigment into the limewash base or source a pre-tinted terracotta limewash. The second coat adds depth and covers any areas where the first coat reveals base wall unevenly.
Shop The Look
| Product |
|---|
| Limewash interior wall paint warm terracotta |
| Natural bristle wall brush wide 4 inch |
| Iron oxide pigment terracotta natural |
| Round brass mirror 60cm wall feature |
| Dried pampas botanical floor arrangement |
6. Tiled Bathroom Splashback (MATERIAL)
Budget: $50–$95 | Time: Full weekend | Skill: Intermediate
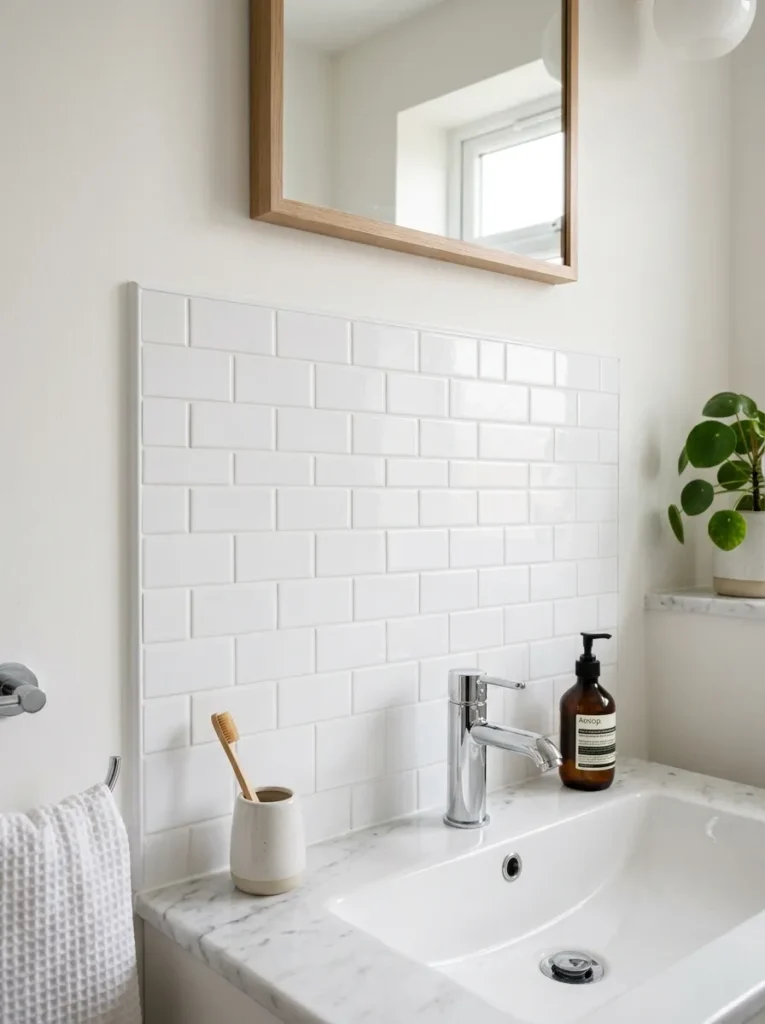
Vibe: The DIY tiled splashback feels professionally finished — the weekend project that most dramatically improves a bathroom’s perceived quality and hygiene.
Why it works: Tiling a bathroom splashback — the small area of wall behind and around a bathroom sink — is the DIY tiling project most appropriate for a beginner because it is compact enough to complete in a weekend, requires relatively few cuts (the most technically demanding tiling skill), and delivers a genuinely functional improvement (a waterproof, hygienic splashback where previously there may have been painted or exposed wall) alongside the visual improvement. The design principle is manageable complexity: beginning with the smallest practical tiling project builds the skill and confidence for subsequent larger projects.
How to get it: Prepare the wall by removing existing tiles (if any), patching any holes with filler, and applying a suitable tile primer. Apply flexible tile adhesive to the wall using a notched trowel in sections of approximately 30x30cm at a time. Set tiles in the brick bond pattern using 2mm tile spacers at all joints. Allow adhesive to cure for 24 hours before removing spacers and grouting with white unsanded grout. Apply grout with a rubber float, wiping excess with a damp sponge before it dries. Seal the grout after 48 hours with a silicone grout sealer.
Shop The Look
| Product |
|---|
| White subway ceramic tile 75x150mm |
| Flexible tile adhesive white kitchen bath |
| White unsanded grout fine joint tile |
| Tile spacer set 2mm plastic joint |
| Grout sealer silicone spray tile |
7. DIY Picture Gallery Wall (LAYOUT / ACCESSORIES)
Budget: $30–$80 | Time: Half day | Skill: Beginner
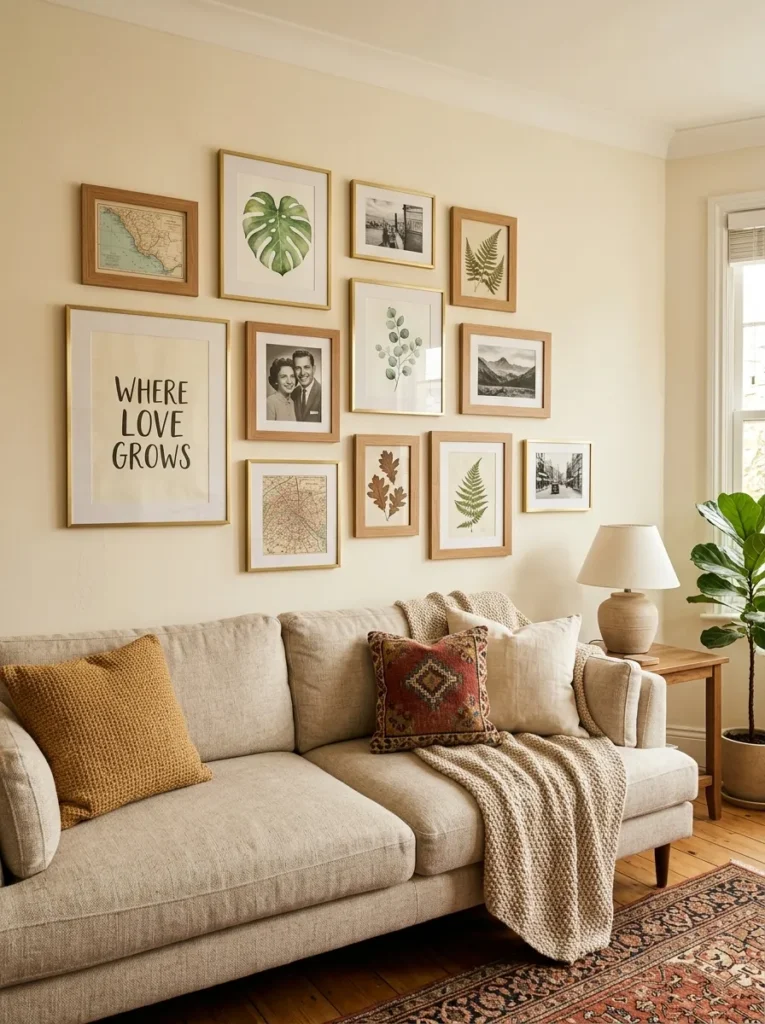
Vibe: The DIY gallery wall feels warmly personal and genuinely curated — the project that transforms the most visible wall in the living room into the room’s most expressive and most personally revealing surface.
Why it works: A DIY gallery wall is the living room decorating project with the highest personal expression payoff because it uses the household’s own chosen images, prints, and meaningful objects rather than purchased art — creating a wall that tells a specific story about specific people rather than displaying generic decorative art. The design principle is personal curation over generic decoration: a gallery wall assembled from personally chosen prints, photographs, and found art is always more visually interesting and more emotionally resonant than a professionally sourced art collection, because personal choices carry specific meaning that selected art cannot replicate.
How to get it: Begin by laying all frames on the floor in the intended composition — photograph from directly above for hanging reference. Cut paper templates of each frame and tape to the wall with masking tape to test the composition before drilling any holes. Begin installing with the largest anchor piece, working outward and maintaining consistent 5cm gaps between all adjacent frames. Use picture hanging strips for frames under 1kg and small picture hooks for heavier frames. Source prints from public domain archives (free download and print), Etsy print sellers ($3–$8 per print), and personal photographs printed at 4×6 to 8×10 inch sizes.
Shop The Look
| Product |
|---|
| Natural wood picture frame set assorted |
| Thin brass picture frame set small |
| Picture hanging strip set varied weight |
| Paper template gallery wall planning |
| Botanical print download set digital |
8. Upcycled Furniture Paint Transformation (COLOR / MATERIAL)
Budget: $15–$45 | Time: Half day | Skill: Beginner
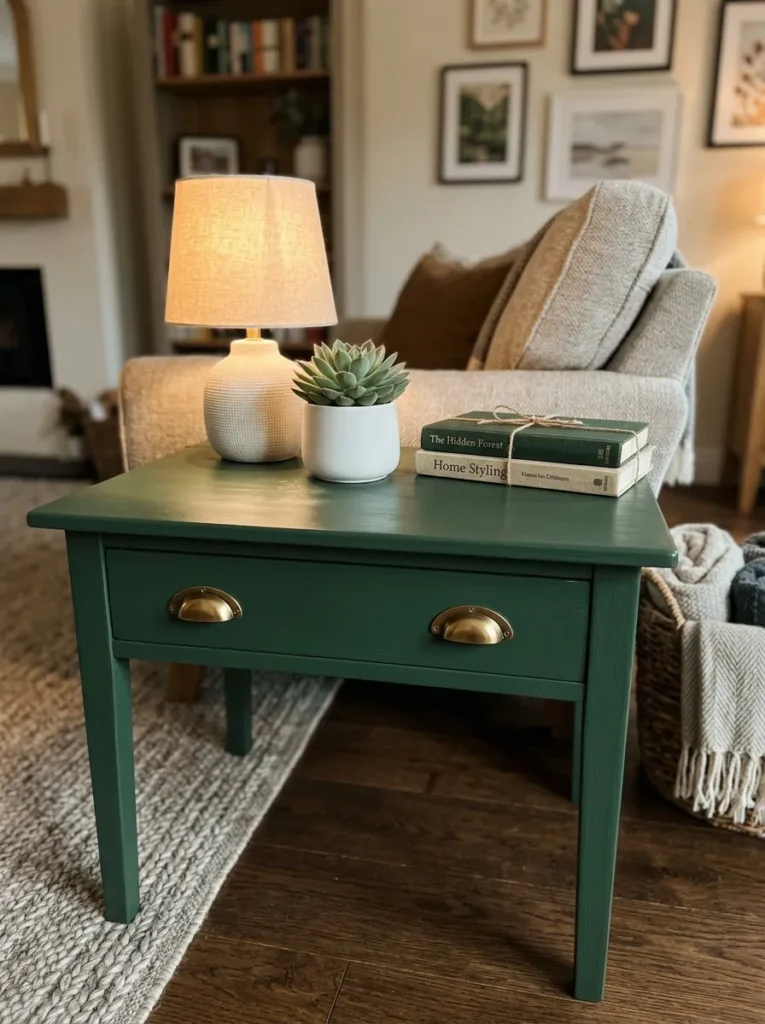
Vibe: The painted furniture transformation feels boldly reinvented — the project that proves the most impactful home design statement often costs $25 and an afternoon rather than $250 and a shopping trip.
Why it works: Painting an existing piece of furniture in a bold, considered color is the home improvement project with the highest value-creation ratio because it takes a piece of furniture the household already owns — and may be considering discarding — and transforms it into the room’s most visually distinctive object. The design principle is value transformation over replacement: the most sustainable and most financially efficient approach to home design is transforming existing objects rather than replacing them, and chalk paint on furniture is the specific material that makes this transformation accessible to complete beginners.
How to get it: Clean the furniture surface thoroughly and remove all hardware before painting. Apply chalk paint directly to the surface with a wide flat brush in long, consistent strokes — two thin coats produce a more even result than one thick coat. The slight brush direction visible in chalk paint’s texture is a quality rather than a flaw — it signals hand-painting. Seal with clear furniture wax applied with a lint-free cloth and buffed after 24 hours. Replace hardware using a paper template to ensure consistent placement across all drawers and doors.
Shop The Look
| Product |
|---|
| Deep forest green chalk paint furniture |
| Brass cup hardware pull set furniture |
| Clear furniture wax matte protection |
| Chalk paint brush flat set application |
| Lint free cloth wax buffing furniture |
9. DIY Herringbone Vinyl Floor (MATERIAL / SMALL SPACE)
Budget: $30–$75 | Time: Full day | Skill: Intermediate
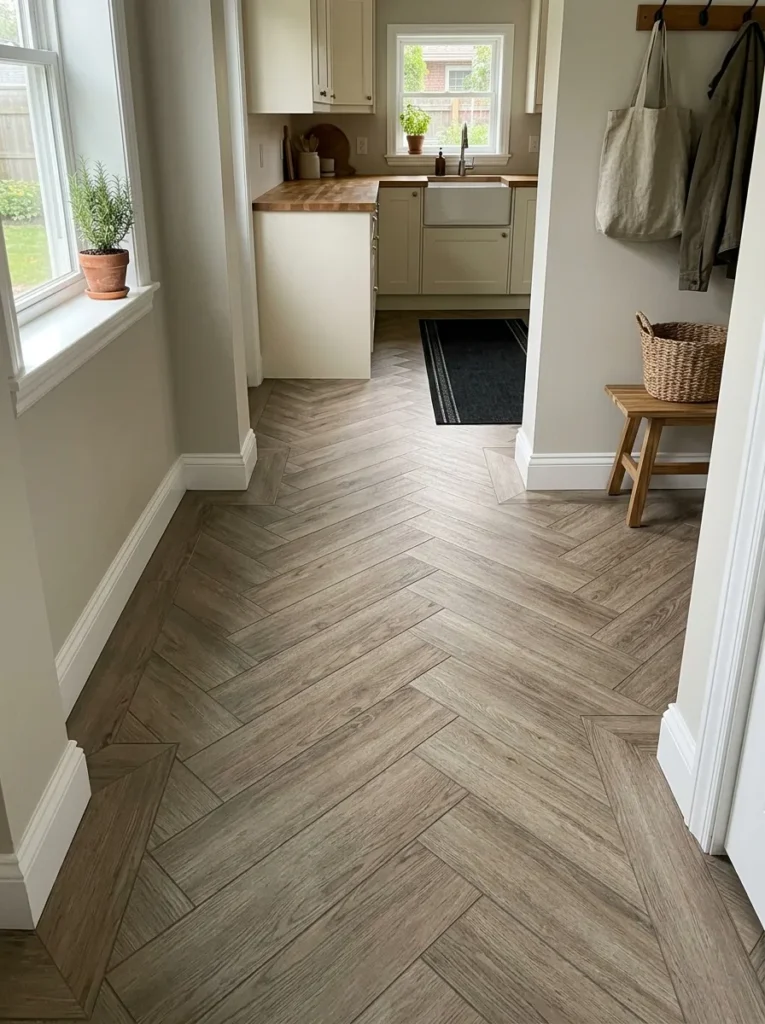
Vibe: The herringbone vinyl floor feels warmly transformative — the floor project that changes a room more dramatically than any paint color while remaining completely reversible.
Why it works: A herringbone peel-and-stick vinyl floor is the flooring project that delivers the maximum visual upgrade at minimum skill requirement because the peel-and-stick adhesive system eliminates the need for specialist flooring adhesive or tools, and the herringbone pattern’s diagonal geometry creates the perception of a significantly larger floor area than the room’s actual dimensions. The design principle is diagonal perception: the herringbone pattern draws the eye along the diagonal axis — the longest dimension in any rectangular room — making the floor appear 20–30% larger than it actually is.
How to get it: Clean and level the existing floor completely — any debris or height variation telegraphs through the thin vinyl tiles. Find the room’s center point and snap chalk lines at 45 degrees to the room walls for the herringbone’s diagonal axis. Begin laying tiles from the center outward, maintaining the herringbone pattern’s consistent joint relationship throughout. Cut border tiles using a craft knife and metal ruler. Press each tile firmly with a rolling pin immediately after placement to activate the adhesive. Leave overnight before walking on the full installation.
Shop The Look
| Product |
|---|
| Peel stick vinyl tile herringbone greige |
| Floor roller 9 inch vinyl adhesion |
| Chalk line reel floor tile marking |
| Craft knife metal ruler vinyl cutting |
| Vinyl floor transition strip edge |
10. DIY Outdoor Planter from Timber (MATERIAL / ACCESSORIES)
Budget: $25–$60 | Time: Half day | Skill: Beginner

Vibe: The DIY timber planters feel warmly productive — the garden project that creates three beautiful planting containers for the cost of one from a garden center.
Why it works: DIY timber garden planters are the outdoor weekend project with the highest return on cost because purpose-made garden planters of equivalent quality from garden centers and homeware retailers cost 3–5 times the material cost of an equivalent DIY version, and the DIY version can be made to exact dimensions for specific garden positions rather than accepting the standard sizes available commercially. The design principle is dimensional precision: a planter built to the exact depth of a deck step, the exact width of a balcony railing section, or the exact height of a windowsill creates a spatial integration with the garden’s existing structure that off-the-shelf planters cannot achieve.
How to get it: Cut 150x25mm pressure-treated timber into the planter’s four sides and base using a hand saw or circular saw. Drill drainage holes in the base board at 15cm intervals. Assemble the sides using 65mm galvanized screws — pre-drill to prevent timber splitting. Attach the base from inside the assembled sides. No painting or finishing required for pressure-treated timber — the natural weathering of treated timber to a silver-grey over 2–3 seasons is itself a beautiful material development. Line the inside with permeable landscape fabric to retain compost while allowing drainage, then fill and plant.
Shop The Look
| Product |
|---|
| Pressure treated timber 150x25mm plank |
| Galvanized screw set 65mm exterior |
| Landscape fabric permeable planter liner |
| Quality compost bag 40L planter filling |
| Lavender plant set herb garden planter |
11. Under-Bed Storage System (SMALL SPACE / LAYOUT)
Budget: $25–$55 | Time: Half day | Skill: Beginner
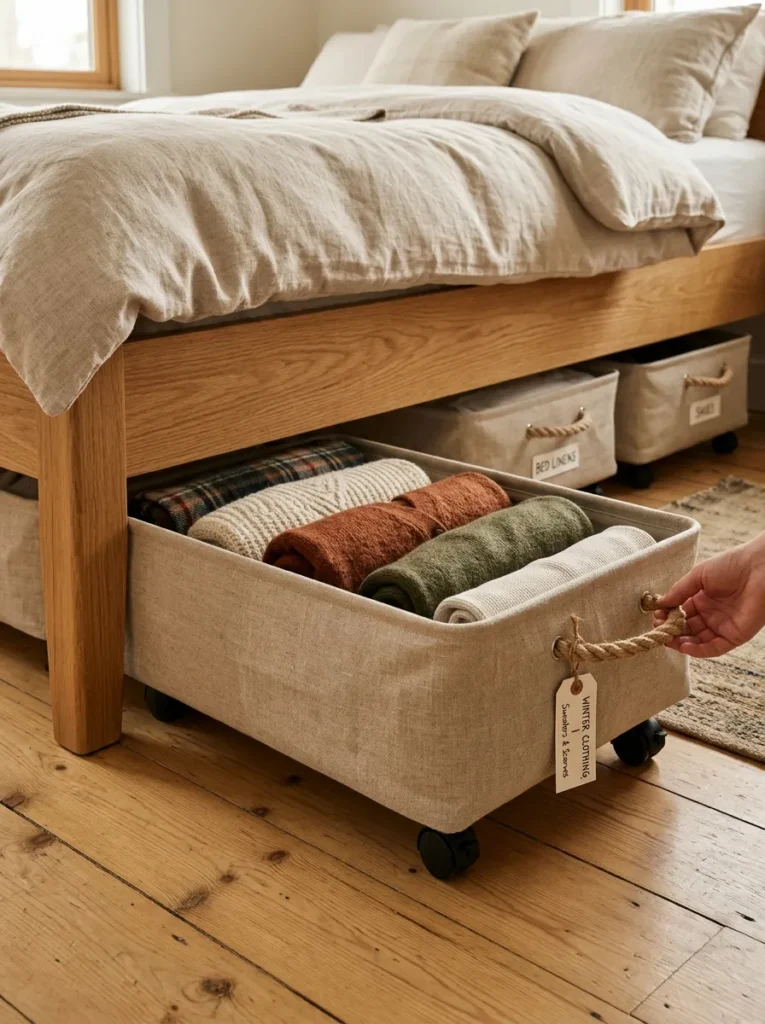
Vibe: The under-bed storage system feels organized and spatially liberating — the project that creates significant additional storage from space the household already owns but is not using.
Why it works: A DIY under-bed storage system is the small-space DIY project with the highest storage gain relative to investment because it creates usable storage from existing space (the volume under the bed, typically 20–30cm of clearance) rather than adding new storage infrastructure. The design principle is existing volume activation: in a home where storage is limited, the highest-efficiency improvement is always the activation of existing unused volume rather than the addition of new storage units. A standard double bed with 25cm clearance has approximately 1.5 cubic meters of accessible storage volume — enough for a full wardrobe’s worth of seasonal clothing, extra bedding, or infrequently used items.
How to get it: Measure the precise clearance under the existing bed frame and purchase or make flat storage containers that fit with 2–3cm clearance from the bed base. Attach smooth-rolling furniture casters (20mm wheel diameter for most under-bed clearances) to the base of each container using the caster’s screws or adhesive base plate. Organize contents by category before storing — seasonal clothing by type, extra bedding by size — and label each container clearly using a label maker or handwritten kraft paper tags. The rolling casters are the essential addition — containers without casters that must be dragged rather than rolled are rarely accessed and effectively cease to function as active storage.
Shop The Look
| Product |
|---|
| Flat fabric storage container linen natural |
| Furniture caster set smooth rolling 20mm |
| Label maker adhesive storage organize |
| Natural rope handle storage upgrade |
| Vacuum storage bag seasonal clothing |
12. DIY Concrete-Look Planter (MATERIAL / COLOR)
Budget: $15–$35 | Time: Half day | Skill: Beginner

Vibe: The DIY concrete-look planters feel architecturally modern — the transformation that makes a $2 terracotta pot indistinguishable from a $35 designer planter.
Why it works: A concrete-look planter made by applying a textured grey paint treatment to an ordinary terracotta or plastic pot is the DIY project with the highest commercial-equivalent value gap — a concrete-look designer planter from a homeware retailer costs $25–$60; the equivalent DIY version costs $2–$5 in materials applied to a $1–$3 pot and takes 30 minutes per planter. The concrete microtopping or grey chalk paint treatment creates a surface quality at normal viewing distances that is genuinely indistinguishable from actual concrete.
How to get it: Source ordinary terracotta or smooth plastic pots of the desired sizes from a garden center or charity shop. Mix concrete microtopping powder with water according to the manufacturer’s ratio (typically 1:0.4 water to powder) to a thick cream consistency. Apply with a palette knife or stiff brush in an irregular, textured manner — specifically avoid smoothing the surface uniformly, as the texture variation is what creates the authentic concrete quality. Allow to cure for 24 hours and seal with a clear matte concrete sealer for outdoor durability. Alternatively, apply two coats of warm grey chalk paint with a dry-brush technique for an indoor version.
Shop The Look
| Product |
|---|
| Concrete microtopping powder grey small |
| Matte concrete sealer spray outdoor |
| Terracotta pot set assorted sizes cheap |
| Palette knife craft application tool |
| Snake plant cutting architectural indoor |
13. DIY Curtain and Pole Installation (LAYOUT / SMALL SPACE)
Budget: $35–$85 | Time: Half day | Skill: Beginner
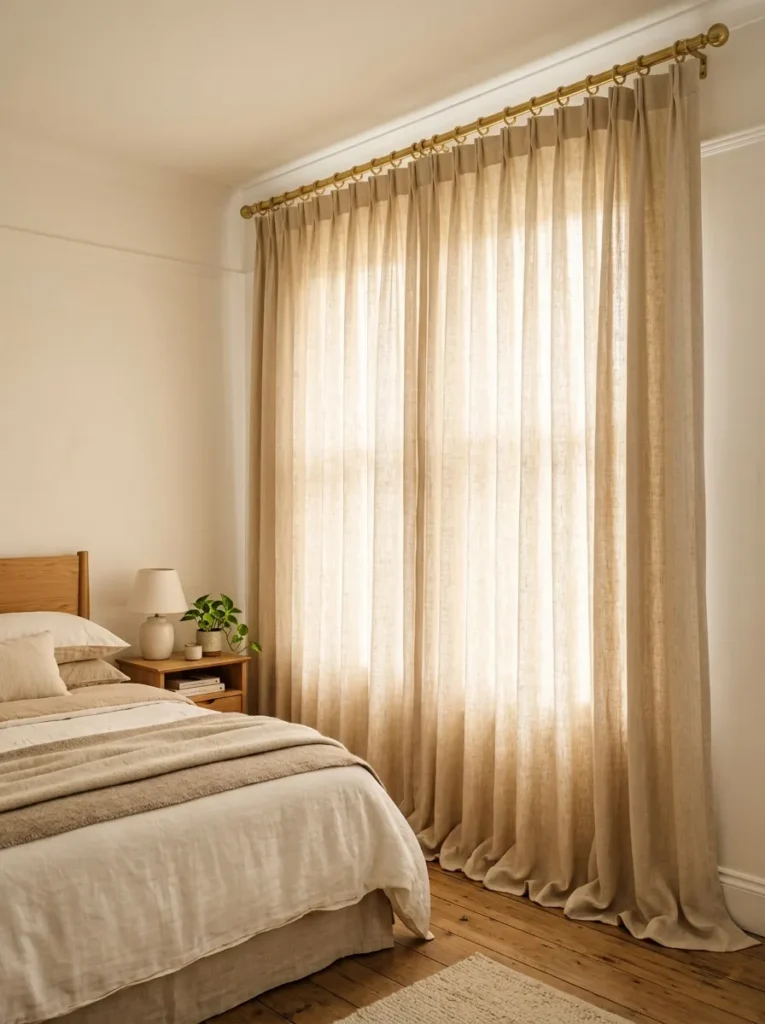
Vibe: The ceiling-height curtain installation feels warmly architectural — the single window treatment upgrade that most dramatically improves a room’s perceived height, light quality, and overall sophistication.
Why it works: Installing curtains at ceiling height rather than window-frame height is the single most impactful DIY upgrade available for any bedroom or living room because it creates the perception of significantly taller ceilings and larger windows through visual proportion alone — the curtain’s vertical line running from ceiling to floor makes the eye read the full floor-to-ceiling height as window height rather than the window’s actual smaller dimensions. The design principle is vertical proportion illusion: mounting curtain hardware at ceiling height and using curtain panels long enough to pool slightly on the floor is the single technical decision that most transforms a room’s apparent scale for zero structural modification.
How to get it: Mount curtain rod brackets as close to the ceiling as the wall structure allows — mark the bracket positions using a level to ensure alignment. Drill into wall studs or use appropriate wall anchors for the bracket screws. Specify curtain panels in a width of 2.5 times the window opening for full, generous gathering when closed — underfull curtains read as mean regardless of fabric quality. Choose natural linen in warm ivory or undyed natural for the most architecturally versatile curtain fabric. Add a white or cream blackout lining behind the linen on a separate track for functional light control.
Shop The Look
| Product |
|---|
| Natural linen curtain panel floor length |
| Brass curtain rod ceiling mount set |
| Brass curtain ring clip set 12 piece |
| Ceiling bracket set brass curtain rod |
| White blackout lining panel curtain |
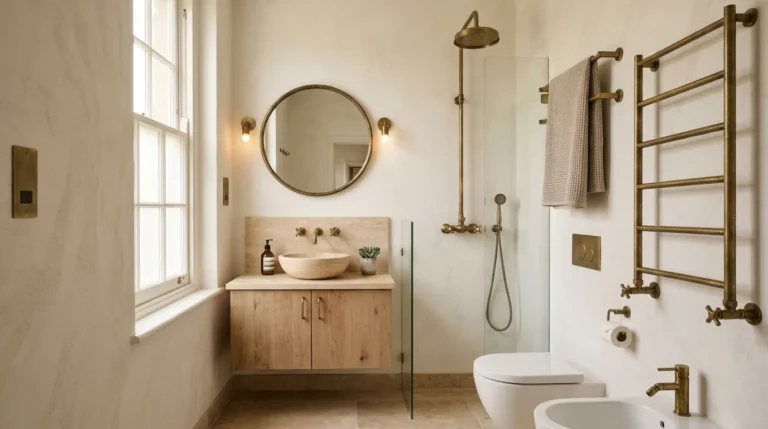
14. Bathroom Vanity Mirror Upgrade (ACCESSORIES / MATERIAL)
Budget: $20–$55 | Time: Half day | Skill: Beginner
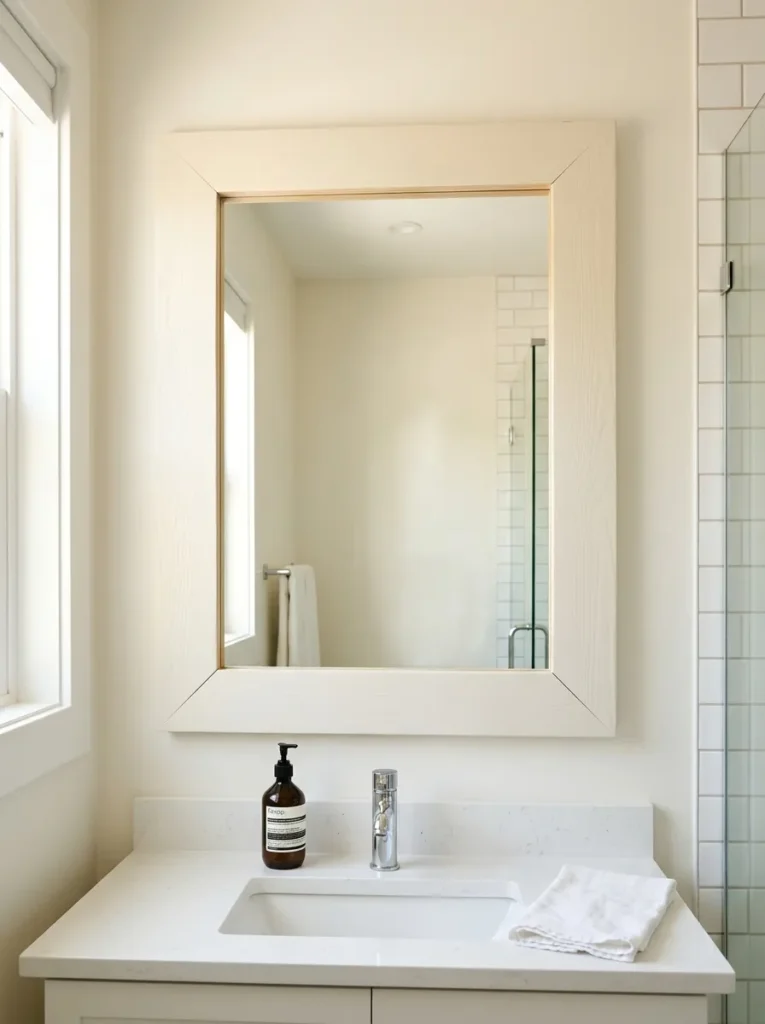
Vibe: The framed bathroom mirror feels quietly transformed — the project that makes the most visible object in the bathroom look like a considered design choice rather than a builder’s fitting.
Why it works: Adding a DIY timber moulding frame to a builder-grade bathroom mirror is the bathroom upgrade that delivers the highest visual improvement for the lowest skill and cost investment — it transforms the bathroom’s most prominent and most viewed surface (the mirror that is looked at multiple times daily) from a generic fitting into a designed feature without any plumbing, electrical, or structural work. The design principle is framing as elevation: adding a frame to any object — a picture, a mirror, a view — elevates the object’s perceived importance and intentionality, because frames signal that the enclosed surface has been specifically chosen and specifically presented.
How to get it: Measure the existing mirror’s perimeter dimensions precisely. Purchase timber moulding (ogee, flat square section, or half-round) in sufficient length to frame the full mirror with 20% overage for mitre cuts. Cut mitre joints at each corner using a mitre box and hand saw — 45-degree cuts at all four corners. Test the frame fit against the mirror before applying any adhesive. Apply mirror adhesive or strong construction adhesive to the back face of each moulding section and press firmly against the mirror surface and surrounding wall. Hold each section in position for 60 seconds and use painter’s tape to maintain pressure during curing. Paint or finish the moulding after the adhesive has cured.
Shop The Look
| Product |
|---|
| Timber moulding ogee flat section metre |
| Mitre box hand saw corner cut |
| Mirror adhesive construction adhesive |
| White satinwood paint moulding frame |
| Painter tape adhesive curing hold |
15. DIY Pegboard Organization System (SMALL SPACE / LAYOUT)
Budget: $25–$60 | Time: Half day | Skill: Beginner
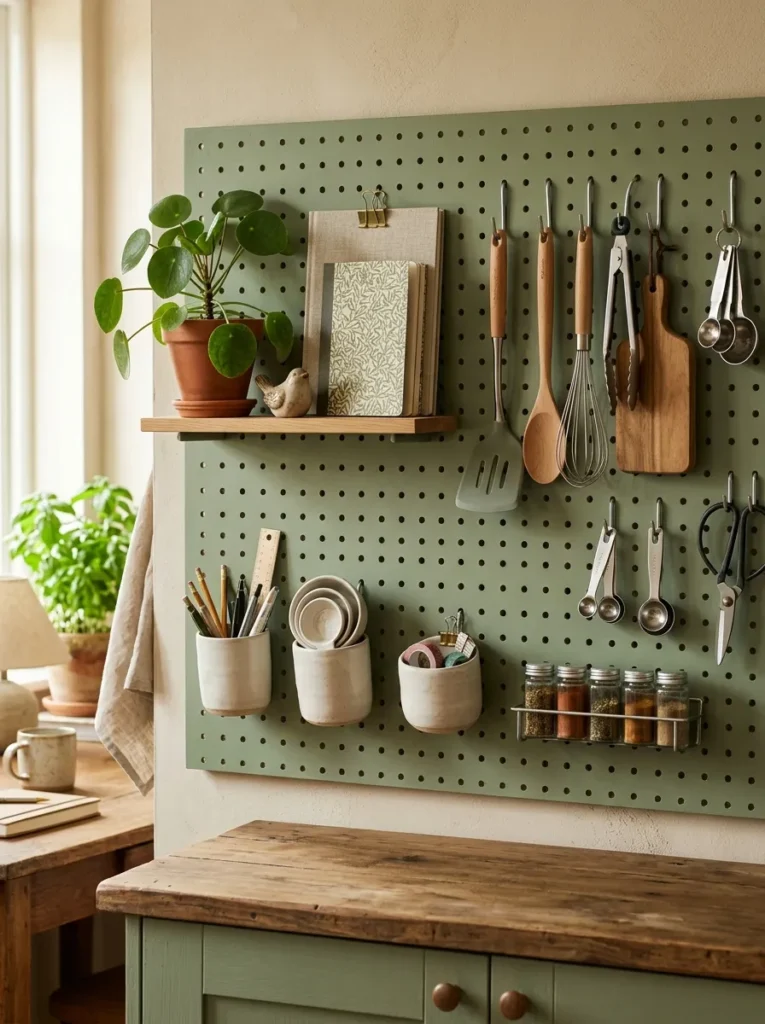
Vibe: The DIY pegboard system feels organized and designed — the project that proves an organizational system can be as visually appealing as any decorative wall feature.
Why it works: A painted and accessorized pegboard is the home organization project that most effectively creates the sense of genuinely designed storage — the painted background color (sage green rather than the standard natural beige) transforms the pegboard from a utilitarian tool-storage device into a wall feature that looks intentional and aesthetically considered. The design principle is organizational design as decoration: when storage systems are designed with the same aesthetic consideration applied to decorative elements — consistent color, considered arrangement, visual variety through height and object variety — they read as designed features rather than imposed necessities.
How to get it: Source a standard hardboard pegboard from a DIY store — cut to size if necessary. Paint in two coats of the chosen color (sage green, deep blue, or warm terracotta all work well) before mounting. Mount the painted pegboard on the wall using spacers (40mm minimum) between the pegboard and wall surface — the spacers create the critical clearance that allows hooks to be inserted from the front. Install the pegboard using appropriate wall anchors at the four corners. Fit peg hooks, small shelves, cup holders, and magnetic strips to organize the specific items needed.
Shop The Look
| Product |
|---|
| Pegboard hardboard 90x60cm natural |
| Chalk paint sage green pegboard coat |
| Pegboard hook set varied sizes |
| Pegboard small shelf accessory set |
| Pegboard spacer set mounting wall |
16. DIY Garden Path with Stepping Stones (LAYOUT / MATERIAL)
Budget: $40–$90 | Time: Full day | Skill: Beginner
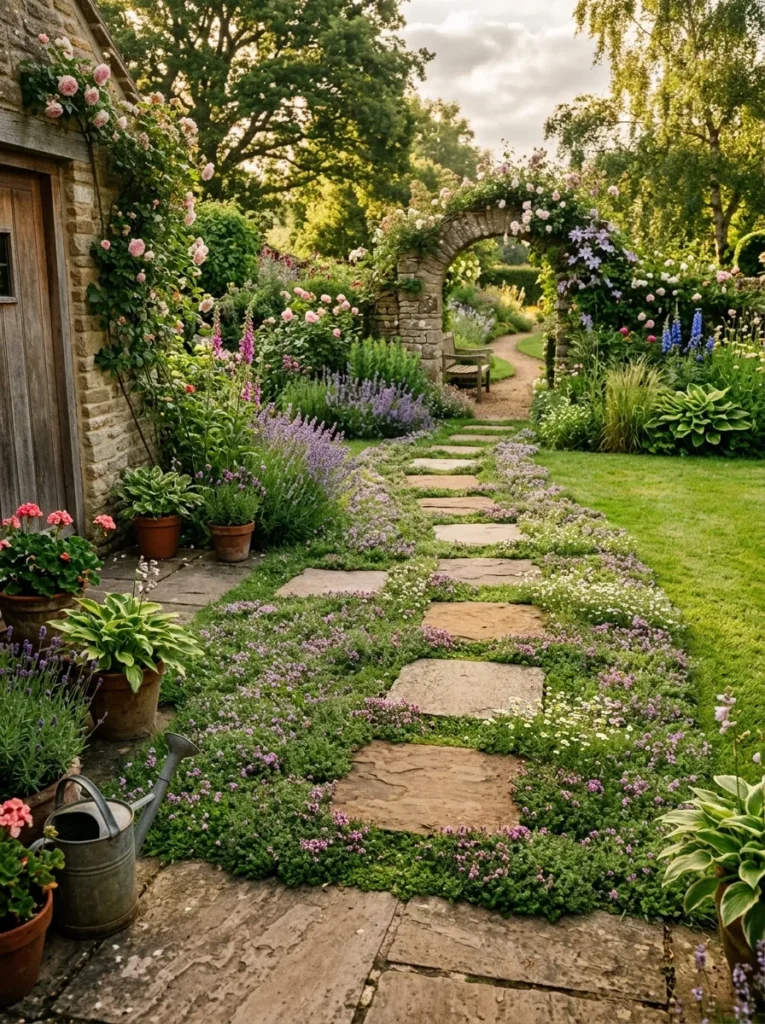
Vibe: The stepping stone garden path feels warmly journeyed — the garden project that creates spatial structure, physical access, and the specific pleasure of a defined route through a garden from the most natural materials.
Why it works: A DIY stepping stone garden path is the garden weekend project that most effectively creates spatial structure in an unorganized garden — defining a route through the space that organizes the garden’s different areas into a sequence rather than a simultaneous view. The design principle is spatial journey creation: a garden path transforms an open lawn or planting area from a space that is viewed from a single static position to a space that is experienced from multiple positions along the path — revealing different views, different planting associations, and different spatial qualities as the path is walked. Creeping thyme planted in the gaps between stepping stones is the specific material addition that transforms a practical path into a sensory garden experience — the fragrance released by footsteps on thyme is one of the most rewarding sensory experiences available in any garden.
How to get it: Mark the path’s course using a garden hose and stakes before cutting any turf. Cut around each stone position with a spade and lift the turf within the cut. Excavate to 50mm depth — 20mm of sharp sand plus 20mm of stone depth plus 10mm below lawn surface level for mower clearance. Fill with sharp sand, tamp level, and set the stepping stone in position. Check that each stone is 20mm below the surrounding lawn surface and adjust sand depth as needed. Firm the stone with gentle foot pressure on each corner. Plant creeping thyme plugs in the gaps between stones immediately after installation — water well and keep moist for the first two weeks until established.
Shop The Look
| Product |
|---|
| Natural sandstone stepping stone 40x40cm |
| Sharp sand bag path base levelling |
| Creeping thyme plug plant set between |
| Garden spade border stepping stone |
| Garden hose planning path layout |
How to Start Your Weekend DIY Project Journey
Your single best first move before beginning any project in this list is to identify the one room or area of your home that creates the most daily friction — the kitchen whose cabinet color makes you feel slightly irritated every morning, the bedroom window without curtains that wakes you too early, the garden without a productive bed that makes the outdoor space feel unused — and prioritize the project from this list that most directly resolves that specific friction point. The most rewarding DIY projects are not those that produce the most impressive results in photographs but those that most directly improve the daily quality of life in the spaces where the most time is spent, because the improvement is encountered with positive reinforcement dozens of times daily.
The most common mistake in weekend DIY projects is underestimating the preparation phase and overestimating the execution phase. Most failed or disappointing DIY projects fail not because the execution was poor but because the preparation was inadequate — the surface was not cleaned before painting, the wall structure was not assessed before drilling, the material quantities were not calculated accurately before shopping. Fix this by spending at least 25% of the total project time on preparation: cleaning and degreasing surfaces, finding studs and assessing wall structure, calculating material quantities with a 15% overage, and organizing all tools and materials before beginning the execution phase. A project prepared correctly almost always executes successfully; a project begun without adequate preparation almost always encounters preventable problems.
Three specific investments under $30 that make every project in this list more achievable, more professional in result, and more safely executable: a good quality spirit level ($12–$18) that is the single most important tool for every installation project in this list — floating shelves, curtain rods, pegboards, and gallery walls all require accurate leveling, and a cheap or inaccurate spirit level produces visibly off-level results that permanently undermine the project’s quality; a stud finder ($15–$25) that identifies the structural elements in any wall before drilling and prevents the most common and most damaging DIY mistake (drilling into a pipe or cable rather than a stud); and a set of good quality sandpaper in 80–120–180–240 grit progression ($8–$12) that is used in every paint, furniture transformation, and woodworking project to produce the smooth, professional surface quality that distinguishes genuinely good DIY from merely completed DIY.
A simple single-afternoon project (painted furniture, concrete planters, under-bed storage) costs $15–$45 in materials and delivers immediate improvement. A full-day project (floating shelves, garden planters, vinyl floor) costs $25–$75 in materials and delivers significant spatial or visual improvement. A full-weekend project (painted cabinet doors, garden raised bed, tiled splashback) costs $35–$95 and delivers the most substantial improvement — the transformations that most clearly demonstrate the difference between the home before and after the investment of one well-spent weekend.
Frequently Asked Questions About Weekend DIY Home Projects
Which project in this list is most appropriate for an absolute beginner with no DIY experience?
The three most beginner-appropriate projects — those requiring no prior experience, no power tools beyond a drill, and no technically demanding skills — are the limewash feature wall (wide brush, damp cloth, and patience), the DIY gallery wall (paper templates, picture hooks, and a level), and the DIY concrete-look planters (mixing and applying microtopping with a palette knife). All three produce results that look significantly more sophisticated than the skill required to achieve them, creating the positive early experience that builds DIY confidence for subsequent more ambitious projects. Begin with the limewash wall if your priority is a dramatic visual room transformation, the gallery wall if your priority is personal creative expression, or the concrete planters if your priority is an outdoor improvement or a project with manageable scope.
How do I make sure my painted furniture project looks professional rather than amateur?
Three specific practices distinguish professional-quality furniture painting from amateur results: thorough degreasing before painting (kitchen cabinet surfaces and frequently handled furniture accumulate oil and wax that must be completely removed for paint adhesion — use a dedicated degreaser rather than dish soap, which leaves residue); thin coats rather than thick (one thick coat creates runs and brush marks; two or three thin coats build an even surface without visible texture); and proper sealing after painting (unsealed chalk paint absorbs grease and moisture quickly, making painted furniture look tired within weeks — a coat of clear furniture wax or water-based furniture topcoat is non-negotiable for any surface that will be handled regularly). The most common amateur mistake is attempting to complete the project too quickly by applying thick coats — patience in thin-coat application is the single skill most worth developing.
Can I complete these projects in a rented property?
Several projects in this list are fully appropriate for rented properties without landlord permission — the painted furniture transformation (painting your own furniture, not the landlord’s), the gallery wall using picture hanging strips rather than nails, the removable wallpaper accent wall, the under-bed storage system, the DIY concrete-look planters, and the DIY outdoor planters. Projects requiring holes in walls (floating shelves, curtain rod installation, pegboard) require landlord permission in most tenancy agreements but are typically approved when a commitment to filling and repainting on departure is provided. Projects requiring permanent structural modification (tiled splashback, herringbone vinyl floor over existing floors) should always be discussed with the landlord before beginning — many landlords will approve these projects when they add value to the property and the material quality is appropriate.
How do I calculate the right amount of material for each project?
The most reliable material calculation approach for any project is: measure the area or length accurately, calculate the theoretical requirement from the material’s stated coverage rate, and add a 15% overage for waste, cuts, and mistakes. For paint: a standard interior paint covers 10–12 square meters per liter per coat — calculate the room or surface area, divide by 10 for conservative coverage, and multiply by the number of coats planned. For tiles: calculate the square meterage of the area to be tiled, add 15% for cuts and breakages. For timber: calculate the total linear meters of cuts required, add 20% for waste and mis-cuts. For vinyl flooring: calculate the room’s square meterage in one measurement (length x width) and add 15% for the herringbone pattern’s higher waste rate relative to straight-set patterns. Always buy slightly more than the minimum calculation suggests — returning unused material is significantly less expensive and time-consuming than making an emergency supplementary purchase mid-project.
What safety precautions are essential for weekend DIY projects?
The three most important safety practices for any of the projects in this list are: always locate pipes and cables before drilling (use a multi-purpose detector that identifies pipes, cables, and studs simultaneously — the $25 investment prevents potentially serious and expensive consequences); wear appropriate respiratory protection when sanding, mixing concrete products, or working with dusty materials (an N95 dust mask costs $5–$8 and prevents the cumulative respiratory effects of fine particulate inhalation); and work from a stable platform for any overhead work (a step ladder rather than a chair or box, positioned on a flat, unobstructed surface). For projects involving power tools (drill, circular saw, jigsaw), safety glasses are non-negotiable — flying debris from drilling or cutting is the most common cause of DIY eye injury and is completely preventable. Read the manufacturer’s safety instructions for any power tool before use regardless of perceived familiarity with the tool type.
Ready to Start Your Weekend DIY Projects?
These 16 projects span the full range of weekend DIY home improvement possibility — from the dramatic visual transformation of painted cabinet doors and the limewash feature wall, through the functional installations of floating shelves, curtain systems, and pegboard organization, to the productive outdoor projects of raised garden beds, timber planters, and stepping stone paths, the floor-level transformations of herringbone vinyl and tiled splashbacks, and the creative uplift of gallery walls, furniture transformations, and concrete-look planters — covering every room, every skill level from absolute beginner to intermediate, every budget from $15 to $95, and every home context from rented apartment to owned suburban property. Begin with the one project that addresses your home’s most persistent daily friction — the surface that bothers you every morning, the room that never quite works, the garden that is always less than it could be — because the DIY project that resolves a genuine daily frustration delivers its satisfaction dozens of times daily for every day of its lifespan, while the project chosen for its photogenic quality rather than its functional relevance delivers its satisfaction primarily in the moment of completion. Today’s specific action: choose one project from this list, purchase the materials this weekend, and begin on Saturday morning rather than planning to begin next weekend — because the most common DIY project failure is not poor execution but perpetual deferral. When the shelf you built holds its first objects, the wall you painted catches the afternoon light in exactly the way you imagined, or the garden bed you constructed produces its first harvest, you will understand exactly why weekend DIY projects earn their devoted, growing community and the permanent place they hold at the top of every home improvement Pinterest board. Save your favorites now, especially the painted cabinet doors and the floating shelves — they are the two projects that, once completed, most completely transform the daily quality of the spaces where you spend the most time.