14 DIY Ladybug Decorations to Brighten Your Home
DIY ladybug decorations are handmade home accents, garden ornaments, seasonal crafts, and children’s room embellishments that use the ladybug’s universally beloved form — its distinctive red and black spotted silhouette, its round body, its cheerful color story — as the creative starting point for projects ranging from painted river stones and fabric garlands to clay pot garden figures and embroidered textile art. This article gives you exactly 14 DIY ladybug decorations to brighten your home, spanning every skill level, every room, every season, and every material from air-dry clay to embroidery thread, with step-by-step guidance and curated product tables for every project.
There is something enduringly charming about the ladybug as a decorating motif — it is one of the few creatures that is universally loved rather than merely tolerated, associated across cultures with good luck, summer abundance, and the particular delight of finding a small perfect living thing going about its business with complete self-possession. A ladybug decoration brings that quality into the home: the cheerful confidence of red and black, the whimsy of the spotted silhouette, and the garden freshness that the ladybug carries as its permanent association. These projects range from a 20-minute painted stone to a half-day embroidery project worthy of framing. Here are 14 ideas worth making — and saving.
Why DIY Ladybug Decorations Work So Well
The ladybug has served as a decorative motif in human material culture for centuries — appearing in medieval European heraldry and illuminated manuscripts, in the folk art traditions of Eastern Europe and Scandinavia where it was associated with the Virgin Mary (from whom the name “Our Lady’s bug” derives in English), in the delftware and majolica ceramics of the 17th and 18th centuries, and in the children’s book illustrations and nursery textiles of the Victorian and Edwardian periods that established the ladybug as one of the foundational motifs of childhood aesthetics. The contemporary DIY ladybug decoration draws from all these traditions while adding the maker movement’s specific values: handmade over mass-produced, natural materials over synthetic, personal expression over commercial reproduction.
The materials that produce the most successful DIY ladybug decorations share specific qualities: they accept the ladybug’s characteristic deep red and matte black paint application cleanly and durably (river stones, air-dry clay, terracotta pots, smooth wooden discs, and white ceramic surfaces); they allow the spotted silhouette to be rendered at scales from 2cm to 30cm with consistent recognizability (the ladybug’s form reduces and enlarges beautifully because it is composed of simple geometric shapes); and they suit both indoor and outdoor use with appropriate sealing and finishing treatments. The ladybug’s color story — deep red oxide, matte black, white accent dot, and green botanical context — is one of the most visually satisfying in the decorative arts because it achieves maximum contrast (red and black) within a warm palette, with the green of garden context and white of eye detail providing the complementary notes that prevent the red-black combination from reading as harsh.
DIY ladybug crafts maintain consistent year-round popularity across all age groups and all craft skill levels, with a particular surge during spring and early summer when the association with garden awakening and seasonal transition gives the motif specific cultural resonance. The ladybug motif’s appeal to children makes it one of the most versatile craft project categories — projects in this list span the range from genuinely adult-level embroidery and ceramic painting to family-friendly painted stone projects appropriate for children aged four and above.
Beginners benefit especially from ladybug decoration projects because the ladybug’s form is one of the simplest possible natural subjects — a semicircle body, a circular head, a central dividing line, and a scatter of circular spots — which means that even a beginner’s attempt at the form produces an immediately recognizable result, creating the positive creative feedback that encourages continued making.
Style at a Glance
| Element | Trait 1 | Trait 2 |
|---|---|---|
| Philosophy | Cheerful handmade over perfect | Nature motif as home brightener |
| Materials | River stone, air-dry clay, terracotta, linen | Embroidery thread, felt, wooden disc |
| Color Palette | Deep red oxide, matte black, white accent | Garden green, warm ivory, botanical natural |
14 DIY Ladybug Decorations to Brighten Your Home
1. Painted River Stone Ladybug Collection
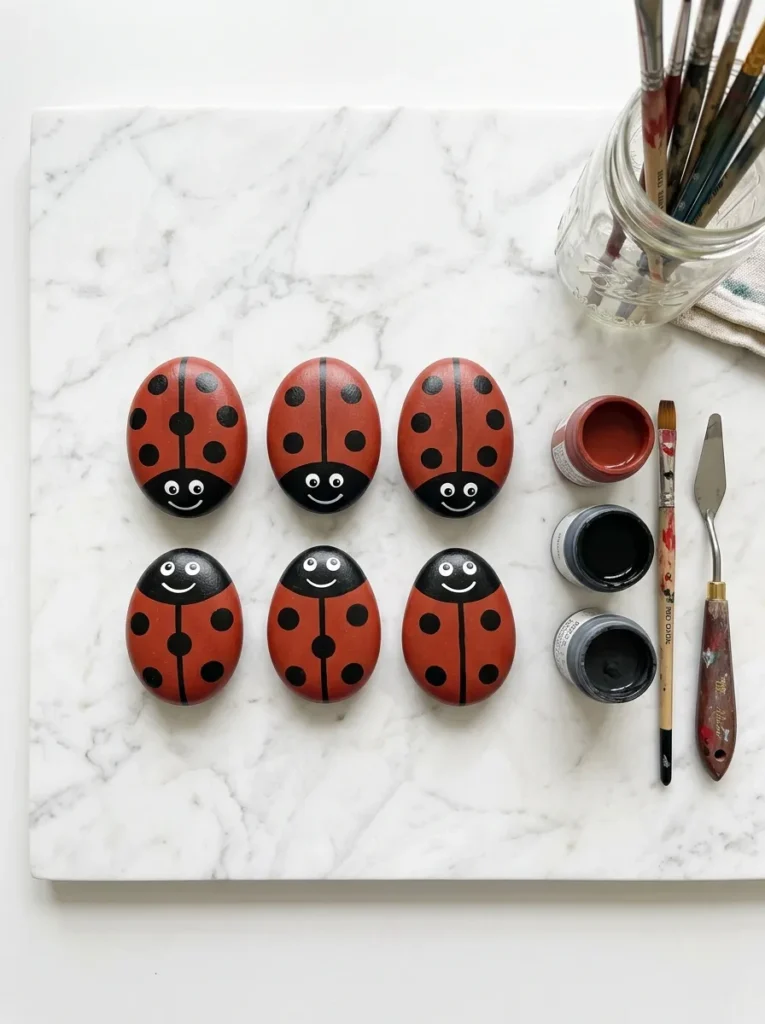
Vibe: The painted stone collection feels cheerfully charming — small perfect objects that look exactly like the creatures they represent and make every surface they occupy feel more alive.
Why it works: Painted river stone ladybugs are the DIY ladybug decoration project with the most universally positive reception because the smooth, naturally oval form of a river stone is already an idealized ladybug body shape — it requires no cutting, no molding, and no sculpting to suggest the ladybug’s characteristic rounded form. The design principle is form finding: when the natural shape of the base material already suggests the intended subject, the maker’s task is simply to apply color that confirms the suggestion rather than to construct the form from scratch. Each stone’s slight variation in size and shape produces natural variation between individual ladybugs that makes a collection of six more charming than six identical manufactured figurines.
How to get it: Select smooth, oval river stones of approximately 5–8cm length from a garden, stream, or purchased stone bag. Paint the full upper surface in deep red oxide acrylic, allowing two coats to dry completely between applications. Paint the head section (approximately one-third of the stone from the rounded end) in matte black. Add a central dividing line in black from head to tail using a fine detail brush. Add 2–6 black spots to the red body section using the wooden end of a brush dipped in black paint for consistent circular spot formation. Add two small white dots as eyes on the head section. Allow to dry 24 hours before sealing with clear outdoor varnish for longevity.
Quick Win: Using the handle end of a paintbrush dipped in paint and pressed onto the stone surface produces perfectly circular spots of consistent size in seconds — far more accurate than attempting to paint circles with a brush tip, and the standard professional technique for dot decoration on stone.
Shop The Look
| Product |
|---|
| Smooth river stone set large assorted natural |
| Deep red oxide acrylic paint craft outdoor |
| Matte black acrylic paint craft multi surface |
| Fine detail brush set 00 0 1 craft painting |
| Clear outdoor varnish spray stone protection |
Also view: 17 Mason Jar Projects for Cozy Home Decor
2. Air-Dry Clay Ladybug Wall Art (MATERIAL)
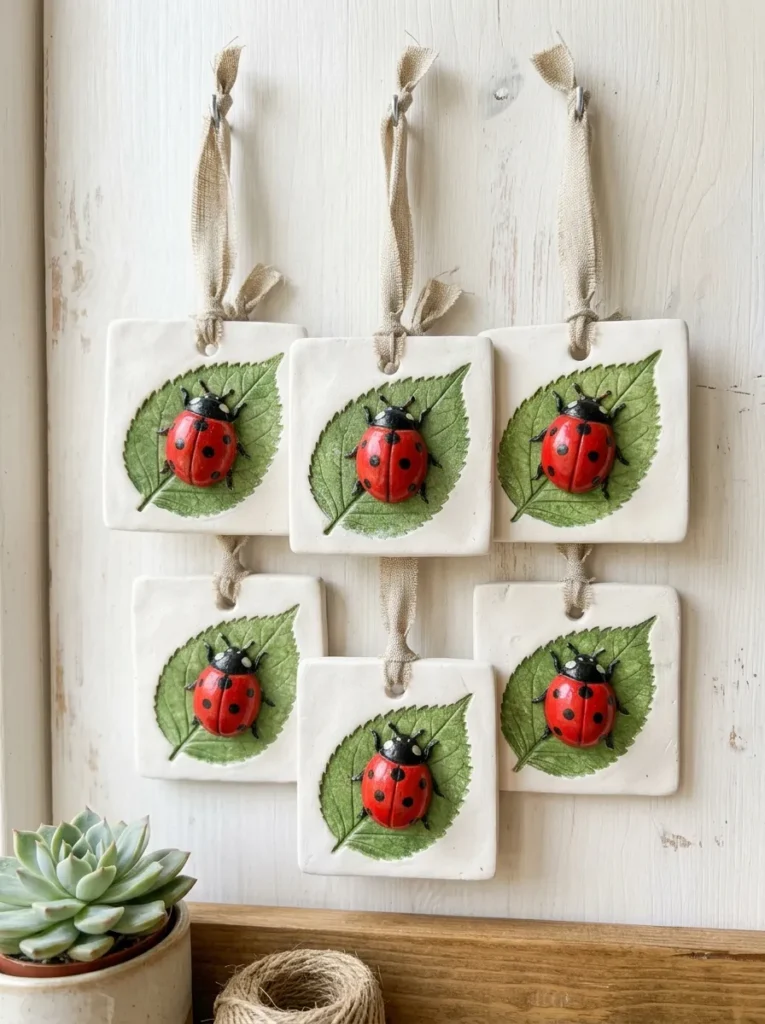
Vibe: The clay tile cluster feels handmade and warmly decorative — small wall hangings that make a plain wall feel cheerfully inhabited.
Why it works: Air-dry clay ladybug wall tiles are the DIY decoration project that most effectively combines sculpture and flat art in a single object — the raised, three-dimensional ladybug figure against the flat clay tile creates a dimensional quality that neither a purely flat painted tile nor a purely sculptural figure achieves alone. The design principle is figure against ground: the sculptural ladybug figure reads most clearly and most beautifully when contrasted against a flat, slightly textured ground (the clay tile) that provides context without competing. The leaf impression background — created by pressing a real leaf firmly into the raw clay before the ladybug figure is attached — adds botanical authenticity to the garden-themed decoration.
How to get it: Roll white air-dry clay to 8mm thickness and cut into 8x8cm squares using a sharp knife and ruler. Immediately press a leaf firmly onto the clay surface to create a botanical impression, then remove the leaf carefully. Form a small oval ladybug body from a separate piece of clay (approximately 3cm long), a smaller circular head piece, and attach both to the tile surface using slip (clay mixed with water to a paste consistency). Create spots by pressing a toothpick into the clay body surface. Create a small hanging hole at the tile top with a toothpick. Allow to dry for 48 hours. Paint with acrylic paints and seal with matte varnish.
Shop The Look
| Product |
|---|
| White air dry clay 500g block smooth natural |
| Acrylic paint set red black green craft |
| Clay sculpting tool set 8 piece detail |
| Matte varnish craft sealer wall art |
| Natural linen ribbon 5mm thin hanging loop |
Also view: 15 Cozy Craft Night Themes for Every Season
3. Ladybug Embroidered Linen Hoop Art (MATERIAL / COLOR)
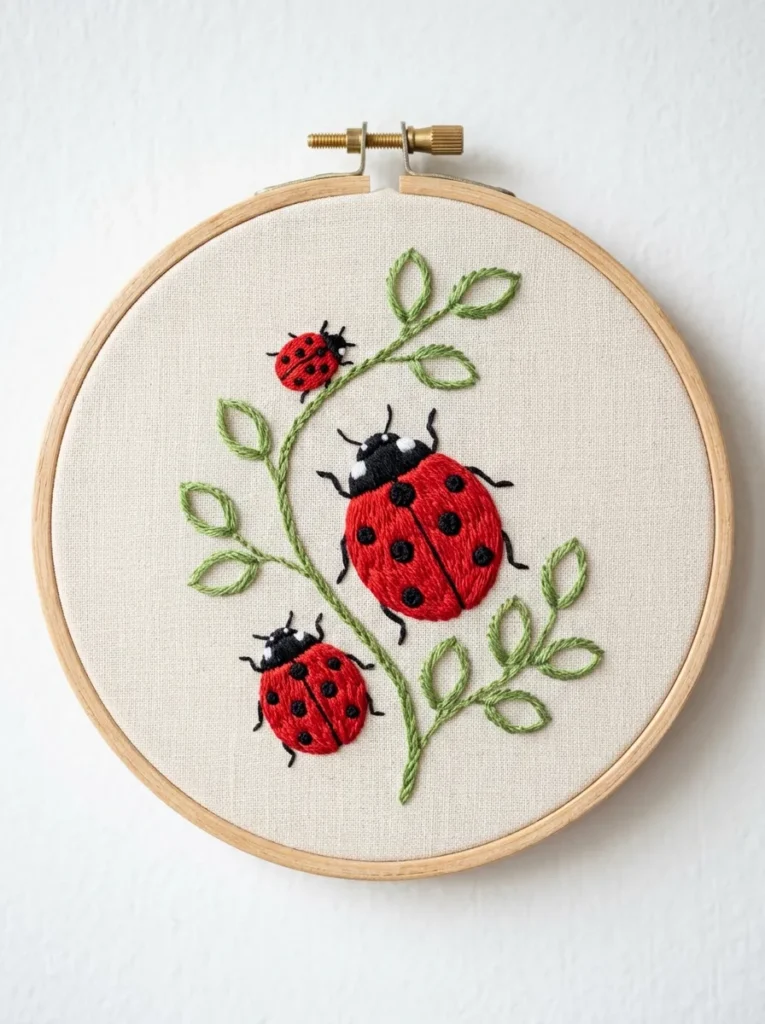
Vibe: The embroidered hoop art feels delicately handmade — the kind of framed textile that makes a wall feel personally made rather than professionally decorated.
Why it works: Embroidered ladybug hoop art is the DIY decoration project that most rewards patience with a result of genuine artistic quality — the combination of satin stitch (which creates a smooth, silk-like surface that catches light beautifully), French knots (which create the raised, three-dimensional spots that are the ladybug’s most distinctive feature), and stem stitch (which creates the precise flowing lines of branches and dividing lines) produces an embroidered image of considerable visual richness. The design principle is stitch variety: using three or four different embroidery stitch types within a single small image creates textural variety that makes the finished piece read as genuinely skilled rather than simply drawn in thread. The natural wood embroidery hoop serves as the frame, eliminating any need for additional framing or finishing.
How to get it: Transfer the ladybug branch design onto cream 28-count linen using a water-soluble fabric marker and a light box or window tracing method. Mount in a 20cm embroidery hoop with the design centered. Work the branches first in two strands of dark green floss using stem stitch. Add leaves using lazy daisy stitch in a lighter green. Work each ladybug body in red satin stitch, filling the oval completely with parallel stitches running from the dividing line outward. Add the black head in black satin stitch. Work each spot as a single French knot in black (two thread wraps for larger spots). Add the eye highlight as a single straight stitch in white. Remove water-soluble marker by lightly misting with water.
Shop The Look
| Product |
|---|
| Natural wood embroidery hoop 20cm set |
| Embroidery floss set red black green white |
| Cream linen embroidery fabric 28 count |
| Embroidery needle set sizes 3 5 7 9 |
| Water soluble fabric marker blue pen |
4. Felt Ladybug Garland (ACCESSORIES / COLOR)
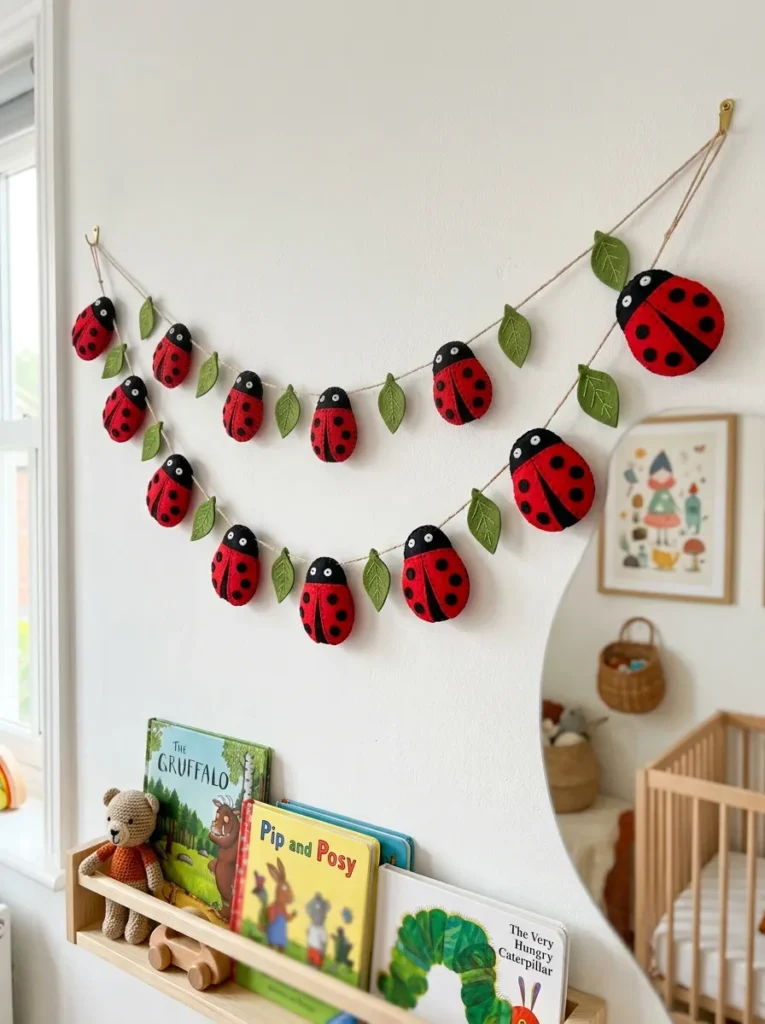
Vibe: The felt garland feels cheerfully bright and perfectly child-appropriate — the kind of handmade room decoration that improves with every look because each individual ladybug has its own slight character.
Why it works: A felt ladybug garland is the DIY decoration project most suited to making in multiples because felt’s forgiving, no-fray quality allows all pieces to be cut without hemming or finishing, making mass production of 12 identical (but naturally slightly varied) ladybug shapes genuinely fast and satisfying. The design principle is repetitive rhythm: a garland’s visual power comes from the regular repetition of a single motif at consistent intervals, which creates the visual rhythm that makes a garland read as a deliberate decoration rather than a random string of objects. The green felt leaf spacers between each ladybug provide the botanical context that grounds the garden motif and prevents the garland from reading as abstract.
How to get it: Cut template shapes from cardboard: a 7x5cm oval for the body, a 3.5cm semicircle for the head, a 1cm circle for each spot (6 per ladybug), and a 5cm leaf shape. Trace and cut from the appropriate felt colors — 12 of each body and head shape, 72 spot circles, 24 leaf shapes. Assemble each ladybug by gluing or stitching the head to the body top, gluing spots to the body, and adding white felt dot eyes. Thread natural cotton twine through each assembled ladybug by piercing through the body with a large needle and tying a simple knot on each side to secure the spacing. Add a leaf shape on each side of every ladybug, secured with a single knot.
Shop The Look
| Product |
|---|
| Felt sheet set red black green white craft |
| Natural cotton twine 3mm thin garland |
| Large eye needle set craft felt garland |
| Fabric glue permanent flexible clear craft |
| Craft scissors small sharp precision cutting |
5. Terracotta Pot Ladybug Garden Ornament (MATERIAL)
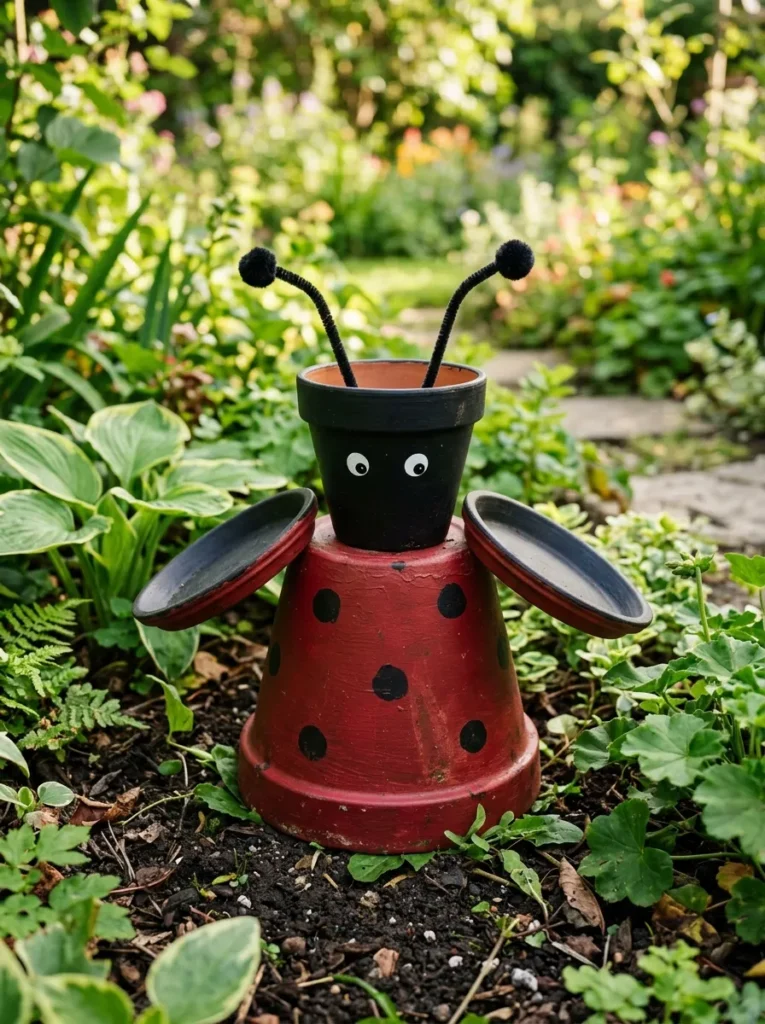
Vibe: The terracotta pot ladybug feels whimsically garden-perfect — a large-scale ornament that makes any garden border look cheerful and intentionally decorated.
Why it works: A terracotta pot ladybug garden ornament is the DIY decoration project that most effectively uses the inherent form of its base material — an inverted terracotta pot already reads as a rounded, dome-shaped body, which is the exact form of a ladybug’s protective wing case. The design principle is form appropriation: rather than fighting the inherent shape of the material, the maker uses it as the starting point and lets it do most of the visual work. The assembled ornament — large inverted pot body, small pot head, saucer wings, pipe cleaner antennae — reads as a cartoon-style three-dimensional ladybug at garden scale (30–40cm), making it the largest and most visually impactful ladybug decoration on this list.
How to get it: Paint the large inverted pot in two coats of red outdoor acrylic, sealing with waterproof exterior varnish between each color. Add black spots using the brush-handle dot technique. Paint the small head pot entirely in matte black and add white dot eyes. Paint two terracotta saucers matte black for the wing details. Stack the head pot on the inverted body pot using strong waterproof adhesive and allow to cure fully (24 hours). Attach the saucer wings at the body sides using the same adhesive. Pierce two holes in the body pot’s base (now the top) for the pipe cleaner antennae — thread through and curl the tips into small spirals, adding a black pom-pom to each spiral tip with craft glue.
Shop The Look
| Product |
|---|
| Terracotta pot set large medium garden natural |
| Red outdoor acrylic paint waterproof exterior |
| Matte black outdoor acrylic garden craft |
| Black pipe cleaner set craft antennae |
| Black pom-pom set small craft antennae tip |
6. Ladybug Rock Bookends (LAYOUT / ACCESSORIES)
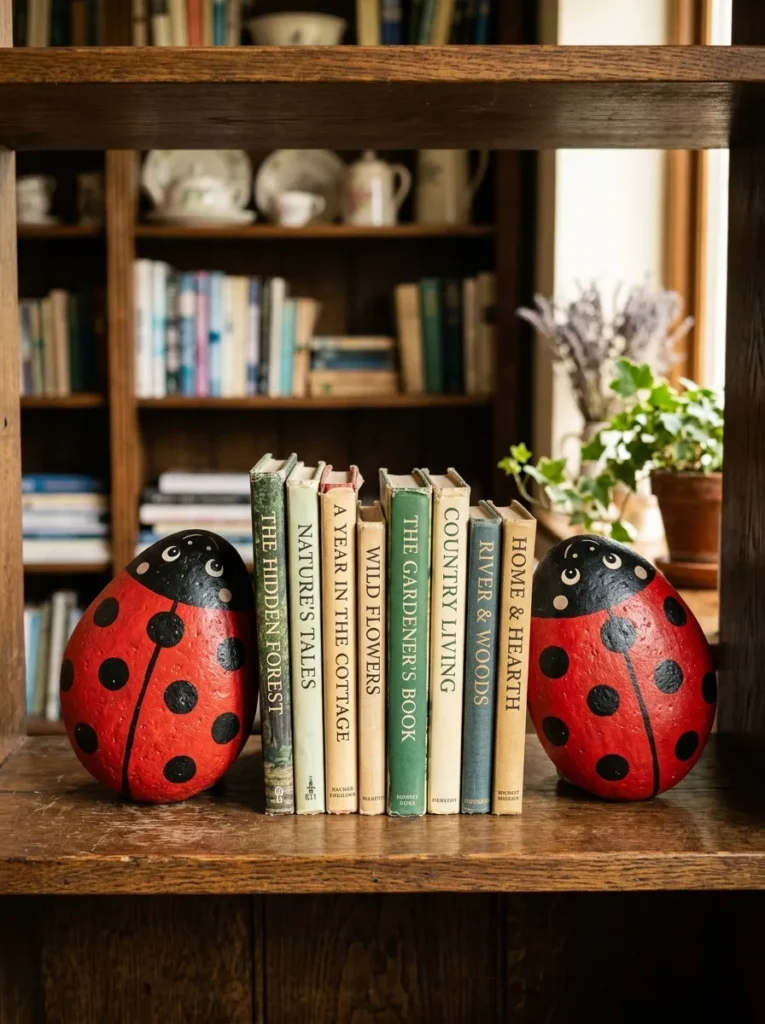
Vibe: The ladybug bookends feel warmly functional and characterful — the most practical ladybug decoration on the list, serving a daily purpose with genuine charm.
Why it works: Large painted river stone ladybug bookends are the DIY decoration project that most elegantly combines function and decoration — a heavy river stone is already an excellent bookend by weight and stability, requiring only the painted ladybug design to transform it from a utilitarian stone into a characterful decorative object. The design principle is functional decoration: the most successful home decorations are those that serve a practical function simultaneously, because they earn their place on the shelf through daily usefulness rather than pure aesthetics. The ladybug bookend is genuinely useful (it holds books upright), genuinely beautiful (the painted design is charming at close range), and genuinely appropriate to any room that contains books.
How to get it: Select two river stones of matching size (12–15cm) and similar weight — the matching size creates the symmetrical bookend pair, and adequate weight (at least 400g per stone) is essential for the bookend function. Apply the same painting technique as the standard painted stone ladybug but at larger scale — the larger canvas allows more spot detail (6–8 spots per body rather than 2–4) and finer detail work on the head (visible antennae lines, more precise eye placement). Apply at least three coats of clear outdoor varnish after painting — bookends experience more handling than display stones and require more robust surface protection.
Shop The Look
| Product |
|---|
| Large river stone set matching pair natural |
| Deep red outdoor acrylic paint durable |
| Clear gloss varnish craft book protection |
| Felt pad set base protection bookend surface |
| Fine detail brush set craft stone painting |
7. Ladybug Window Cling Decals (COLOR / SMALL SPACE)
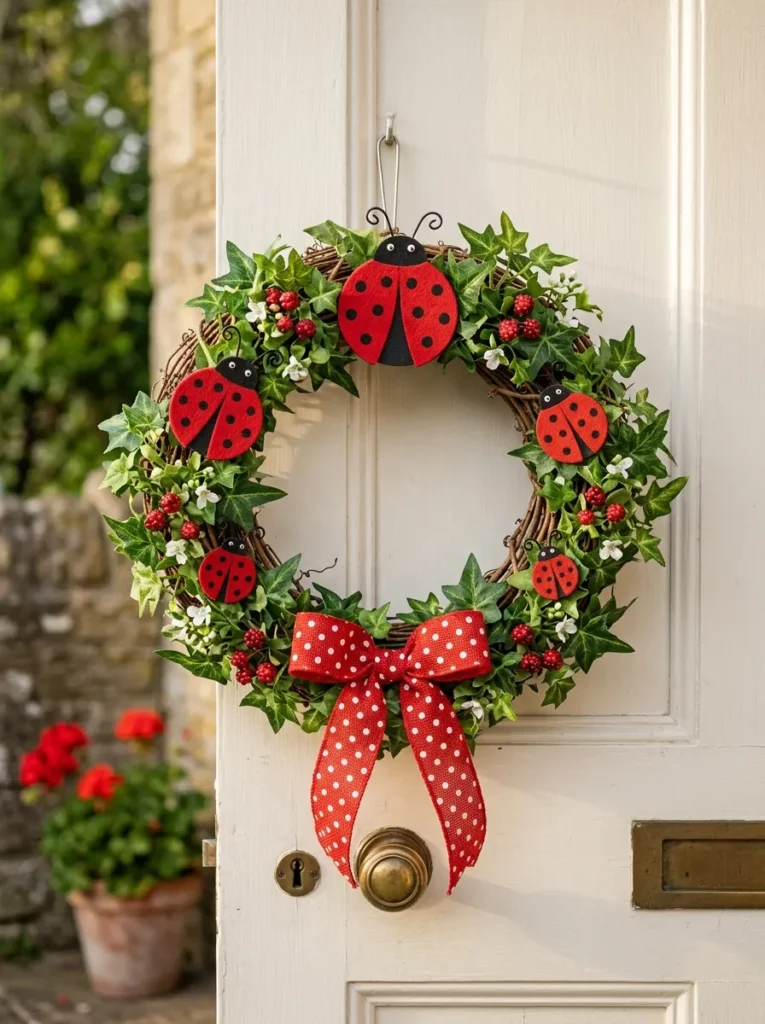
Vibe: The window clings feel bright and seasonal — charming decorations that catch morning light and make the kitchen window feel like a celebration of spring.
Why it works: Handmade ladybug window clings are the DIY decoration project that uses light as an active design material rather than merely a passive illumination source — when translucent colored gel or puffy paint is applied to glass, the backlighting from daylight transforms a simple painted surface into a luminous, stained-glass quality decoration. The design principle is transmitted light: unlike opaque decorations that reflect light from the front, window clings transmit light through the colored medium, creating a warm glow quality that changes throughout the day as the light angle and intensity change. The ladybug silhouette is specifically ideal for window cling application because its simple, compact form reads clearly in the translucent medium at any size.
How to get it: Apply red dimensional puffy paint in the ladybug body shape (an elongated oval) directly onto a smooth plastic sheet or acetate. Add the black head, dividing line, and spots using black dimensional paint while the red is still wet or after it dries (for crisper definition). Allow to dry completely for 24 hours — the puffy paint cures to a flexible, rubbery surface. Peel from the backing sheet and press onto the window glass — the cling adheres to glass through static and the inherent tackiness of the cured puffy paint. Clings are fully removable and repositionable without any adhesive residue on the glass.
Shop The Look
| Product |
|---|
| Red dimensional puffy paint fabric craft |
| Black dimensional puffy paint fabric craft |
| Green dimensional puffy paint leaf craft |
| Smooth acetate sheet craft cling base |
| Window cling storage sheet flat preserve |
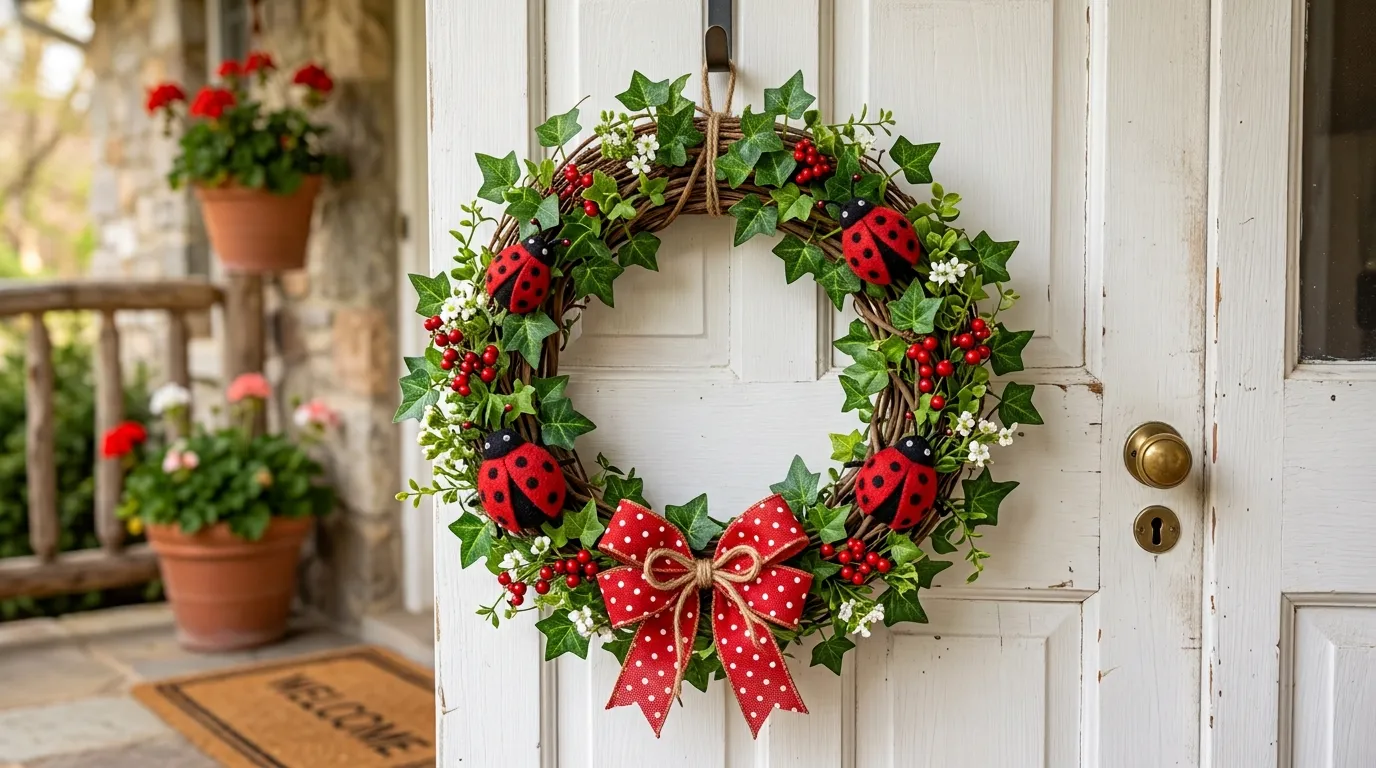
8. Ladybug Wreath for Front Door (LAYOUT / ACCESSORIES)
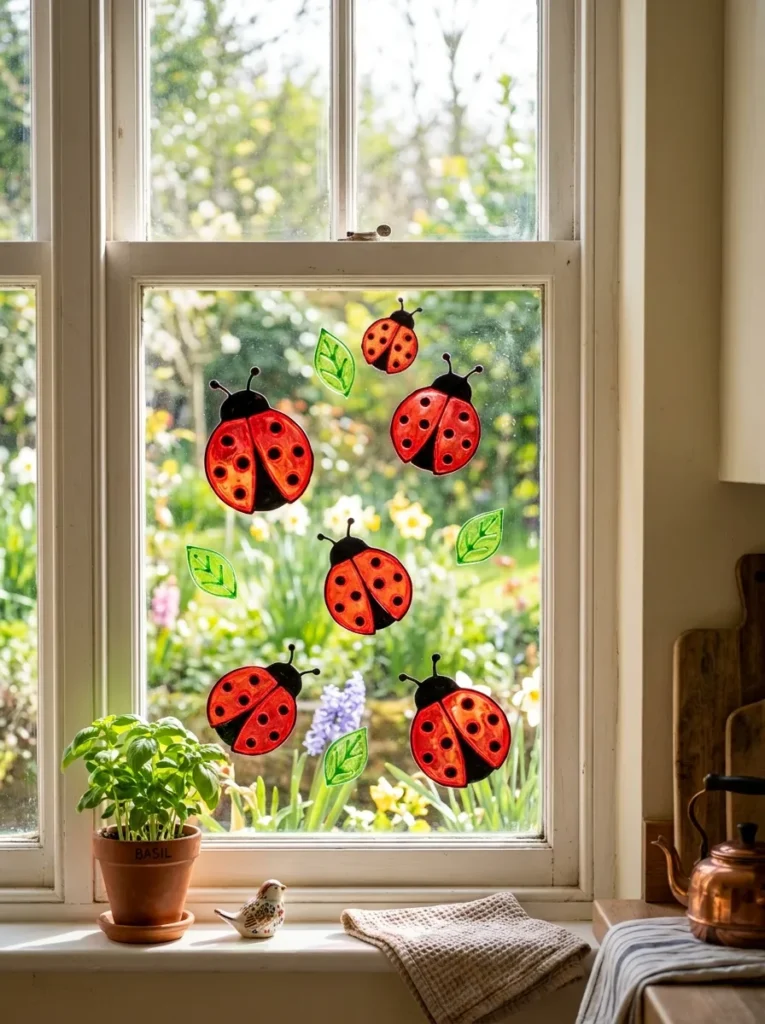
Vibe: The ladybug wreath feels warmly welcoming — a front door decoration that announces the season and the household’s cheerful character simultaneously.
Why it works: A ladybug-themed front door wreath is the DIY decoration project with the highest social visibility because the front door is the first decorative surface seen by every visitor and passer-by — making the wreath the home’s most public creative statement. The design principle is botanical context: ladybugs placed within a wreath of green ivy leaves are immediately understood as garden creatures in their natural habitat, which gives the decoration a narrative completeness that standalone ladybug figurines displayed indoors cannot achieve. The five ladybugs at varied positions around the ring creates the impression of a colony of bugs going about their business on the wreath’s botanical surface — a more lively and characterful arrangement than symmetrically placed bugs.
How to get it: Wire or glue green preserved ivy leaves onto a 35cm foam or grapevine ring base, working around the full ring in overlapping layers until the base is fully covered. Make five ladybug figures at varied scales (4cm, 6cm, 8cm, 8cm, 10cm) from the following materials: painted wooden discs, large painted river stones, or thick felt pieces — all using the same red and black ladybug design. Wire each ladybug to the wreath ring using 24-gauge florist wire, positioning them at natural intervals at different positions around the ring. Tie a wide red ribbon bow at the 6 o’clock position as the wreath’s visual anchor. Add small artificial red berry clusters for additional color accents.
Shop The Look
| Product |
|---|
| Foam wreath ring 35cm craft base |
| Preserved ivy leaves bunch wreath natural |
| Red wired ribbon 4cm wide bow craft |
| Florist wire 24 gauge green craft |
| Small wooden disc set craft paint ladybug |
9. Ladybug Pinecone Garden Decorations (MATERIAL / SMALL SPACE)
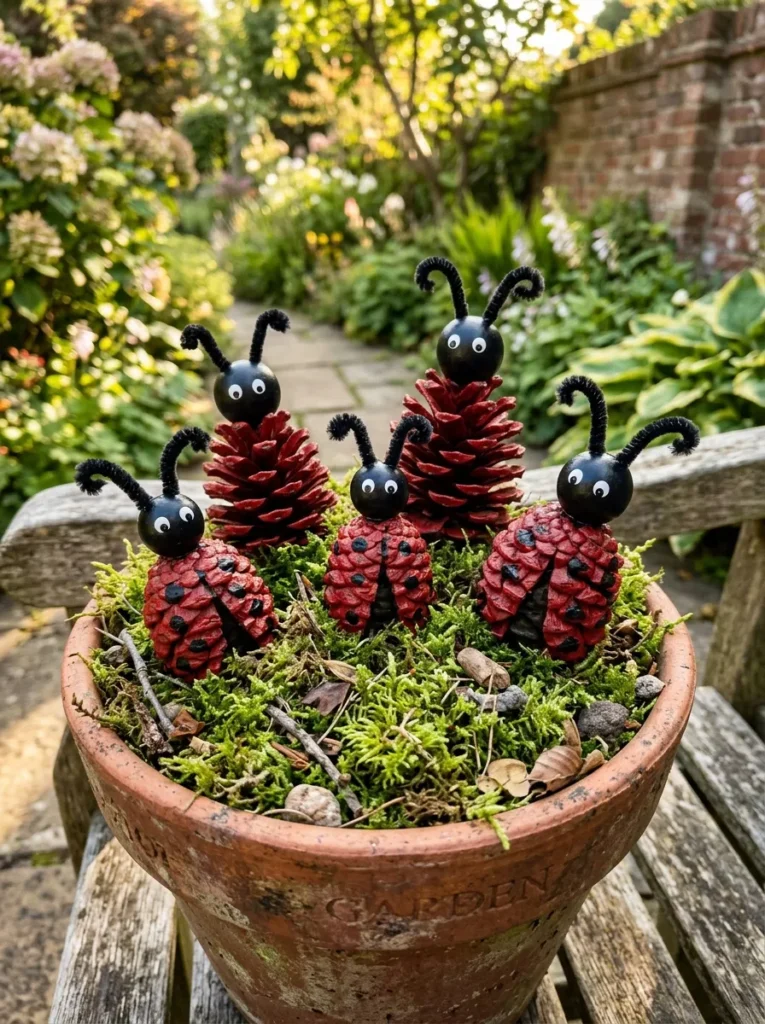
Vibe: The pinecone ladybug collection feels naturally whimsical — garden craft that looks genuinely at home in the garden because its primary material comes from there.
Why it works: Pinecone ladybugs are the DIY decoration project that most effectively uses a free, foraged natural material as the primary creative base — a dried pinecone’s elongated oval form and naturally textured surface are excellent starting points for a ladybug body, requiring only paint and a few additional elements to complete the transformation. The design principle is natural form appropriation: like the river stone ladybug, the pinecone already suggests the ladybug’s body form, and the natural scale variation between individual pinecones produces a collection with natural size variety that manufactured alternatives cannot replicate. The pinecone’s existing texture, partially visible through red paint, adds visual interest that a smooth surface cannot provide.
How to get it: Collect or purchase large, closed pinecones of 6–10cm length. Apply two coats of red outdoor acrylic paint, working it into the pinecone’s scales — the paint will sit on the outer scale surfaces while the deeper scale gaps remain darker, creating a naturally textured appearance. Paint black spots using the brush-handle dot technique on the upper scale surfaces. Glue a 2cm round wooden bead (painted matte black with white dot eyes added) to the pinecone’s tip as the head. Insert two black pipe cleaner antennae into the head bead through pre-drilled holes, curling the tips. Stand the pinecone bugs vertically in a moss-filled terracotta pot.
Shop The Look
| Product |
|---|
| Large pinecone bag natural dried assorted |
| Red outdoor acrylic paint craft exterior |
| Round wooden bead set 20mm craft head |
| Black pipe cleaner set craft antennae |
| Preserved decorative moss bag natural green |
10. Ladybug Napkin Ring Set (ACCESSORIES)
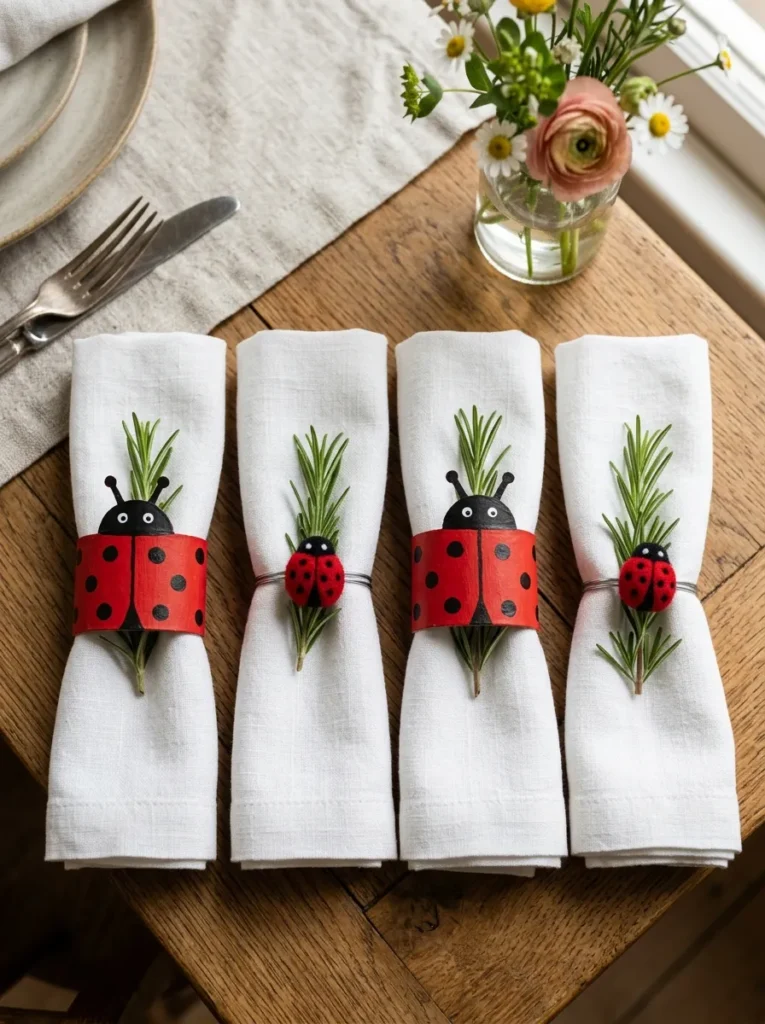
Vibe: The ladybug napkin rings feel warmly festive — the table detail that makes a spring or summer meal feel genuinely celebrated rather than simply served.
Why it works: Handmade ladybug napkin rings are the DIY decoration project that most effectively transforms the dining table from a functional surface into a seasonally considered setting — because napkin rings are the smallest and most personal element of a table setting, they are the detail that guests notice and comment on most readily. The design principle is intimate scale: the closer an object is to the person using it (and a napkin ring is held in the hand before every meal), the more its handmade quality is noticed and appreciated — the slight imperfections of a handmade ring are felt as well as seen, creating a tactile experience of care and personal attention that machine-made alternatives cannot provide.
How to get it: For the cardboard tube version: cut toilet paper tubes into 4cm rings. Apply two coats of red acrylic paint to the outside. Paint a black band across one section of the ring for the head. Add black spots using the dot technique. Seal with clear varnish. For the wire version: form 20-gauge craft wire into a 4cm diameter ring (approximately 13cm of wire needed per ring). Twist the wire ends together to secure. Attach a small felt ladybug figure (3cm) to the front of the ring using a small dab of strong glue. Both versions are complete in under 20 minutes per ring once materials are assembled.
Shop The Look
| Product |
|---|
| Craft wire 20 gauge silver flexible ring |
| Small felt sheet set red black craft |
| Red acrylic paint multi surface craft |
| Clear varnish gloss craft seal protection |
| White linen napkin set 4 piece dining |
11. Ladybug Mason Jar Lantern (LIGHTING / COLOR)
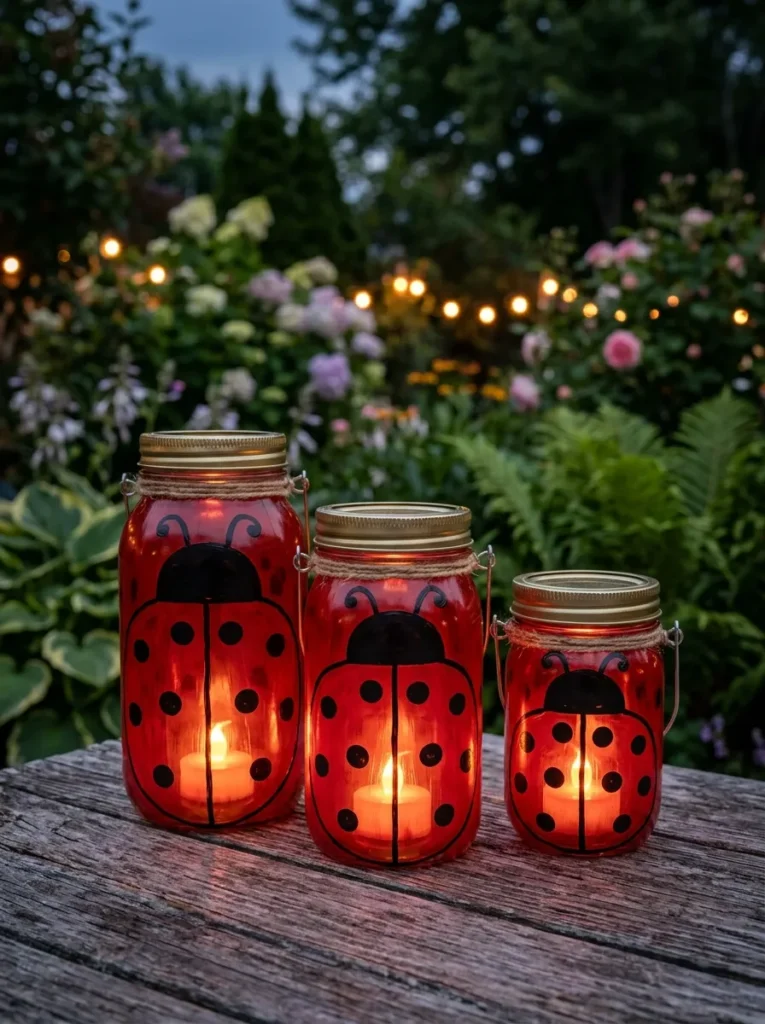
Vibe: The ladybug lanterns feel magically warm at dusk — red glass-painted jars glowing from within with warm light, making any garden table or windowsill feel like a fairy tale scene.
Why it works: Ladybug mason jar lanterns are the DIY decoration project that most effectively uses light as a creative material because the translucent glass paint applied to the jar exterior both colors and diffuses the LED light source inside, transforming a functional battery-operated tea light into a warm, red-glowing lantern of considerable atmospheric beauty. The design principle is transmitted color: the red glass paint acts as a color filter for the warm white LED light passing through it, combining the warm amber of the LED with the translucent red of the paint to create a warm, ember-like glow that changes quality as the light level outside changes — brighter in full darkness, warmer in twilight. The ladybug motif, reduced to its most essential elements (red body, black head, black spots) on a cylindrical glass surface, creates a pattern that reads clearly when the jar is lit from within.
How to get it: Clean mason jars thoroughly with white vinegar and allow to dry completely — any grease or moisture prevents glass paint adhesion. Apply translucent red glass paint to the jar body in a solid layer, leaving the head section clear. Apply matte black glass paint to the head section and add spots using the brush-handle dot method. Allow to cure for 24 hours before baking (if using oven-cure glass paint) or 72 hours for air-cure versions. Place a battery-operated LED tea light inside each finished jar — never use a real flame inside a painted glass jar, as the heat may crack the glass or degrade the paint.
Shop The Look
| Product |
|---|
| Clear glass mason jar set 3 sizes natural |
| Translucent red glass paint oven bake |
| Matte black glass paint oven bake detail |
| Battery LED tea light flameless set 6 |
| Glass paint brush set fine tip craft |
12. Ladybug Wooden Disc Mobile (LAYOUT / MATERIAL)
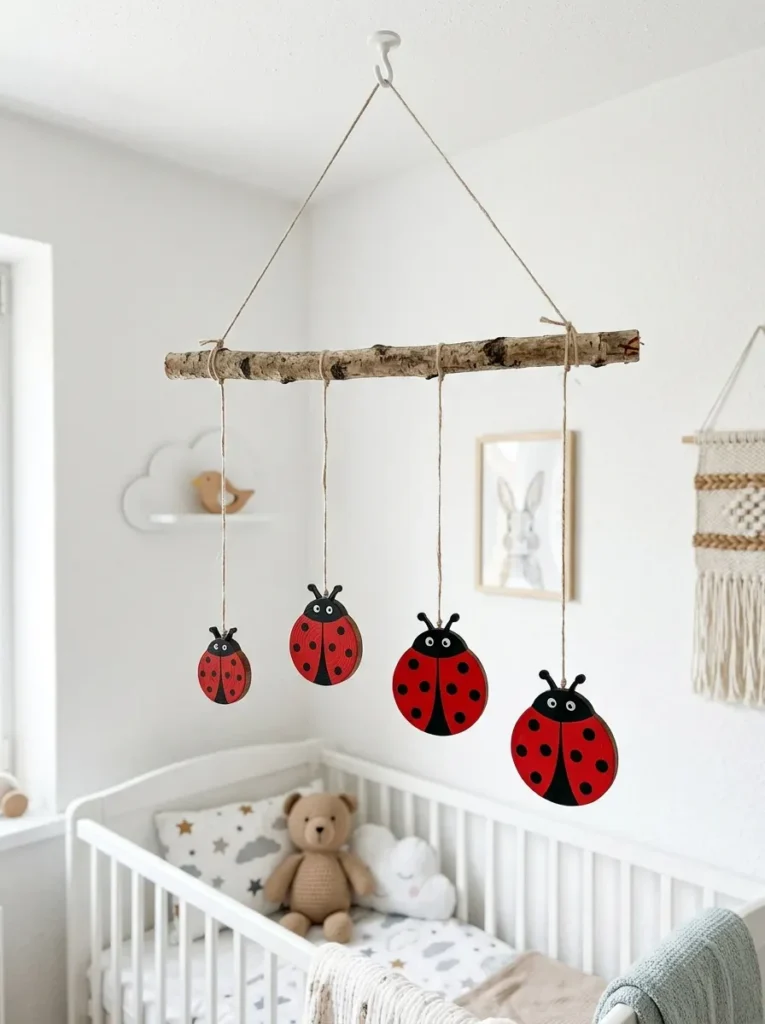
Vibe: The ladybug mobile feels fresh and nursery-perfect — the gentle movement of spinning ladybug discs making a children’s room feel alive and whimsical.
Why it works: A ladybug wooden disc mobile is the DIY decoration project that most effectively uses movement as a design quality — the slight rotation of lightweight painted wooden discs in air currents creates the kinetic quality that makes a mobile the most engaging wall decoration available in a children’s room. The design principle is kinetic contrast: the spinning disc movement against the static wall behind it creates a visual dynamic that captivates infants and children equally, and the ladybug’s simple, recognizable silhouette reads clearly even in motion. Birch branches found in the garden or sourced from a florist provide the most natural-looking horizontal mobile arm, with the slight irregularity of a real branch producing a more organic quality than a perfect wooden dowel.
How to get it: Paint four wooden discs (5–8cm diameter) as ladybugs using the standard red and black technique. Drill a small hole at the top center of each disc for the hanging string. Cut four lengths of natural linen string at varied lengths — 15cm, 20cm, 25cm, and 30cm — and thread through each disc hole, knotting beneath. Tie the four strings to a 40cm birch branch at even intervals. Tie a single centered string to the branch for the ceiling hang. Test the balance before mounting — adjust string positions along the branch until the mobile hangs level when suspended.
Shop The Look
| Product |
|---|
| Wooden disc set 5-8cm natural birch craft |
| Natural linen string thin 1mm mobile |
| Birch branch natural craft mobile arm |
| Drill bit set 2mm small hole craft |
| Ceiling hook small brass nursery mount |
13. Ladybug Fabric Cushion Cover (MATERIAL / ACCESSORIES)
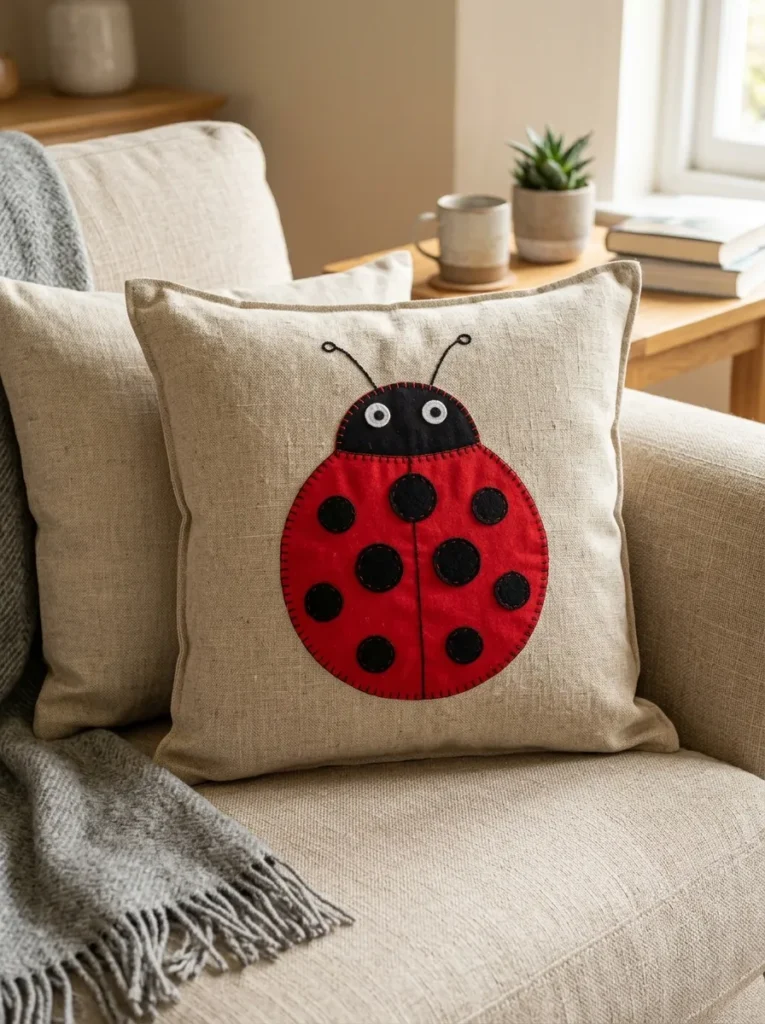
Vibe: The ladybug cushion feels casually charming and home-warm — a seasonal soft furnishing that brightens a sofa without disrupting the home’s overall aesthetic.
Why it works: A ladybug appliqué cushion cover is the DIY decoration project that most effectively introduces the ladybug motif into the living room in a way that feels domestically appropriate rather than novelty-themed — because a fabric cushion is a legitimately expected living room object, and the ladybug appliqué is simply its decorative treatment rather than a standalone themed novelty. The design principle is motif integration: when a seasonal or themed motif is applied to a standard, expected home object (cushion, tea towel, table runner), it reads as considered design rather than seasonal clutter, and remains visually appropriate for longer than standalone novelty decorations. The natural linen ground is the critical material choice — it elevates the appliqué from craft project to genuine soft furnishing.
How to get it: Cut the ladybug appliqué shapes from fabric with iron-on interfacing fused to the back — the interfacing prevents fraying and makes the raw-edge appliqué technique possible without hemming. Cut a 20cm oval body from red cotton and a 10cm semicircle head from black cotton, plus six 2cm circles from black felt for spots. Iron the body and head pieces onto the cushion cover front panel in their correct positions. Machine stitch around all edges using a close zigzag stitch (stitch length 0.5mm, width 3mm). Sew on the felt spots using the same zigzag. Hand stitch two small white felt circles as eyes. Complete the cushion cover with an envelope-back closure.
Shop The Look
| Product |
|---|
| Natural linen fabric by the yard cushion cover |
| Red cotton fabric appliqué body quarter meter |
| Iron-on interfacing fusible web craft appliqué |
| Black felt sheet appliqué spot craft |
| Cushion pad insert 45x45cm hypoallergenic |
14. Ladybug Watercolor Print Series (COLOR)
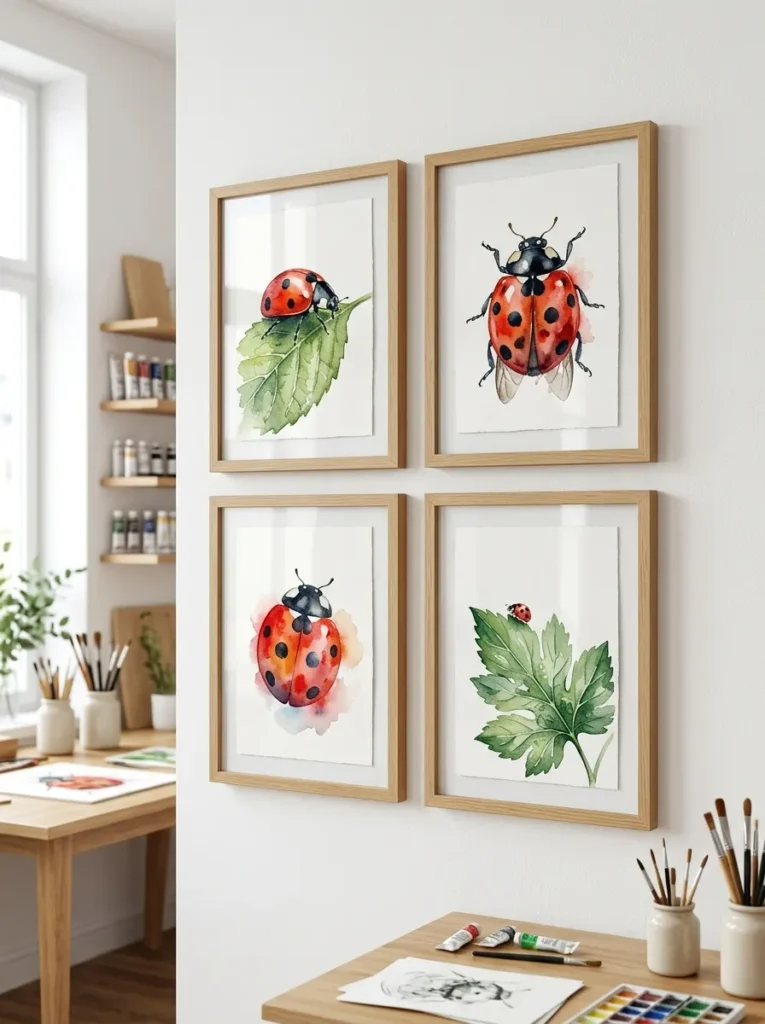
Vibe: The watercolor print series feels fresh and artisanally beautiful — four prints that together form a considered piece of wall art rather than four standalone decorations.
Why it works: A watercolor ladybug print series is the DIY decoration project that most effectively elevates the ladybug motif from charming craft to genuinely considered wall art — because a matched set of four botanical-style watercolor prints in natural wood frames constitutes a complete, frameable art series of the kind sold in design-forward homeware shops and independent print galleries. The design principle is series coherence: four prints that share the same artistic style, the same color palette, the same subject, but show different compositions and perspectives create a visual set with the coherent variety that makes a gallery wall or framed art series feel curated and complete. The loose, wet-on-wet watercolor technique is specifically appropriate for the ladybug subject because it creates the soft, organic quality that suits a natural history illustration approach.
How to get it: Work on 300gsm cold-press watercolor paper cut or pre-sized to A5 (148x210mm). For each of the four prints, pre-wet the ladybug body area with clean water and drop concentrated red watercolor onto the wet surface, allowing it to bloom organically — do not direct the paint but allow it to spread naturally, adding a deeper red at the edges before the surface dries. Add the black head and spot details with a fine liner (005) after the watercolor has dried completely. Paint the botanical elements (leaves, stems) in loose wet-on-wet green washes. Allow all prints to dry completely before pressing flat under heavy books for 24 hours to eliminate any curl. Frame and hang as a 2×2 grid.
Shop The Look
| Product |
|---|
| Watercolor paper 300gsm cold press A5 pad |
| Watercolor paint set red black green botanical |
| Round watercolor brush set 2 4 6 natural |
| Fine liner pen 005 black detail botanical |
| Natural wood picture frame A5 set of 4 |
How to Start Your DIY Ladybug Decoration Journey
Your single best first move is to make one painted river stone ladybug before attempting any other project on this list — not because it is the most impressive finished result, but because it is achievable in 30 minutes with $5 of materials, requires no prior craft skill, and produces a result so immediately charming that it creates the creative momentum for every subsequent project. The first completed ladybug decoration is the most important because it establishes that the ladybug motif is genuinely as accessible and rewarding to make as it appears, and that even the most basic version of the form produces the cheerful, brightening effect that makes these decorations worth making in the first place.
The most common beginner mistake in DIY ladybug decorations is using the wrong type of red paint — bright fire-engine red rather than the deeper red oxide or brick red tone that makes ladybug decorations look naturalistic and sophisticated rather than primary-color bright. The specific red that reads as most charming and most home-appropriate in ladybug decorations is a warm, slightly darkened red — closer to brick, terra cotta, or dried rose than to the primary red of a traffic light. Craft paint labeled “red oxide,” “barn red,” “brick red,” or “burgundy red” in a matte or chalk finish produces the most convincing and most elegant ladybug color at any scale and on any material.
Three specific items under $50 that unlock the greatest number of ladybug decoration projects from this list: a tube of deep red oxide outdoor acrylic paint ($6–$10) that covers projects 1, 5, 6, 7, 8, 9, 10, 11, and 12 as the primary body color for every painted ladybug on any surface; a 20-piece assorted felt sheet pack in red, black, green, and white ($8–$12) that covers projects 4, 7, 8, 10, and 13 as the fabric material for every felt-based project; and a set of detail brushes in sizes 00, 0, 1, and 2 ($7–$12) that provides the precision tool needed for spot and eye detail on every painted project in the list — three purchases totaling under $35 that collectively unlock the materials for 12 of the 14 projects.
A single painted river stone takes 30 minutes and costs $5–$8 in materials. A felt garland takes 2–3 hours and costs $12–$18 for a 12-bug garland. The embroidered hoop art takes 4–6 hours and costs $15–$25 for a single framed piece. The full ladybug watercolor print series takes one full afternoon and costs $20–$35 in materials, producing a set of four frameable prints that would retail for $60–$120 in a design shop. The largest project — the terracotta pot garden ornament — takes one afternoon and costs $15–$25, producing the most visually impactful single decoration on the list.
Frequently Asked Questions About DIY Ladybug Decorations
What paint works best for painting ladybug decorations on different surfaces?
The surface determines the paint type: for river stones, terracotta pots, and pinecones used outdoors, waterproof outdoor acrylic paint sealed with exterior varnish is the only appropriate choice — indoor acrylic paint on outdoor surfaces will fade and peel within one season. For wooden discs and MDF surfaces, any good quality acrylic craft paint works well, sealed with matte or gloss varnish. For glass surfaces (mason jar lanterns, window clings), dedicated glass paint — available in oven-cure and air-cure versions — is essential, as standard acrylic paint will not adhere permanently to glass. For fabric and felt, fabric paint or felt-specific craft glue are the appropriate materials; standard acrylic paint on fabric will crack after washing. In every case, a matte or chalk finish in the deep red oxide tone produces the most naturalistic and home-appropriate ladybug color.
How many spots should a DIY ladybug decoration have?
Real ladybug species vary from 2 to 22 spots depending on species — the seven-spot ladybug (Coccinella septempunctata), the most common European species, has exactly seven spots in a consistent pattern (three on each wing case and one at the center of the wing case join). For decorative purposes, 2–6 spots per wing case (4–12 total) is the range that reads as most charming and most recognizable at all scales. For very small decorations (under 5cm), 2–4 total spots maintain legibility. For larger decorations (over 10cm), 6–12 spots create the visual richness the larger surface can accommodate. There is no correct answer — the most charming DIY ladybug decorations often give each individual bug a slightly different spot count, creating the natural variation of a real colony of individuals.
Can children make DIY ladybug decorations and from what age?
Yes — DIY ladybug decorations span the full range of child-appropriate craft activity. Painted river stones are appropriate for children aged 4 and above with adult supervision for the paint and varnish application. Felt ladybug garlands are appropriate for children aged 6 and above for the cutting and assembly stages. The pinecone ladybug collection is appropriate for children aged 5 and above, with adults handling the glue and antennae assembly. The projects involving hot tools (hot glue gun), outdoor varnish, or sharp cutting implements require adult handling of those specific stages regardless of the child’s age. The embroidery hoop art and watercolor print series are more appropriate for older children and adults due to the fine motor skill requirements.
How do I make DIY ladybug decorations weatherproof for garden use?
Three layers of protection are required for any painted decoration intended for permanent outdoor garden use: a primer coat appropriate to the base material (terracotta primer for pots and pinecones, no primer needed for river stones, wood primer for wooden discs); a waterproof outdoor acrylic paint for all color layers rather than standard craft acrylic; and a minimum of two coats of exterior matte or gloss varnish as the final protective layer. Even with full outdoor treatment, very small decorations (under 5cm) are not suitable for permanent outdoor display as they may be displaced by wind, rain, or birds. Medium to large decorations (10cm and above) with full weatherproofing treatment will last 2–3 outdoor seasons before requiring repainting.
What is the best way to display a collection of DIY ladybug decorations?
The most visually effective display approach for a ladybug decoration collection uses the same principles that make any decorative object collection successful: varied heights (using books, wooden boards, or upturned pots as plinths to create height variation between same-sized objects), odd-numbered groupings (3 or 5 objects read as more dynamic than 2 or 4), botanical context (placing dried leaf sprigs, fresh herbs, or small plants between or beside the ladybug decorations grounds the garden motif in natural botanical material), and a consistent surface (a wooden board, stone slate, or natural tray containing the collection gives it a defined boundary that reads as a composed display rather than a random scatter). For outdoor garden displays, ladybug decorations placed at varied depths in a garden border — some at the front edge, some recessed among plant stems — create the impression of real ladybugs going about their garden business.
Ready to Start Making Your DIY Ladybug Decorations?
These 14 ideas span the full range of DIY ladybug decoration possibility — from the instantly achievable painted river stone and the charming pinecone garden figure, through the textile warmth of the felt garland and the appliqué cushion, to the genuine artistic quality of the embroidered hoop art and the watercolor print series, the functional charm of the bookends and napkin rings, and the atmospheric magic of the glass jar lanterns and window clings — covering every material, every skill level, every room in the home, every scale from a 2cm napkin ring adornment to a 35cm garden ornament, and every budget from zero-cost foraged pinecones to a $30 complete embroidery project. Begin with the painted river stone today — find one smooth stone in the garden, the park, or a bag from a garden center, pick up a small pot of red paint and a fine detail brush, and make the first ladybug in under 30 minutes — because that one small bright object, sitting on a windowsill or a shelf or a garden path, will create the particular domestic pleasure that all the other 13 projects promise and deliver in their own varied ways. When you find yourself reaching for another stone, or cutting another felt shape, or threading another piece of linen string, you will understand exactly why DIY ladybug decorations earn their devoted making community and their permanent place at the top of every cheerful, nature-inspired craft Pinterest board. Save your favorites now, especially the embroidered hoop art and the watercolor print series — they are the two projects that, once completed, make the most convincing argument that a ladybug decoration can be a genuinely beautiful piece of art rather than simply a charming seasonal craft.