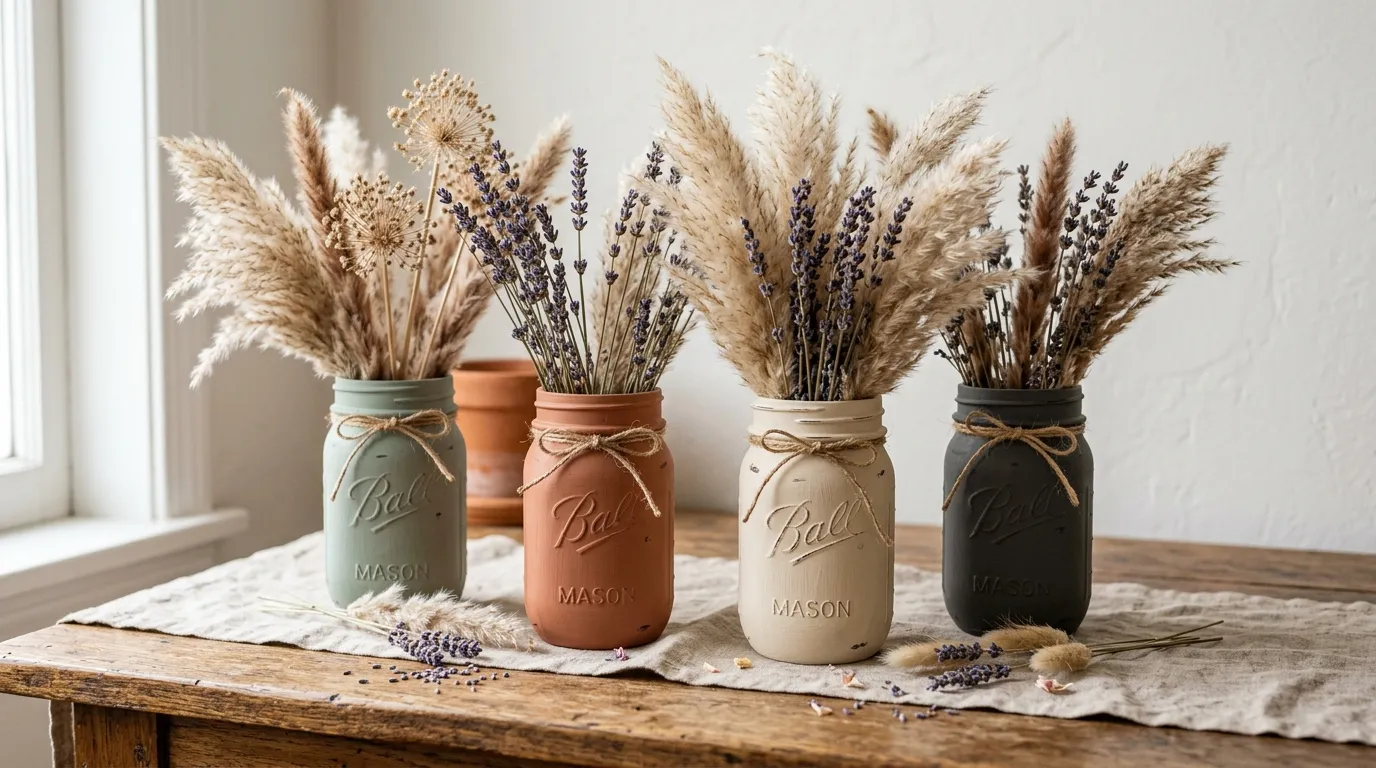
17 Mason Jar Projects for Cozy Home Decor
Mason jar projects are DIY home decor and functional crafts that repurpose standard canning jars — typically Ball, Kerr, or generic wide-mouth jars in pint, quart, and half-gallon sizes — into decorative objects, storage solutions, lighting fixtures, and display vessels through painting, filling, wrapping, or grouping techniques. Here are 17 ideas for using mason jars to create genuinely cozy, considered home decor that looks intentional rather than crafted.
Mason jars have been in American kitchens since 1858, and their design hasn’t changed because it doesn’t need to. The wide mouth, the heavy glass, the threaded lid — these aren’t aesthetic choices, they’re engineering solutions that happen to produce one of the most versatile and visually warm vessels in domestic life. The homes that use them well don’t try to disguise what they are. They lean into the clarity, the weight, the honest utility — and build something beautiful from exactly that. Here are 17 ideas worth saving — and stealing.
Why Mason Jar Projects Work So Well
What makes mason jar projects genuinely effective as home decor? Mason jar projects sit at a specific intersection of craft, sustainability, and honest material aesthetics — they use an object with genuine functional heritage and apply it to decorative purposes without requiring it to pretend to be something else. The mason jar’s design virtues (clarity, weight, uniform shape, wide mouth that accepts almost any filling) make it an extraordinarily adaptable vessel. As a home decor material, it draws from the American farmhouse and cottage aesthetic traditions where utility objects were pressed into decorative service without apology — a tradition that reads as warm, authentic, and grounded rather than manufactured or performative.
Core materials and approaches. The mason jar project toolkit is built around four intervention types: filling (with water and botanicals, candles, sand, stones, or fairy lights), coating (paint, chalk paint, chalkboard paint, twine wrapping, cement dipping), grouping (clusters of varied sizes on trays, in crates, on shelves), and mounting (wall-mounted arrangements using pipe fittings, wooden boards, or wire hangers). The most successful mason jar projects use the jar’s glass quality — its weight, its clarity, its slight blue-green tint — as an aesthetic asset rather than something to be covered or disguised. Natural fill materials (dried botanicals, sand, river stones, moss) and warm light sources (tea lights, fairy lights, pillar candles) consistently produce the most cozy results.
Why mason jar decor is sustainably relevant now. The mason jar’s sustained popularity in home decor is connected to the broader shift toward sustainable and reuse-focused domestic aesthetics — a mason jar is an object that already exists, has already been manufactured, and can serve an essentially infinite number of secondary purposes after its primary canning function is complete. This aligns with the growing preference for decor that is earned rather than purchased, handmade rather than mass-produced, and meaningful rather than merely decorative. Pinterest data consistently places mason jar DIY projects among the most-saved craft and home decor content year over year.
Can mason jar projects look genuinely sophisticated rather than craft-fair generic? Yes — and the distinction lies almost entirely in restraint and material quality. A single large mason jar filled with a carefully curated combination of dried botanicals, displayed on a styled wooden tray with two complementary objects, reads as considered interior design. Twelve mason jars in six different sizes covered in six different craft techniques reads as a craft project. The principles of curation, restraint, and material consistency are what separate sophisticated mason jar decor from the generic version.
Style at a Glance
| Element | Detail |
|---|---|
| Philosophy | Honest utility elevated through curation and restraint |
| Key Materials | Clear glass, beeswax, dried botanicals, natural twine, chalk paint |
| Key Colors | Clear glass blue-green, warm cream, natural linen, terracotta, sage |
17 Mason Jar Projects for Cozy Home Decor
1. Fairy Light Lantern Cluster on a Wooden Tray
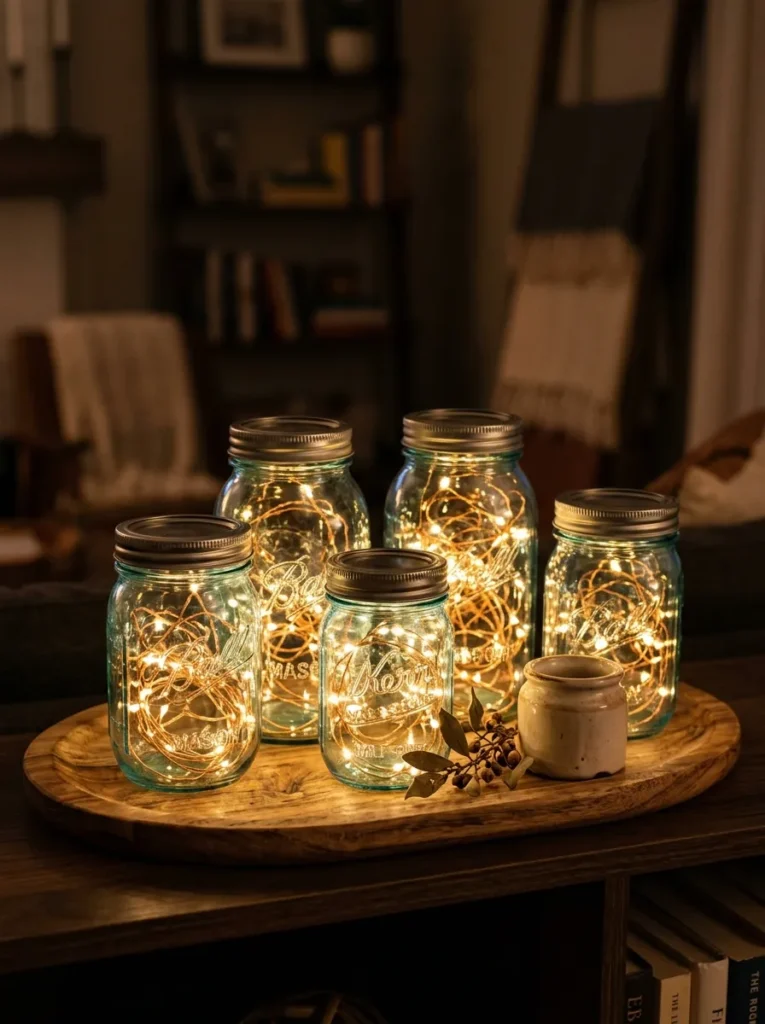
Vibe: A fairy light mason jar cluster feels warm and intimate — the table or shelf that generates its own amber atmosphere after dark.
Why it works: Mason jars filled with copper fairy lights are the mason jar project with the highest warmth-to-effort ratio — the glass amplifies and distributes the fairy lights’ warm glow while the jar’s form creates a pool of contained light that reads as more intentional and intimate than the same lights strung openly. The design principle is concentrated warm light: grouping five jars of varied sizes on a single wooden tray creates a composed light installation that functions as both ambient lighting and decorative display simultaneously. The slight blue-green tint inherent in standard clear mason jar glass adds a warmth and depth to the amber fairy light glow that a neutral clear glass vessel cannot achieve.
How to get it: Coil a strand of battery-operated copper fairy lights (2700K, 20–30 lights per strand per jar) loosely inside each jar so the lights distribute throughout the jar’s interior volume rather than pooling at the bottom. Leave the battery pack draped outside the jar under the tray for invisible power access. Vary the jar sizes — one quart, two pints, and two half-pints — for the height variation that creates visual interest in the cluster. Use a single wooden tray or a small wooden crate to contain and unify the grouping.
Quick Win: Battery-operated copper fairy lights in a 20-light strand cost $5–$8 each — filling three mason jars already on a kitchen shelf creates an immediate warm ambient light cluster for under $25.
Shop The Look
| Product |
|---|
| Battery operated copper fairy lights 20 strand warm |
| Mason jar set quart pint half pint mixed |
| Oval wooden serving tray natural finish |
| Small ceramic decorative object for tray |
| Dried botanical sprig bundle for styling |
Also view: 15 Luxury Interior Decor Ideas for Every Room
2. Chalk-Painted Mason Jar Vases in Muted Tones
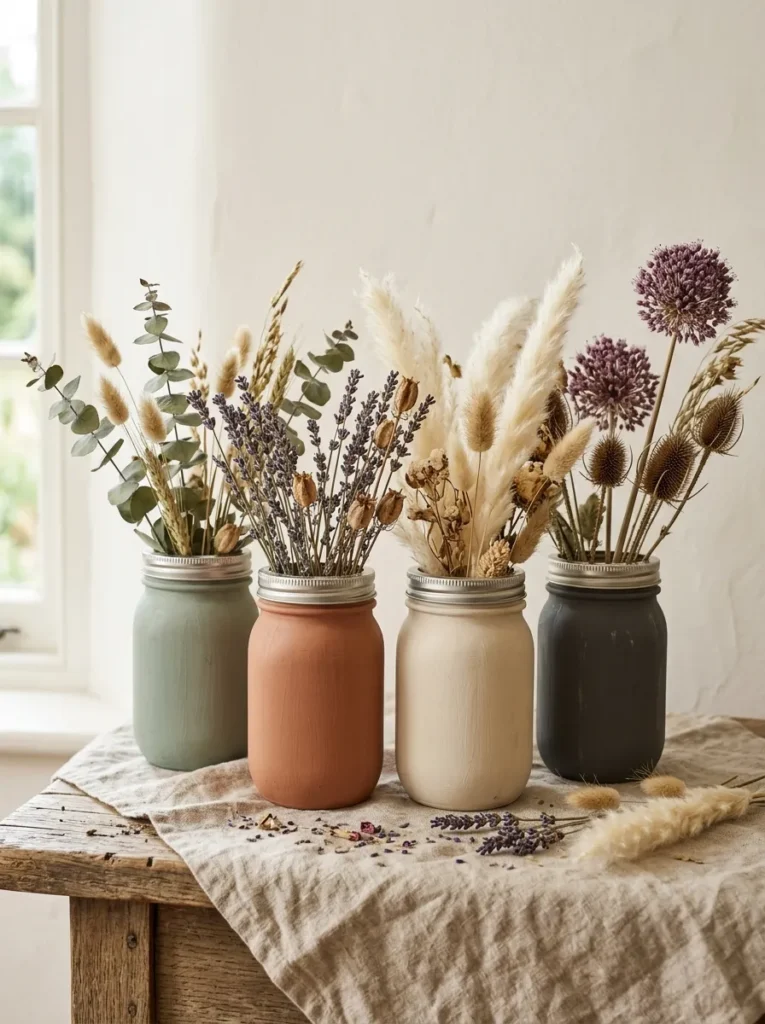
Vibe: Chalk-painted mason jar vases feel botanical and warm — the vase collection that looks like it was assembled over years rather than made in an afternoon.
Why it works: Chalk paint on mason jar exteriors creates a matte, slightly textured surface that reads as genuinely ceramic-adjacent — the paint obscures the glass’s transparency while adding the tactile warmth of a clay or painted ceramic surface. The design principle is material transformation through coating: a chalk-painted mason jar is visually unidentifiable as a mason jar, which expands its design vocabulary from “rustic farmhouse” to whatever palette and finish the chalk paint introduces. Grouping four jars in four closely related muted tones (all from the same warm family — sage, terracotta, cream, charcoal) creates a color-family relationship between the jars that reads as a considered set rather than individual objects.
How to get it: Apply chalk paint directly to clean, dry mason jar exteriors without priming — chalk paint’s calcium carbonate content allows adhesion to glass without a primer layer. Use a wide flat brush and apply in consistent horizontal strokes for a uniform surface, or use a dry-brush technique (very little paint on the brush, dragged quickly across the surface) for a more textured, aged effect. Two coats provide full coverage. Seal with clear furniture wax if the jars will be handled frequently. Fill with dried botanicals — no water required.
Shop The Look
| Product |
|---|
| Chalk paint set muted tones sage terracotta cream |
| Mason jar set wide mouth quart set of 4 |
| Dried pampas grass stem bundle natural |
| Dried lavender bundle for vase display |
| Clear furniture wax for chalk paint sealing |
3. Beeswax Candle Holders with Pressed Flower Exterior
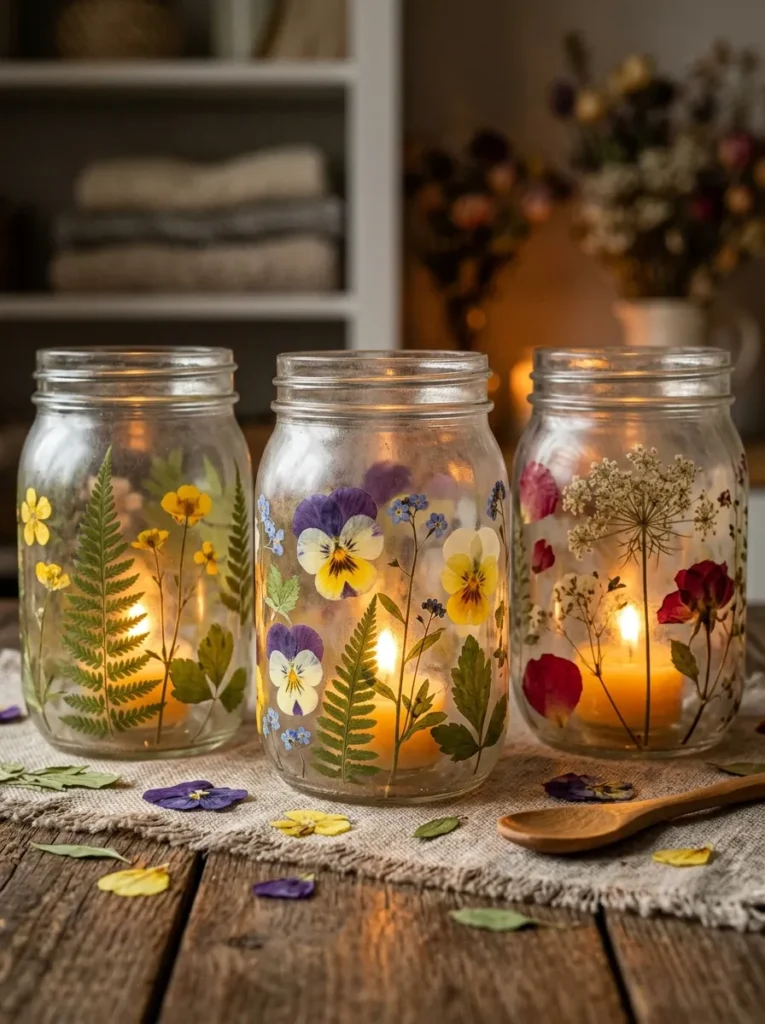
Vibe: Pressed flower candle holders feel delicate and luminous — the candlelight that reveals itself through botanical silhouettes.
Why it works: Pressed botanical specimens adhered to the exterior of a mason jar create a botanical-glass lantern effect when backlit by a candle — the translucent pressed plants become visible in their full color and detail only when lit from behind, transforming an unlit jar decorated with dried flowers into a glowing botanical display. The design principle is light-activated decoration: the pressed botanicals are passive elements until the candle inside is lit, at which point the warm light activates the botanical design and creates the luminous effect. This dual state — decorative when unlit, luminous when lit — gives the piece a dynamic quality that a static decorative object cannot achieve.
How to get it: Press ferns, pansies, and small-leaf specimens between heavy books for 48 hours minimum (or use a microwave press for 2-minute results). Brush a thin layer of Mod Podge onto the area of the jar where you want to place the first botanical, press the specimen firmly, then brush another layer of Mod Podge over the top. Allow to dry fully (30 minutes) before adding adjacent specimens. Cover the full exterior with overlapping botanicals or create a deliberate focal arrangement on one side. Seal with two coats of matte Mod Podge. Place a beeswax tealight inside only — never a high-heat candle that could crack the glass.
Shop The Look
| Product |
|---|
| Pressed flower set assorted dried botanical |
| Matte Mod Podge decoupage medium |
| Beeswax tealight candles set of 12 |
| Small foam brush set for decoupage |
| Microwave flower press quick dry kit |
4. Rope-Wrapped Mason Jar Organizers for the Kitchen
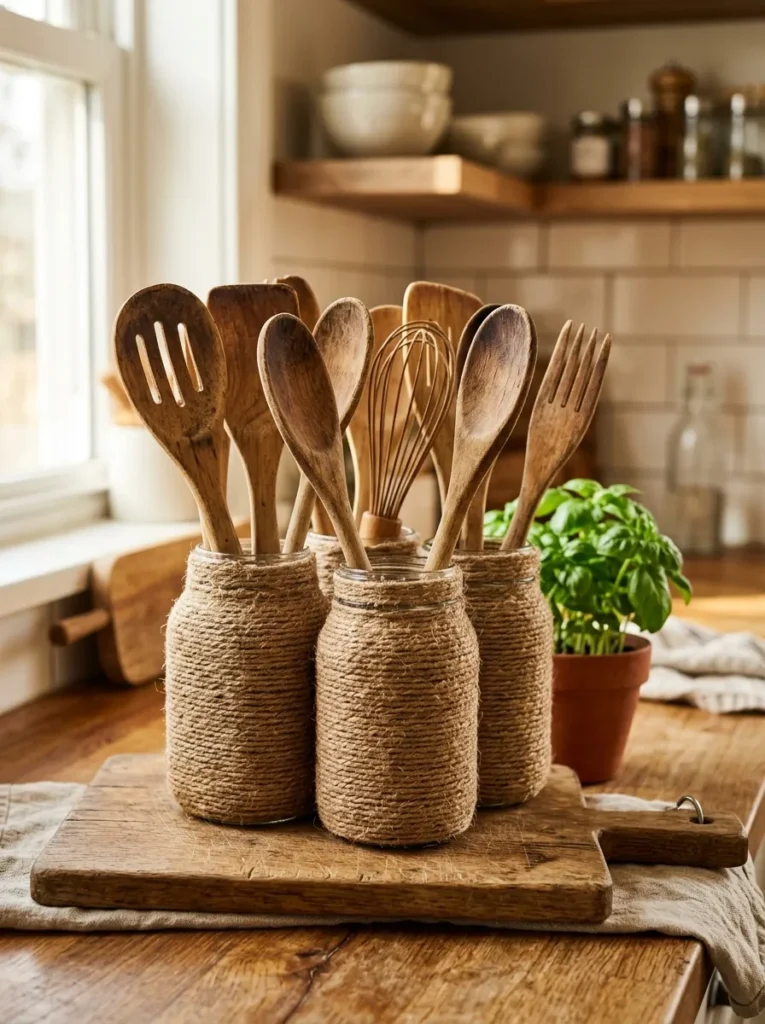
Vibe: Rope-wrapped mason jar organizers feel warm and completely resolved — kitchen storage that looks like it was chosen for the counter rather than tolerated on it.
Why it works: Jute rope wrapping converts a mason jar from a glass vessel into a textile object — the transformation is so complete that the jar’s glass origin is invisible beneath the wrapping, which means the finished piece reads as a purpose-made organizer rather than a repurposed container. The design principle is material covering as design transformation: unlike paint (which modifies the glass surface), wrapping with natural rope replaces the visual material entirely, creating a new object with different tactile and aesthetic qualities. Natural jute specifically connects the kitchen organizer to the warm, natural material palette that contemporary farmhouse and organic kitchen aesthetics use across cutting boards, linen towels, and wooden spoons.
How to get it: Apply a line of craft glue to the base of the jar and press the rope end to secure. Wrap tightly, applying small dots of craft glue every 3–4 wraps to maintain adhesion. Keep each row of rope pushed snugly against the previous row — gaps in the wrapping reveal the glass below and disrupt the surface uniformity. When reaching the jar’s neck, tuck the rope end under the last few wraps and secure with glue. Total wrapping time per jar: 15–20 minutes.
Shop The Look
| Product |
|---|
| Natural jute rope 6mm 50ft roll |
| Craft glue clear precision tip bottle |
| Mason jar quart wide mouth set of 4 |
| Wooden kitchen utensil set for display |
| Small potted herb basil thyme for counter |
5. Terrarium Mason Jar with Moss and Succulents
Vibe: A mason jar terrarium feels alive and contained — a small, self-sufficient green world in a vessel that costs almost nothing.
Why it works: A mason jar terrarium is the mason jar project that most directly connects the home to the natural world — living plants and preserved moss inside a clear glass jar create a miniature landscape that brings organic life into any indoor surface. The design principle is visible layering as composition: the clear glass allows the terrarium’s internal layers — drainage stones, moss, soil, succulent — to be seen in cross-section, converting the functional construction of a planted container into a visual element. The layered cross-section viewed through the glass is as much of the terrarium’s visual appeal as the plants above it.
How to get it: Layer a 1-inch depth of small river pebbles at the jar base for drainage. Add a thin layer of activated horticultural charcoal (prevents bacterial growth in the closed-bottom environment). Add 2 inches of cactus and succulent potting mix. Plant one small succulent in the center, pressing the roots into the soil firmly. Fill any gaps with preserved sheet moss, pressing it to cover all visible soil. Add decorative pebbles or sand as the surface layer. Water very sparingly — one tablespoon every two to three weeks is typically sufficient.
Shop The Look
| Product |
|---|
| Wide mouth quart mason jar set of 3 |
| Small succulent assortment live set of 3 |
| Preserved sheet moss natural green |
| River pebble small bag for drainage |
| Cactus succulent potting mix bag |
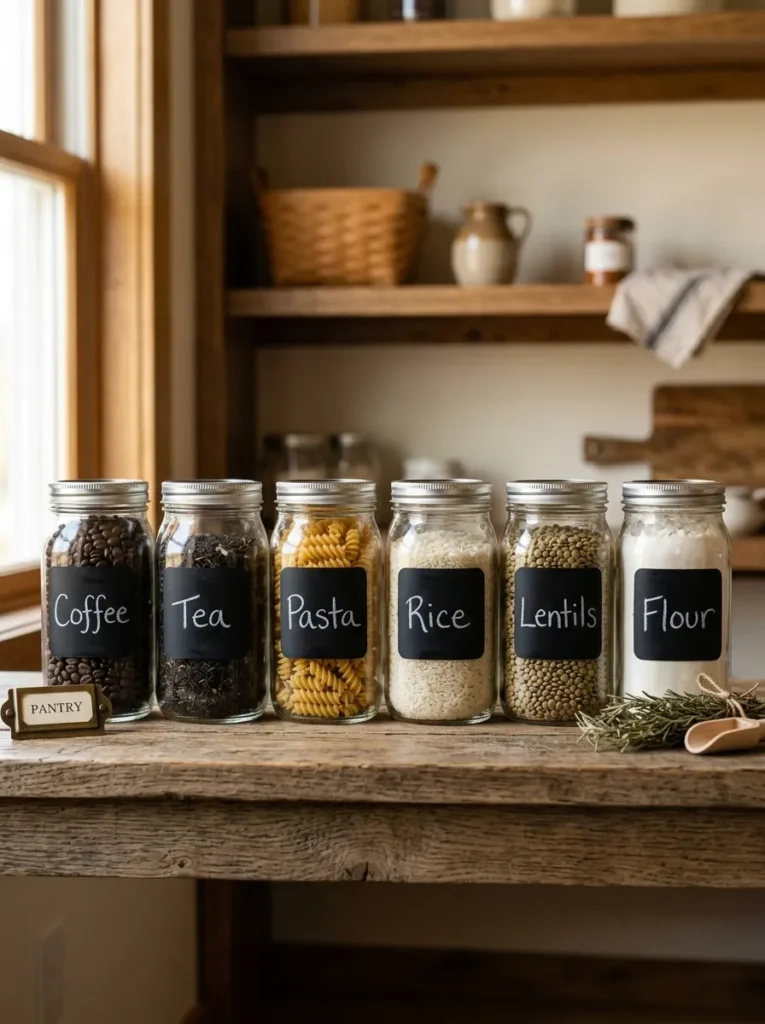
6. Chalkboard-Painted Mason Jar Storage Labels
Vibe: Chalkboard-labeled mason jar pantry storage feels organized and personal — the pantry that looks considered rather than accumulated.
Why it works: Chalkboard paint applied to a specific section of a mason jar’s exterior creates a built-in labeling system that is both permanently attached and infinitely changeable — the chalk label can be wiped away and rewritten as the jar’s contents change, making the storage system permanently adaptable. The design principle is functional personalization: a pantry of matching mason jars with chalkboard label sections reads as a designed storage system rather than a collection of repurposed containers, because the consistent format and hand-lettered labels give the collection a visual coherence that branded packaging cannot achieve. The combination of opaque chalkboard section (label) and clear glass section (contents visibility) provides both the organizational information of a label and the contents visibility of clear storage simultaneously.
How to get it: Apply chalkboard paint to a clean, dry section of the jar exterior using a small foam brush — either a free-form organic shape or use painter’s tape to create a clean-edged rectangle or oval. Two to three coats of chalkboard paint, allowing full drying between coats. Cure the chalkboard surface by rubbing the full painted area with the side of a piece of chalk, then wiping clean with a damp cloth — this prevents the first written label from ghosting permanently into the surface.
Quick Win: A small can of chalkboard paint costs $8–$12 and covers twelve or more mason jars — the entire pantry jar labeling system costs under $15 in paint plus the jars themselves.
Shop The Look
| Product |
|---|
| Chalkboard paint black small can |
| Mason jar quart wide mouth set of 6 |
| Chalk marker white for jar labeling |
| Small foam brush set for chalkboard application |
| Wooden pantry shelf for display |
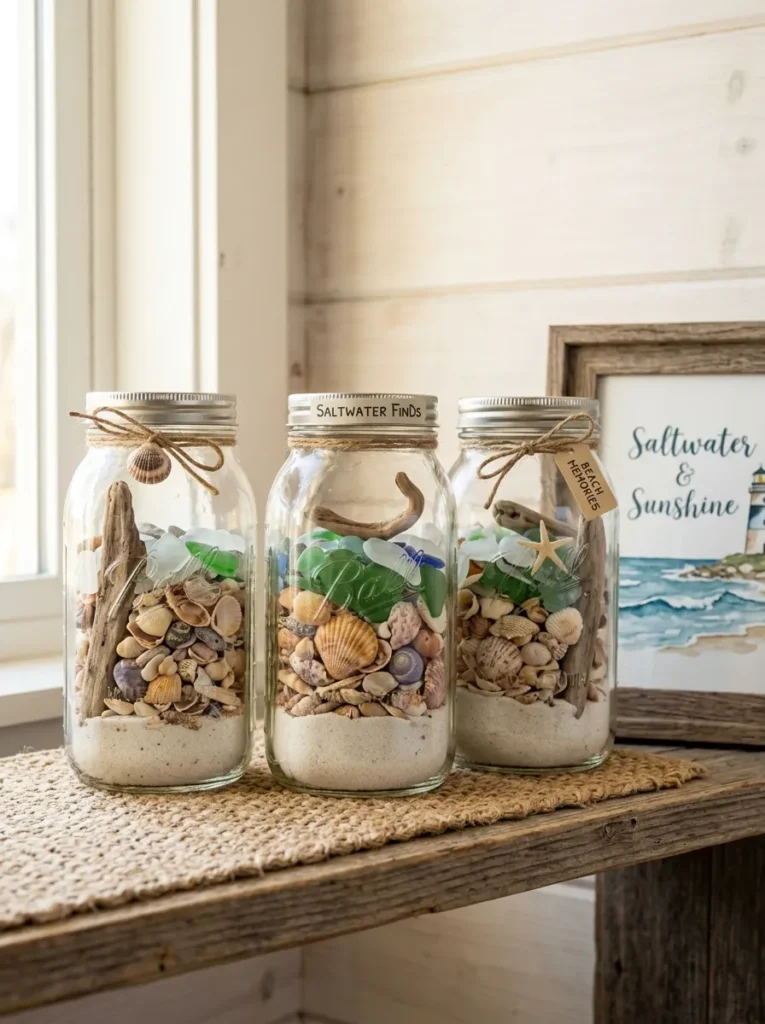
7. Sand and Shell Beach Memory Jar
Vibe: A beach memory mason jar feels nostalgic and specific — the vacation that stays on the shelf after the tan fades.
Why it works: A filled mason jar that contains genuinely collected materials — sand and shells from a specific beach, river stones from a meaningful walk, dried flowers from a garden — is the home decor category that most directly connects an object to its owner’s personal narrative. The design principle is memory made material: the contents of the jar are not merely decorative but commemorative, giving the object a personal meaning that purchased decor cannot carry. The clear glass of the mason jar is essential to this function — it displays the contents as a visible collection rather than concealing them, making the jar simultaneously a storage vessel and a specimen display.
How to get it: Collect sand, shells, and sea glass in a resealable bag during a beach visit specifically for this purpose. At home, layer the materials in the jar from heaviest and largest at the base to smallest and most delicate at the top. Press the most visually interesting shells against the interior glass surface before adding surrounding sand — they become visible through the glass as a display. Add a piece of driftwood or a small message rolled and tucked in last. Label the base or lid with the location and date in permanent marker.
Shop The Look
| Product |
|---|
| Wide mouth quart mason jar set of 3 |
| Craft sand white fine decorative |
| Small decorative shell assortment bag |
| Sea glass pieces decorative assorted |
| Small driftwood piece decorative natural |
8. Hanging Mason Jar Wall Planter with Pipe Fittings
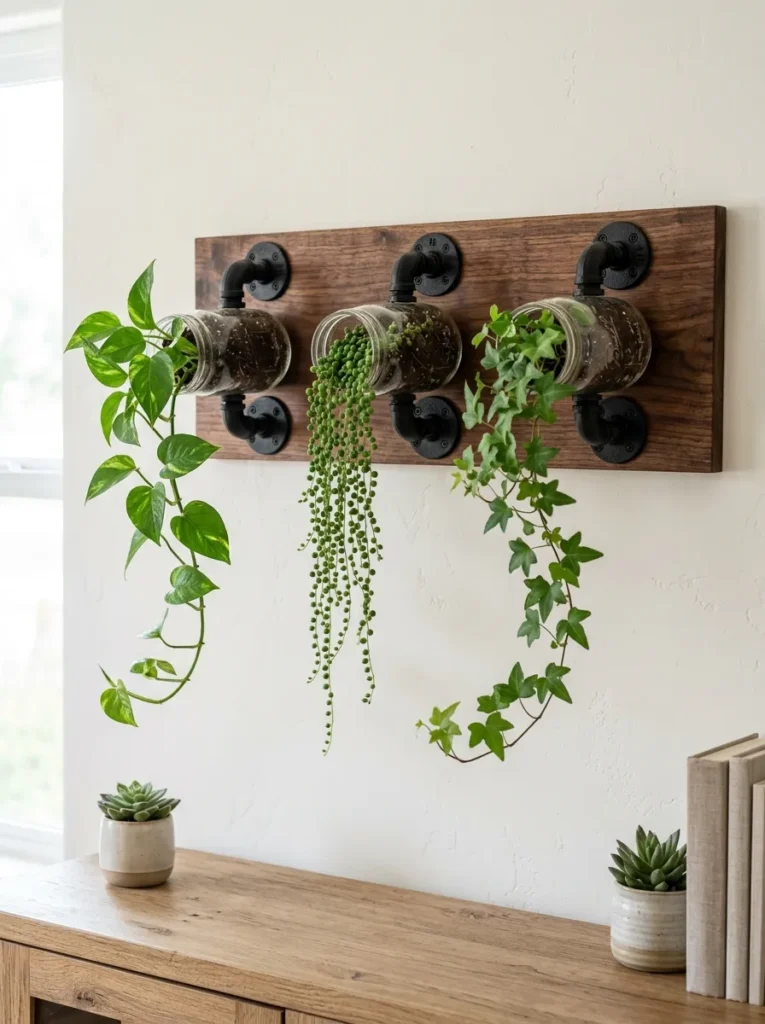
Vibe: A wall-mounted mason jar planter feels architectural and alive — the living wall feature that doesn’t require a wall of $200 pocket planters to achieve.
Why it works: Mounting mason jars horizontally on a wooden board using pipe hardware creates a wall planter installation with a genuinely designed, industrial-meets-organic aesthetic that reads as considerably more expensive and complex than it actually is. The design principle is hardware as design element: black pipe clamps and flanges are not disguised or minimized — they are displayed as a visible, intentional hardware choice that gives the installation its distinctive character. The horizontal jar orientation (opening facing outward) allows plants to be planted in the jar horizontally with their roots in moist soil inside the jar and their trailing stems emerging from the opening and cascading downward — a planting orientation that creates organic movement and vertical visual interest.
How to get it: Cut or purchase a wooden board (reclaimed wood or a stained pine board) at 60–80 cm length. Mount three 3/4-inch pipe clamps (the size that fits a standard pint mason jar body) at even intervals along the board using wood screws. Stain or seal the board before mounting the clamps. Fill each jar two-thirds full with potting mix, plant a small trailing plant, and slide the jar into the clamp with the opening facing outward. Mount the board to the wall using two heavy-duty picture hooks or direct screw mounting into studs.
Shop The Look
| Product |
|---|
| Black pipe clamp flange 3/4 inch set of 3 |
| Pint mason jar wide mouth set of 3 |
| Reclaimed wood board or pine plank 60cm |
| Wood stain dark walnut small can |
| Trailing pothos or string of pearls plant small |
9. Mason Jar Snow Globe with Winter Scene
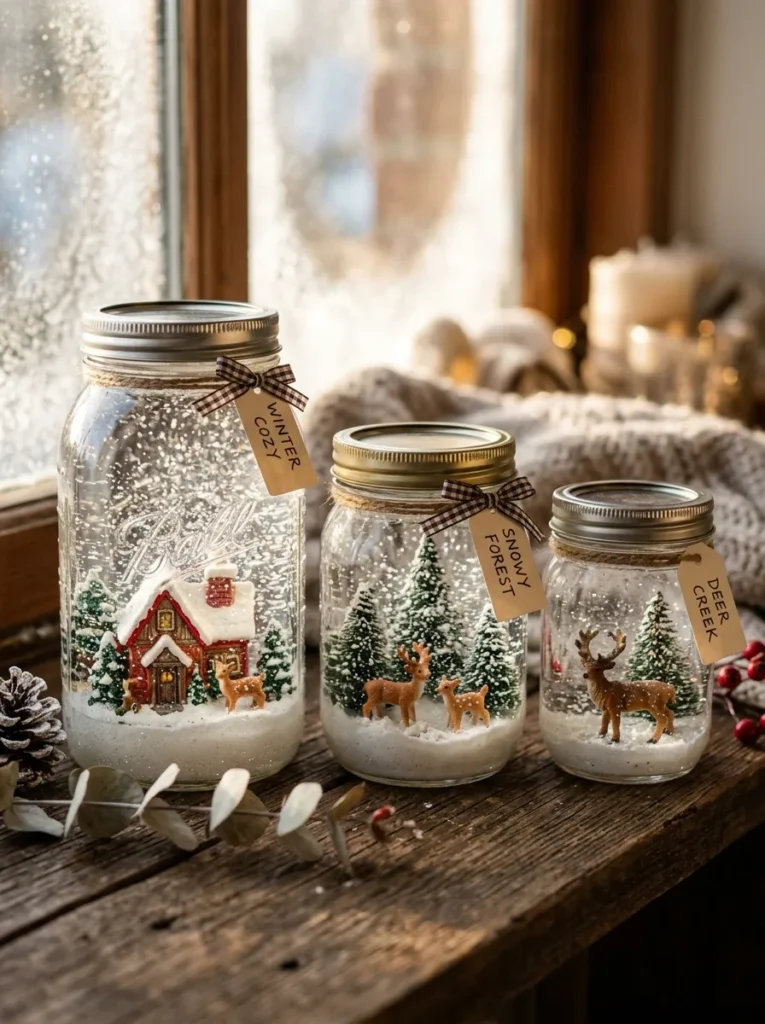
Vibe: A mason jar snow globe feels whimsical and warm — the decoration that makes adults feel the specific nostalgia of childhood winter.
Why it works: The snow globe is one of the most universally emotionally resonant decorative objects — its combination of a miniature scene, enclosed liquid environment, and suspended floating material creates a contained world that triggers a specific quality of contemplative pleasure. A mason jar snow globe version applies this principle to a vessel that provides significantly more interior volume than a standard commercial snow globe, allowing more elaborate interior scenes. The design principle is miniature world-building in transparent enclosure: the clear glass of the mason jar is essential — it is the viewing window into the contained world, and the jar’s generous opening width allows elaborate scenes to be constructed inside.
How to get it: Glue miniature figurines (ceramic house, small evergreen, animal figure) to the interior of the mason jar lid using waterproof epoxy. Allow 24 hours to cure. Fill the jar almost to the brim with distilled water and add 2–3 tablespoons of glycerin (available at pharmacies) — the glycerin slows the glitter’s descent, creating the slow-fall effect of a quality snow globe. Add 1–2 tablespoons of white iridescent glitter. Screw the lid (with attached scene) tightly onto the jar and seal the lid thread with a thin line of waterproof silicone sealant. Invert to display.
Shop The Look
| Product |
|---|
| Miniature ceramic house figurine small |
| White iridescent glitter for snow globe |
| Glycerin liquid pharmacy grade |
| Waterproof epoxy glue for figurine mounting |
| Wide mouth quart mason jar set of 3 |
10. Mason Jar Herb Garden on a Kitchen Windowsill
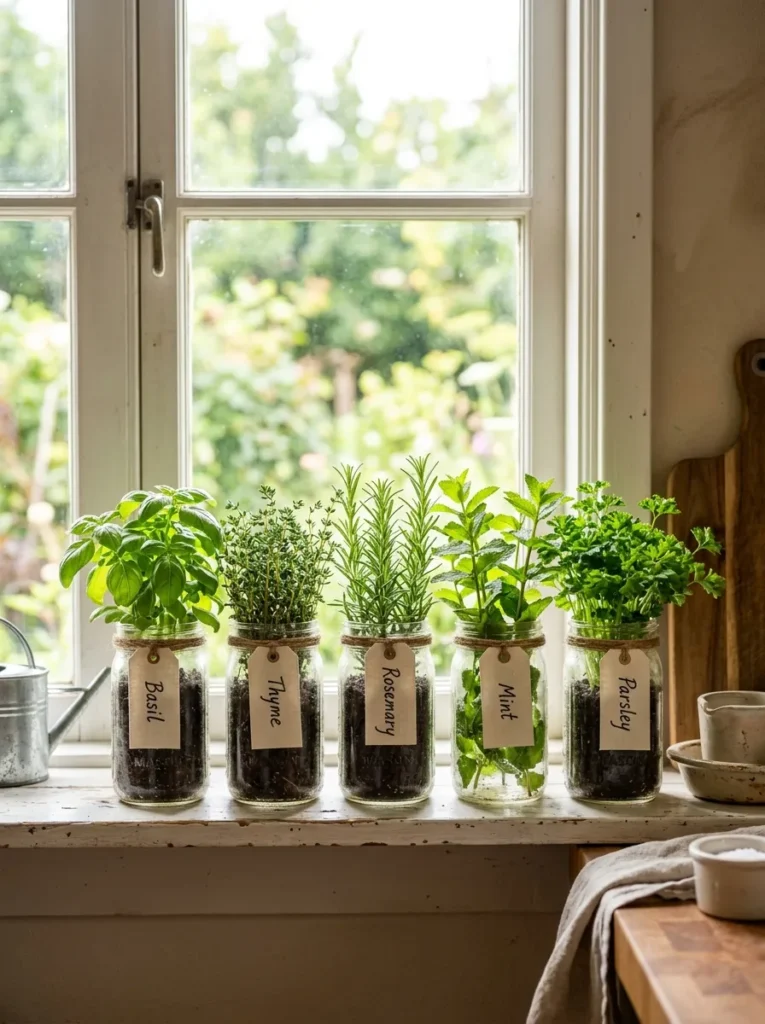
Vibe: A mason jar herb garden on the windowsill feels freshly domestic — the kitchen detail that makes cooking feel like it happens somewhere that matters.
Why it works: A kitchen herb garden in mason jars is the mason jar project that most directly integrates with daily domestic life — the herbs are used regularly, which means the jars are interacted with rather than merely displayed, giving them a functional presence that purely decorative mason jar projects lack. The design principle is living utility on display: when functional objects (herb plants) are organized in matching vessels (mason jars) with consistent labeling (linen tags with jute twine) on the kitchen’s most naturally lit surface (the windowsill), they read as a designed kitchen feature rather than improvised herb storage. Bright natural window light behind the herb jars creates the backlit silhouette effect that makes herb foliage appear luminous.
How to get it: Add a layer of small pebbles to each jar base for drainage (mason jars have no drainage holes — the pebble layer prevents root rot by keeping roots above standing water). Fill with herb potting mix. Plant small herb starts purchased from a garden center or grocery store. Add a linen label tag (cut from natural linen fabric, hand-written with a permanent marker, and tied with jute twine through a small hole punched in the tag) identifying each herb. Water sparingly — the closed-bottom jar retains moisture longer than a drainage-hole pot.
Quick Win: Five pint mason jars on a sunny windowsill with herb starts from a grocery store ($2–$3 each) and homemade linen labels creates a complete kitchen herb garden for under $25 in jar and plant costs.
Shop The Look
| Product |
|---|
| Pint mason jar wide mouth set of 6 |
| Herb starter plant set basil thyme rosemary |
| Herb potting mix small bag |
| Natural linen fabric for label cutting |
| Jute twine thin 1mm for label tying |
11. Layered Sand Art Mason Jar
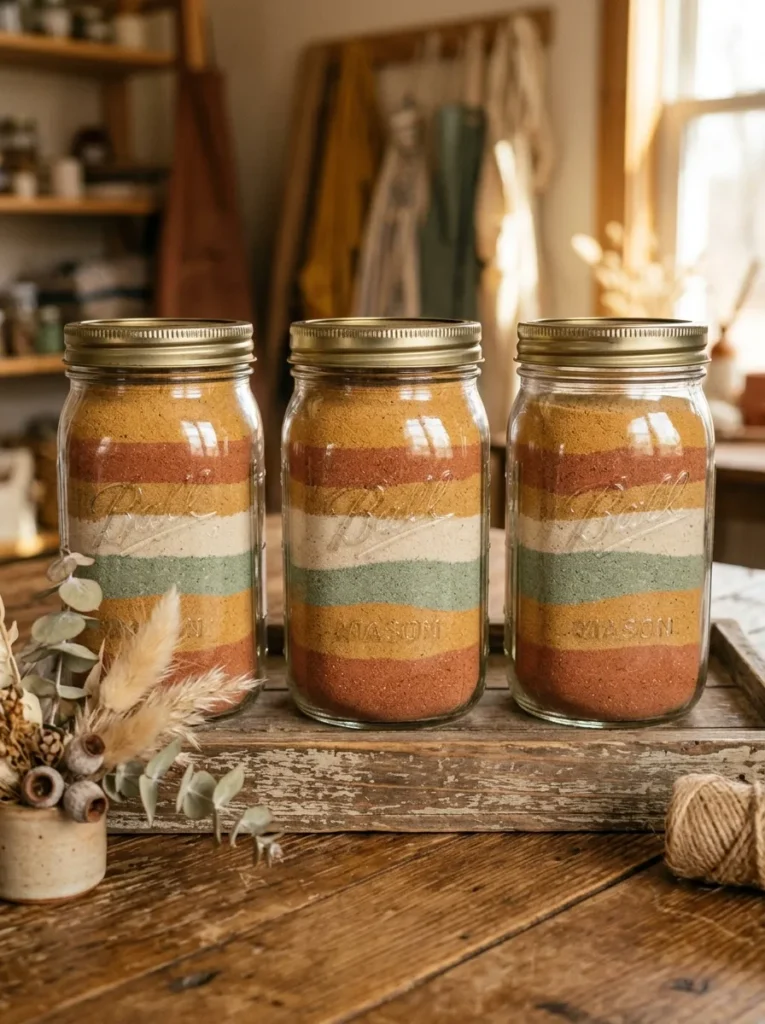
Vibe: A layered sand art jar feels warm and graphic — the decorative object that is both a color palette and a composition simultaneously.
Why it works: Layered colored sand in a clear mason jar creates a cross-section composition that is visible through the glass as a series of horizontal color bands — the jar is simultaneously a container and a display case for the sand’s color arrangement. The design principle is visible layering as decoration: the same technique used in geological specimen displays is applied here as a pure color and texture composition. A warm earth-tone sand palette — terracotta, ochre, cream, and dusty sage — creates a desert landscape color story that connects to the broader warm, natural aesthetic of contemporary home decor without referencing any specific landscape literally.
How to get it: Pour each color of sand into the jar slowly through a paper funnel, using a wooden skewer to gently press the sand against the glass wall to ensure clean, visible layer edges. Vary layer thicknesses — thin layers (1 cm) alternating with thick layers (3–4 cm) create more visual interest than uniform layer heights. Do not shake or jar the container after layering — the layers will mix at their edges if disturbed. Seal the top with the jar lid or a cork to prevent accidental disruption.
Shop The Look
| Product |
|---|
| Colored craft sand set earth tones terracotta ochre |
| Wide mouth mason jar quart set of 3 |
| Paper funnel pack for sand pouring |
| Wooden skewer set for sand pressing |
| Cork stopper set for jar sealing |
12. Mason Jar Oil Lamp with Floating Wick
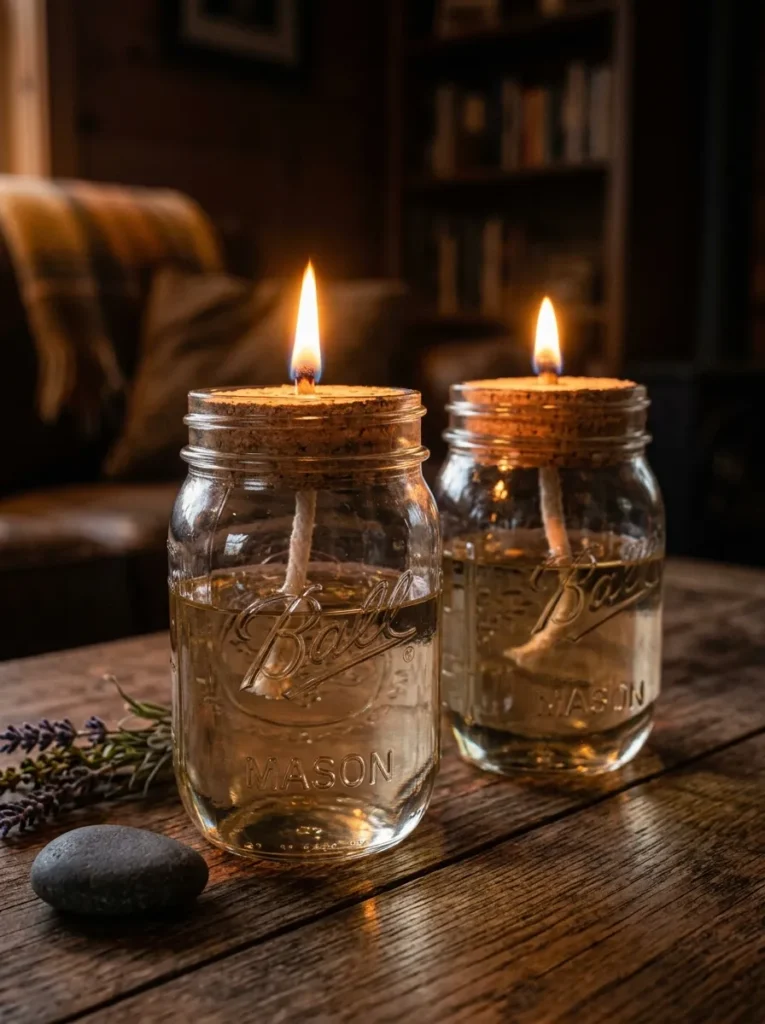
Vibe: A mason jar oil lamp feels elemental — fire held in glass, the oldest form of domestic light in a vessel that costs almost nothing.
Why it works: A mason jar oil lamp is the most elemental mason jar light project — it uses the jar’s transparent glass to display the oil reservoir while the floating wick and flame above create a genuinely functional light source with warm, intimate quality. The design principle is functional transparency: the clear glass mason jar allows the oil column to be visible beneath the floating flame, creating a visual connection between fuel and fire that gives the lamp a quality of honest functional display. The amber color of standard lamp oil visible through the glass adds warmth to the light source before the wick is even lit.
How to get it: Fill a mason jar two-thirds with clear lamp oil (paraffin or citronella lamp oil — never cooking oil, which goes rancid). Create a floating wick holder by pushing a cotton wick through the center of a small cork disk (pre-drilled or purchased as a floating wick holder). Float the cork on the oil surface with the wick extending 1 cm above the cork. Light with a long match or lighter. Place on a heat-safe, non-flammable surface and never leave unattended. Extinguish by placing the jar lid over the opening to starve the flame of oxygen.
Shop The Look
| Product |
|---|
| Clear lamp oil paraffin indoor |
| Floating wick holder cork set |
| Cotton wick for oil lamp set |
| Wide mouth pint mason jar set of 2 |
| Long match set for candle lighting |
13. Cement-Dipped Mason Jar Vases
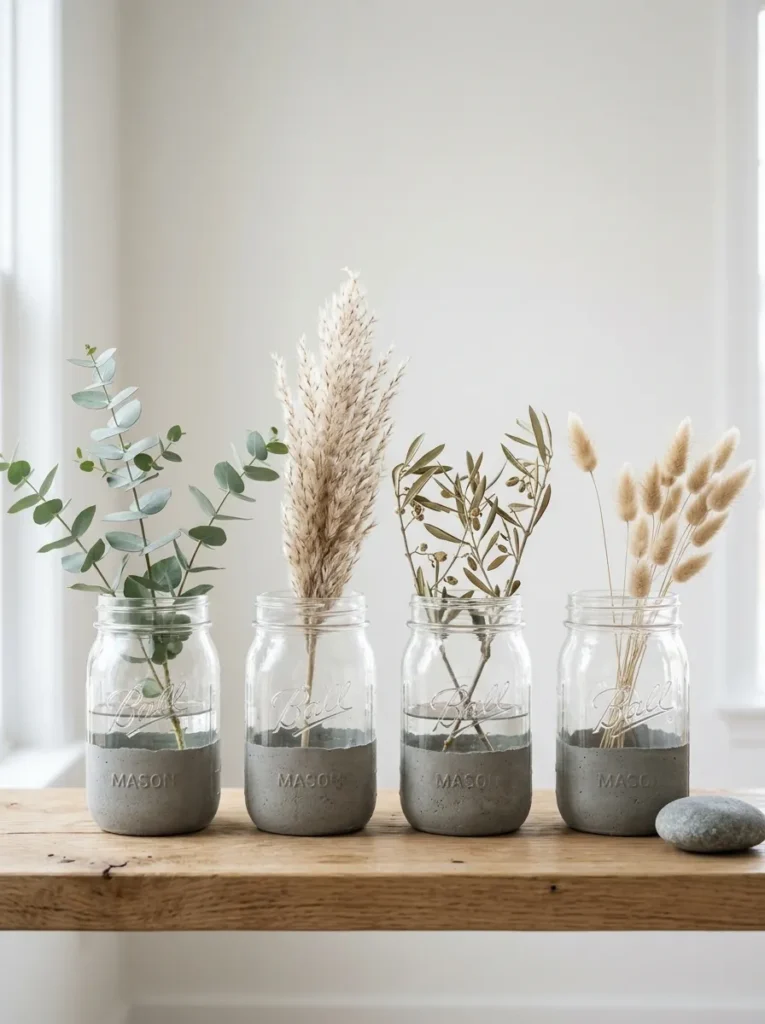
Vibe: A cement-dipped mason jar feels minimal and architectural — the craft project that looks most like it belongs in a design store.
Why it works: Cement dipping is the mason jar technique that most effectively moves the jar from a farmhouse or rustic aesthetic into a contemporary, minimal design register — the raw concrete texture and grey tone connect the jar to the industrial-meets-organic design language of contemporary ceramics and concrete accessories. The design principle is material contrast through partial coating: by coating only the lower third of the jar in cement while leaving the upper two-thirds as clear glass, the two materials create a dialogue between industrial concrete and transparent glass that neither material alone can generate. The clean horizontal line where the two materials meet reads as a deliberate design decision rather than an accident of process.
How to get it: Mix concrete craft powder (or use concrete paint for a thinner coating) to a thick cream consistency. Dip the lower third of an inverted jar into the mixture, allowing excess to drip off. Place right-side up on a piece of waxed paper to cure. Use painter’s tape at the desired cement line for a clean horizontal edge — apply the tape, dip or paint up to the tape edge, allow to partially set, then remove the tape carefully before the concrete fully hardens. Allow 24–48 hours full cure before filling with water or botanicals.
Shop The Look
| Product |
|---|
| Concrete craft powder small bag grey |
| Wide mouth mason jar pint set of 4 |
| Painter’s tape for clean cement line |
| Waxed paper roll for curing surface |
| Single stem dried botanical for display |
14. Farmhouse Bathroom Organizer Set
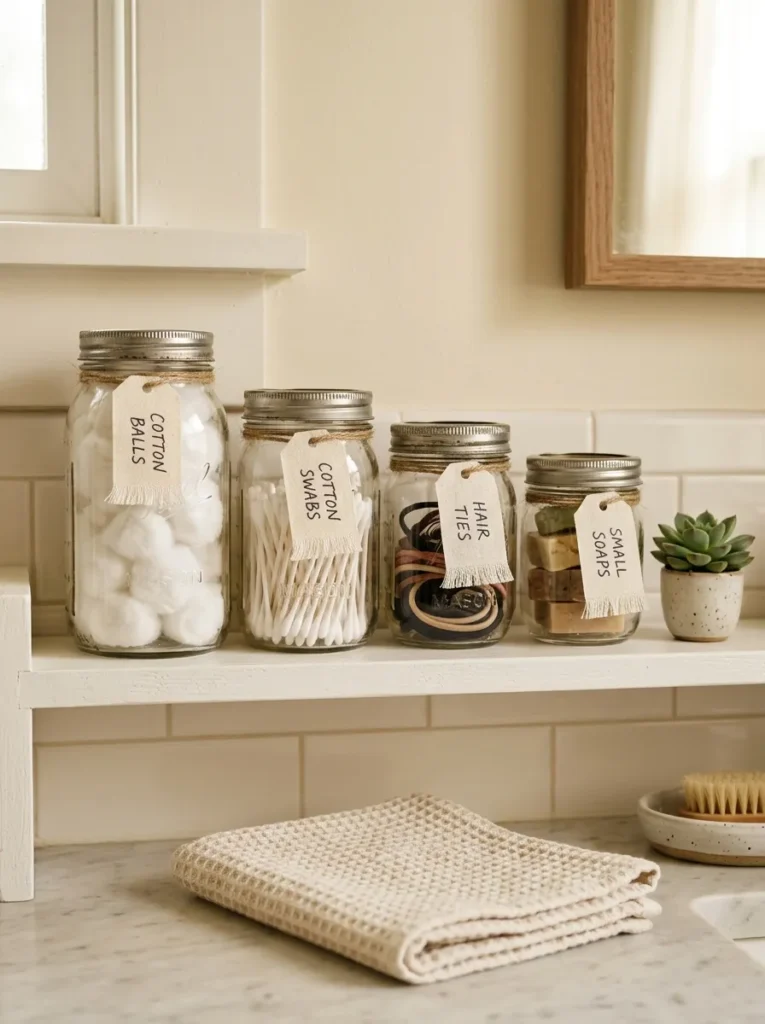
Vibe: A mason jar bathroom organizer set feels clean and considered — the bathroom counter that looks styled rather than randomly equipped.
Why it works: Bathroom organization in matching mason jars applies the principle of vessel consistency as visual system — when all bathroom counter items are stored in matching vessels with consistent labeling, the counter reads as an organized system rather than an accumulation of individual products. The design principle is categorical unity through matching containers: clear mason jars allow the contents to be visible (which maintains the functional information of what each jar holds) while the uniform jar format creates the visual consistency that reads as interior design rather than bathroom clutter. The linen label tags add the warm personal touch that distinguishes a mason jar bathroom organizer from an office supply organizer.
How to get it: Choose rust-proof lids for bathroom mason jar organizers — standard mason jar lids will rust in the bathroom’s humid environment. Replace with plastic lids or use the jar without a lid for frequently accessed items (cotton balls, cotton swabs). Cut linen labels from natural linen fabric, write contents in pencil or thin permanent marker, and tie around the jar neck with a short length of jute twine. Group on a small wooden tray or directly on a shelf in a consistent arrangement.
Shop The Look
| Product |
|---|
| Mason jar set mixed sizes 4 piece with lids |
| Plastic rust proof mason jar lid set |
| Natural linen for label fabric |
| Jute twine thin for label tying |
| Small wooden bathroom tray for grouping |
15. Painted Ombre Mason Jar Vase Collection
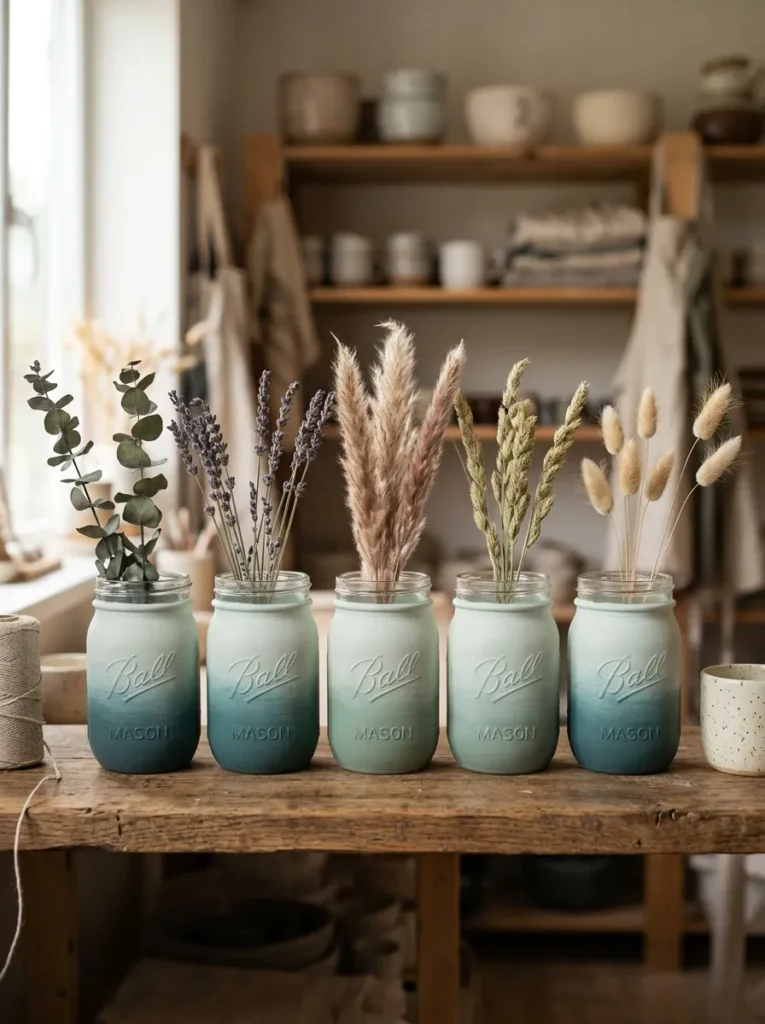
Vibe: An ombre mason jar collection feels calm and considered — the color graduation that takes an ordinary collection of jars and makes them read as a single composed installation.
Why it works: Painting a collection of mason jars in a graduated ombre sequence — from deep saturated tone to pale near-neutral — creates a color installation that reads as a single composed statement rather than a collection of individual objects. The design principle is sequential color as composition: when objects are arranged in a clear color gradient, the eye reads the arrangement as a single horizontal color story that moves from dark to light, which creates visual momentum and directionality that a random or unordered color arrangement cannot achieve. The ombre technique is more forgiving than a strict color match because the graduation allows slight tonal variation between jars — making it accessible for first-time painters.
How to get it: Mix your darkest color in full saturation for the first jar. Add increasing amounts of white to the same base color for each subsequent jar — the white content increases by approximately 20% per jar across five jars, ending at roughly 80% white for the palest jar. Apply to clean, dry jar exteriors using a sponge brush for the most even coverage. Two to three coats per jar. Display in order from darkest to lightest with consistent spacing between jars.
Shop The Look
| Product |
|---|
| Acrylic paint set teal and sage |
| White acrylic paint for ombre mixing |
| Sponge brush set for smooth application |
| Wide mouth mason jar set of 6 |
| Dried botanical stem set for display |
16. Wax-Sealed Mason Jar Candle
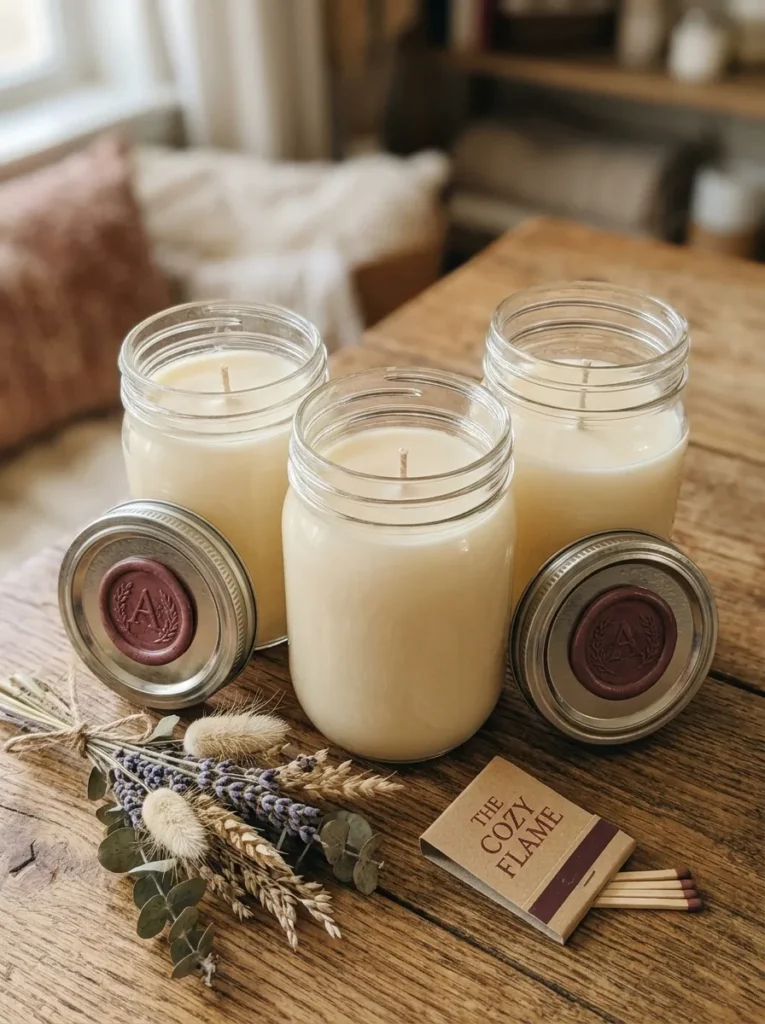
Vibe: A mason jar soy candle feels warm and gift-ready — the handmade object that looks and smells like something carefully considered.
Why it works: A mason jar soy candle is the project that most directly demonstrates the elevation available through quality material selection — the same glass jar that holds preserved tomatoes becomes a premium home fragrance product when filled with quality soy wax and a cotton wick. The design principle is material quality as perceived value: soy wax has a naturally creamy, matte surface when set that reads as considerably more luxurious than paraffin wax, and a clean cotton wick centered precisely in the jar reads as intentionally crafted rather than casually assembled. The wax seal on the lid converts a functional closure into a decorative and gift-signaling element.
How to get it: Melt soy wax flakes (coconut-soy blend melts at a lower temperature and produces a creamier surface) in a double boiler to 80°C. Add fragrance oil at 10% by weight of the wax volume (for a 240ml jar, add approximately 24ml fragrance oil) at 75°C and stir for 2 minutes. Pour into a pre-warmed mason jar with a centered, wick-bar-secured cotton wick at 65°C. Allow to cool undisturbed for 24 hours. Trim the wick to 6mm before use. Apply a wax seal stamp to the lid for a finished, gift-ready presentation.
Quick Win: A 500g bag of soy wax flakes ($8–$12) fills four standard pint mason jar candles — the material cost per finished candle is $3–$5, making mason jar soy candles one of the most cost-effective handmade gift items available.
Shop The Look
| Product |
|---|
| Soy wax flakes coconut blend 500g bag |
| Pre-tabbed cotton wick set with wick bar |
| Fragrance oil set warm scents |
| Wax seal stamp kit with burgundy wax |
| Pint mason jar wide mouth set of 4 |
17. Small-Space Mason Jar Project: Magnetic Spice Jar Wall
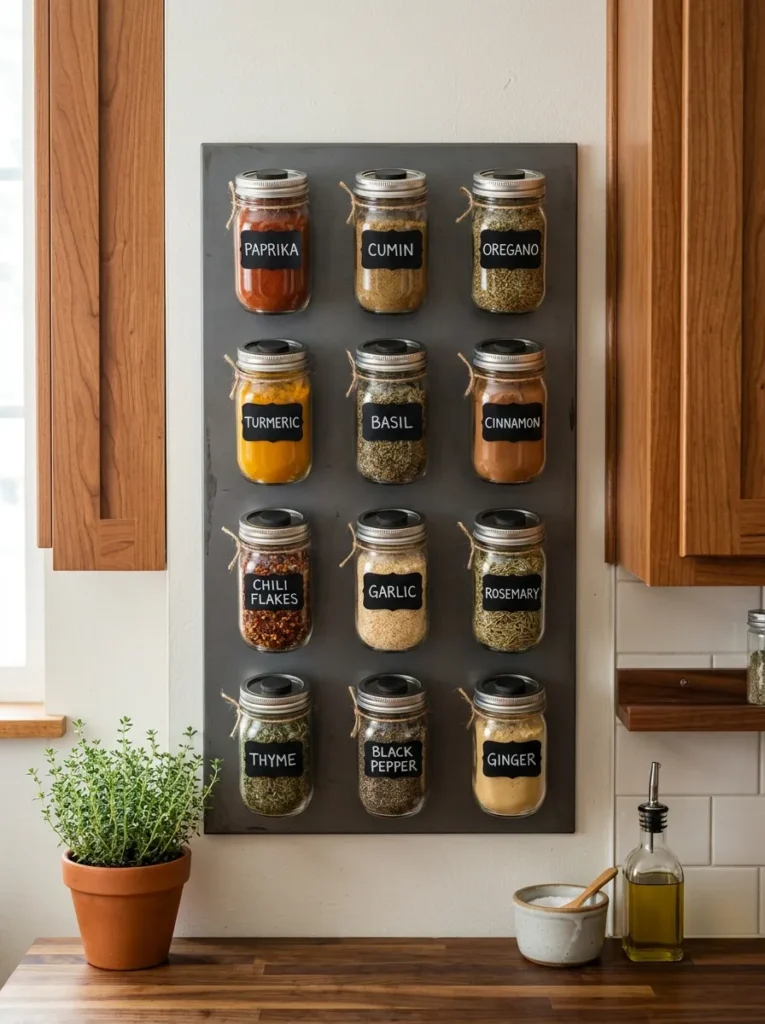
Vibe: A magnetic mason jar spice wall feels ingeniously space-efficient — the kitchen storage solution that turns a blank wall into a complete spice library without occupying a single counter inch.
Why it works: The magnetic mason jar spice wall is the project that most creatively addresses the small kitchen’s primary storage challenge — it converts a blank wall surface (typically between cabinets or beside the stove) into a three-dimensional storage system without requiring cabinet installation or counter surface. The design principle is vertical space activation through magnetic mounting: by attaching small magnetic discs to mason jar lids, any steel or magnetic panel becomes a flexible, rearrangeable spice storage wall where jars can be removed for use and returned to any position. The clear glass of half-pint mason jars allows spice contents to be visually identified from across the kitchen, eliminating the label-reading that cabinet-stored spice jars require.
How to get it: Mount a 30×60 cm steel sheet or magnetic whiteboard panel to the kitchen wall using appropriate wall anchors. Apply small neodymium magnets (20mm diameter, rated for at least 3 kg pull strength) to the lid exterior of each half-pint mason jar using strong epoxy. Fill jars with dried spices and attach a small chalkboard or linen label tag. Press each jar lid-first to the steel panel — the magnet holds the jar firmly for normal kitchen use while allowing easy removal. Arrange in a grid pattern for the most organized visual presentation.
Shop The Look
| Product |
|---|
| Half pint mason jar wide mouth set of 12 |
| Neodymium magnet disc 20mm strong set |
| Steel sheet magnetic panel 30x60cm |
| Epoxy adhesive strong clear for magnet bonding |
| Mini chalkboard label tag set for spice jars |
How to Start Your Mason Jar Project Practice
The single first move is to collect six to eight mason jars in two or three consistent sizes — specifically, a combination of pint and half-pint jars in wide-mouth format — and store them in a single location (a kitchen shelf, a basket in a craft area) where they are permanently accessible. The mason jar projects that never get started are almost always projects where the jars themselves are not immediately to hand — the activation energy of locating jars, washing them, and gathering them together before a project can begin is exactly the kind of friction that converts creative intention into deferred action. A permanent, accessible jar collection removes that friction entirely and makes any project on this list achievable in an impulse moment rather than requiring advance planning.
The most common mistake in mason jar home decor is overloading a single space with too many mason jar projects simultaneously — a shelf with fairy light jars, chalk-painted vases, sand art jars, and terrarium jars reads as a craft table rather than a designed interior. The fix is the same editorial principle that applies to all home decor: choose one mason jar project per surface, display it alongside non-mason-jar objects, and allow it to be the glass element in a mixed-material composition rather than the dominant material. A single cluster of fairy light jars on a living room shelf beside a ceramic object, a wooden tray, and a dried botanical reads as interior design. The same shelf with four different mason jar projects reads as a craft fair display.
Three projects under $20 each that create the most immediate cozy home impact: the fairy light jar cluster (three jars, one strand of battery fairy lights per jar, a wooden tray — total $18–$24) that creates warm ambient light anywhere in the home, the chalk-painted vase set (three jars, one can of chalk paint in a muted tone, dried botanicals — total $12–$22) that creates a warm botanical display from materials available at any craft store, and the kitchen herb garden windowsill (five pint jars, herb starts from a grocery store, linen label scraps — total $15–$20) that adds living green and domestic warmth to the kitchen simultaneously. These three projects cover three different rooms and three different functional categories — light, display, and living garden — for under $65 in combined materials.
Realistic expectations: mason jar projects are genuinely among the most accessible and immediately satisfying home decor DIY activities available — most projects in this list have active time under 30 minutes and produce display-ready results within 24 hours of completion. The material cost per project ranges from essentially nothing (collected beach sand, found botanicals, repurposed jars) to $15–$25 for projects requiring purchased materials. The limitation is not cost or skill — it is restraint and curation. The most successful mason jar home decor comes from making a few projects very well and displaying them in edited, considered compositions rather than making many projects and displaying everything simultaneously.
Frequently Asked Questions About Mason Jar Projects
What size mason jar works best for home decor projects?
The pint (16 oz) and quart (32 oz) wide-mouth jars are the most versatile sizes for home decor — the pint is the right scale for individual vases, bathroom organizers, candles, and single herb plants, while the quart provides the volume needed for terrariums, snow globes, layered sand art, and fairy light displays. The half-pint (8 oz) jar is the ideal scale for spice storage, small bathroom supplies, and single tealight candles. Mixing two sizes in a grouped display — three quarts and two pints, or two quarts and three half-pints — creates the height variation that makes jar clusters visually interesting rather than uniformly flat.
Can I use any paint on mason jars, or does it need to be a specific type?
Chalk paint and acrylic craft paint are the two most accessible options for mason jar exterior painting, and they perform differently. Chalk paint adheres directly to glass without a primer or sealant for decorative display purposes, dries to a matte finish, and creates the most sophisticated ceramic-adjacent appearance. Standard acrylic craft paint requires a glass-specific primer for adhesion and benefits from a sealant coat for durability. For the most professional-looking results, chalk paint on the exterior of the jar is the optimal choice for purely decorative vases and display jars. For functional storage jars that will be handled frequently, seal chalk paint with clear furniture wax or matte polyurethane for durability.
How do I make mason jar crafts look sophisticated rather than craft-fair generic?
The three decisions that most determine whether a mason jar project reads as sophisticated or generic are material restraint (one technique per jar, not multiple interventions competing on the same jar), color palette discipline (choose muted, warm tones — dusty sage, terracotta, warm cream, warm charcoal — rather than bright primary colors), and display curation (one mason jar project displayed alongside non-mason-jar objects in a mixed-material composition reads as interior design; a shelf of eight mason jar projects reads as a craft display). The mason jar is a neutral vessel — it is the color, the material additions, and the display context that determine the final aesthetic register.
Are mason jars safe to use as candle holders?
Standard mason jars are made from tempered or annealed soda-lime glass, which is heat-resistant to a point but not designed specifically for candle use. The safest mason jar candle applications are: tealight candles (low heat output, contained in a metal cup), oil lamps with floating wicks (low and consistent heat), and container candles where the wax itself is poured into the jar and the glass is heated gradually as the wax melts (not introduced to sudden temperature change). Avoid placing a freshly lit pillar candle inside a cold mason jar — the sudden temperature differential can crack the glass. Always burn mason jar candles on a heat-safe surface and never leave them unattended.
How do I prevent mason jar bathroom organizers from developing rust?
Standard mason jar lids are made from plain steel that will rust in the consistently humid bathroom environment. Replace standard two-piece lids with plastic mason jar lids (available in standard regular and wide-mouth sizes) for rust-free bathroom use, or use the jars without lids for open-top bathroom organizers — cotton balls, cotton swabs, and hair accessories are all accessible without a lid. Alternatively, seal standard lids with a clear waterproof spray paint before bathroom use — this provides rust protection for a year or more before reapplication is needed.
Ready to Start Your Mason Jar Project?
These 17 mason jar projects span every room, function, and aesthetic register the mason jar can inhabit — from a fairy light cluster on a living room shelf and a botanical pressed candle holder to a magnetic kitchen spice wall, a handmade soy candle, and a bathroom organizer system — so whether you have three jars and an afternoon or a full basket of jars and a project weekend, there is a specific, achievable, and genuinely cozy starting point here for exactly where you are. The most important thing to understand about mason jar home decor is that its value comes from intention, not from quantity — one well-executed mason jar project displayed thoughtfully reads as warmly considered interior design, while a room full of mason jar projects reads as a craft showcase. Today, collect three jars, buy one strand of copper fairy lights, and make the fairy light cluster for any shelf in your home — that single cozy moment of warm amber light will show you exactly what this material is capable of. Pin the projects that made you reach for a jar immediately, and let those be the ones you make first.