16 Bathroom Ideas That Blend Style and Function
Bathroom ideas that blend style and function use material specification, fixture selection, storage integration, lighting design, and spatial arrangement to create bathrooms that serve the complete practical program of the space — daily hygiene, grooming, therapeutic bathing, laundry, and private recovery — while achieving a visual and sensory quality that makes the bathroom a room of genuine domestic pleasure rather than merely a room where functional necessities occur. This article gives you exactly 16 ideas spanning every bathroom size, every renovation budget, and every design direction, so every household finds both the practical solutions and the aesthetic approaches that their specific bathroom requires.
A bathroom that blends style and function does not treat these as competing priorities — it understands that the most beautiful bathroom decisions are almost always also the most functional ones, and that the most functional bathroom decisions are almost always also the most beautiful when made with the right materials and the right proportions. A well-chosen tile in the correct format makes the room appear larger and is easier to clean than an incorrect tile. A floating vanity with concealed plumbing storage is more functional than a pedestal basin and more beautiful as well. A correctly positioned mirror doubles the room’s apparent depth while serving its practical function completely. Here are 16 ideas where style and function genuinely reinforce each other.
Why Bathroom Ideas That Blend Style and Function Work
The false opposition between style and function in bathroom design rests on a misunderstanding of what each term means in a domestic context. “Style” in interior design does not mean decoration applied over function — it means the visual quality of the specific material, proportion, and detail decisions from which function is delivered. A bathroom where the vanity storage, the shower enclosure, the tile choice, the lighting position, and the towel provision are all specified with both practical adequacy and visual consideration is not a bathroom where style has been added to function — it is a bathroom where the functional decisions were simply made well.
The domestic bathroom presents the richest opportunity for this convergence in any room of the home: it is the room where material choices (tile, stone, timber, ceramic, glass, metal) have the most direct impact on both the room’s practical hygiene performance and its visual warmth; where storage decisions most directly determine whether the room reads as calm and organized or cluttered and pressured; where lighting placement most profoundly affects both the functional adequacy of the illumination (for grooming, for safety) and the atmospheric quality of the room at different times of day; and where the specific relationships between fixtures (the distance between the basin and the shower, the height of the towel rail relative to the bath, the positioning of the mirror relative to the window) most directly determine both the room’s ergonomic usability and its spatial composition.
Style at a Glance
| Element | Function | Style |
|---|---|---|
| Philosophy | Every functional decision is also a design decision | The best bathrooms are where these cannot be distinguished |
| Materials | Tile, natural stone, timber, ceramic, glass | Warm neutral, botanical, warm metallics |
| Key Decisions | Layout, storage, lighting, fixture quality, surface material |
16 Bathroom Ideas That Blend Style and Function
1. The Floating Vanity with Integrated Storage — Surface Calm, Concealed Depth
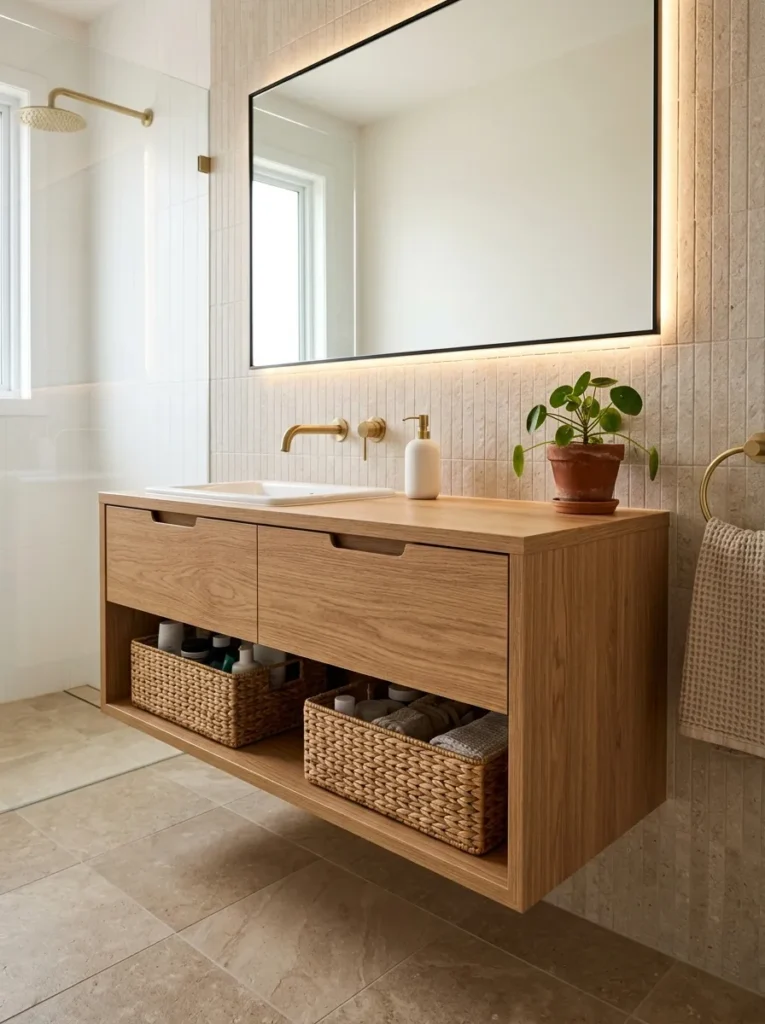
Vibe: The floating vanity feels like a bathroom that solved its storage problem while simultaneously making the room appear larger — the concealed drawer storage, the wicker basket shelf, and the 50cm floor clearance together creating a vanity that is more organized and more spacious-reading than any pedestal basin arrangement.
Why it works: A floating oak vanity with drawers, an open shelf for basket storage, and an undermount basin applies the layered storage hierarchy principle — the bathroom’s daily-use items (grooming tools, dental accessories, skincare products) need the most accessible storage position (the slim drawers at the top), while the less frequently accessed items (cleaning supplies, spare toiletries, backup products) need the least accessible but most capacious storage (the two wicker baskets on the open lower shelf). The undermount basin’s position on the left third of the vanity (rather than centered) creates the clear display surface on the right that the bathroom needs for the few objects that benefit from being on the worktop rather than stored.
The floor clearance function: The 50cm floor clearance beneath a floating vanity is not simply visual — it allows floor cleaning beneath the vanity (preventing the mold and soap scum accumulation that collects beneath floor-standing vanity cabinets where a mop cannot reach), creates the visual continuity of the floor plane that makes the room read as larger than its actual dimensions, and allows under-floor heating to distribute heat evenly across the bathroom floor without the floor-standing cabinet blocking the heat from the floor zone.
Budget: Floating oak vanity 100cm: $400–900. Wall-mounted brass tap: $120–400. Undermount basin: $80–200. Wicker baskets: $20–40.
Quick Win: Adding two wicker baskets to the lower shelf of any existing open-shelf bathroom vanity converts visible product accumulation into organized concealed storage at zero renovation cost and $15–30 in basket cost.
Shop The Look
| Product |
|---|
| Floating oak vanity 100cm |
| Undermount basin ceramic white |
| Brushed brass wall-mounted tap |
| Wicker basket set bathroom |
| Small terracotta plant pot |
Also view: 15 Cozy Bathroom Aesthetic Designs for Every Style
2. Large Format Tile — Fewer Grout Lines, More Visual Space
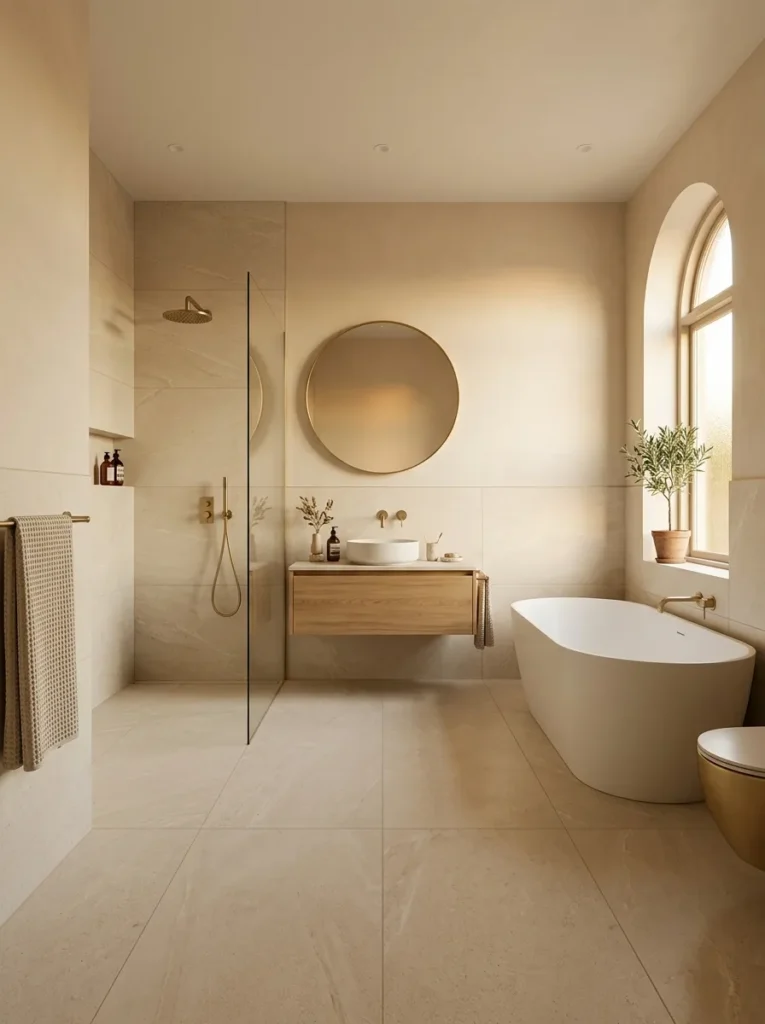
Vibe: The large format tile bathroom feels like the room was made from a single continuous piece of warm stone — the minimal grout line interruption and the matching grout color creating a bathroom surface that reads as monolithic rather than tiled.
Why it works: Large format tile at 600×1200mm with tone-matching grout applied to both floor and lower walls applies the surface continuity spatial expansion principle — the number of grout lines visible in a tiled bathroom is directly correlated with how small the room appears: a bathroom tiled in 100×100mm mosaic has approximately 144 times more grout lines per square metre than one tiled in 600×1200mm, creating a visual complexity that the eye processes as a smaller, busier space. The large format tile’s minimized grout lines allow the eye to read the floor and wall surfaces as continuous planes rather than assembled modules, creating the spatial expansiveness of a genuinely larger room. The tone-matching grout (a warm putty that matches the tile’s warm cream without exact duplication) is the crucial specification — white grout creates a high-contrast grid that reverses the large format’s spatial benefit.
Installation requirement: Large format tiles require a perfectly flat, precisely prepared substrate — larger tiles bridge surface irregularities less effectively than smaller tiles, and any substrate unevenness creates lippage (one tile edge higher than the adjacent tile) that is significantly more visible and more hazardous at large format than at small format. Use a self-leveling compound to create a perfectly flat floor substrate before large format tile installation.
Budget: 600×1200mm porcelain tile per square metre: $30–100. Tone-matching grout: $15–25 per bag. Installation (labor and materials): $50–100 per square metre.
Shop The Look
| Product |
|---|
| Large format 600×1200mm porcelain |
| Warm cream stone porcelain tile |
| Tone-matching putty grout |
| Self-leveling compound floor |
| Large format tile adhesive |
Also view: 16 Relaxing Beach Decor Ideas with Coastal Charm
3. Walk-In Shower with Frameless Glass — Open Plan Bathing
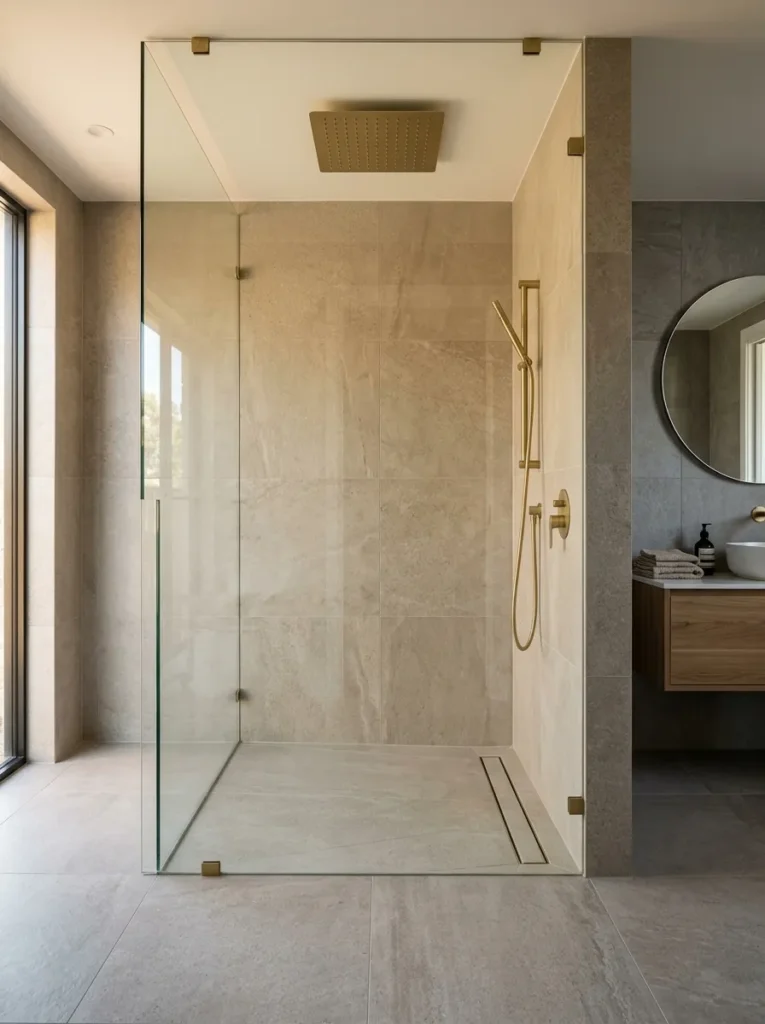
Vibe: The frameless walk-in shower feels like a shower that refused to interrupt the room — the single glass panel and the curbless continuous floor creating a shower zone that is visually part of the bathroom rather than an enclosed capsule within it.
Why it works: A frameless glass walk-in shower with a curbless continuous floor applies the barrier elimination spatial principle — the conventional framed shower enclosure (with its aluminum or steel frame, its raised threshold, and its visual division between the shower’s tiled enclosure and the bathroom’s surrounding floor) creates a room-within-a-room that visually divides the bathroom into a larger dry zone and a smaller wet zone, making both appear smaller than they actually are. The frameless glass panel eliminates this visual division entirely: the eye reads the bathroom as one continuous space rather than two separate zones, making both the shower and the surrounding bathroom appear larger. The curbless floor (the shower floor and the bathroom floor in the same tile at the same level, with water managed by the fall of the shower floor toward the linear drain) eliminates the raised threshold that creates a physical division alongside the visual one.
Waterproofing specification: The curbless shower requires a waterproof membrane applied to the full shower floor and walls behind the tiles, with the membrane extending onto the adjacent bathroom floor by a minimum of 150mm beyond the shower zone boundary. The concealed linear drain must be installed with a sloped floor (minimum 1:80 fall toward the drain) created by a pre-formed sloped shower tray or by a skilled tile setter laying the tiles with a consistent gradient.
Budget: Frameless glass panel and fixings: $400–900. Linear drain: $150–400. Ceiling rain head and plumbing: $300–800. Total: $850–2,100.
Shop The Look
| Product |
|---|
| Frameless glass panel 10mm |
| Point fixings glass floor ceiling |
| Concealed linear drain shower |
| Ceiling rain head 30cm brass |
| Curbless shower waterproof membrane |
4. Heated Towel Rail as Bathroom Architecture — Function as Feature
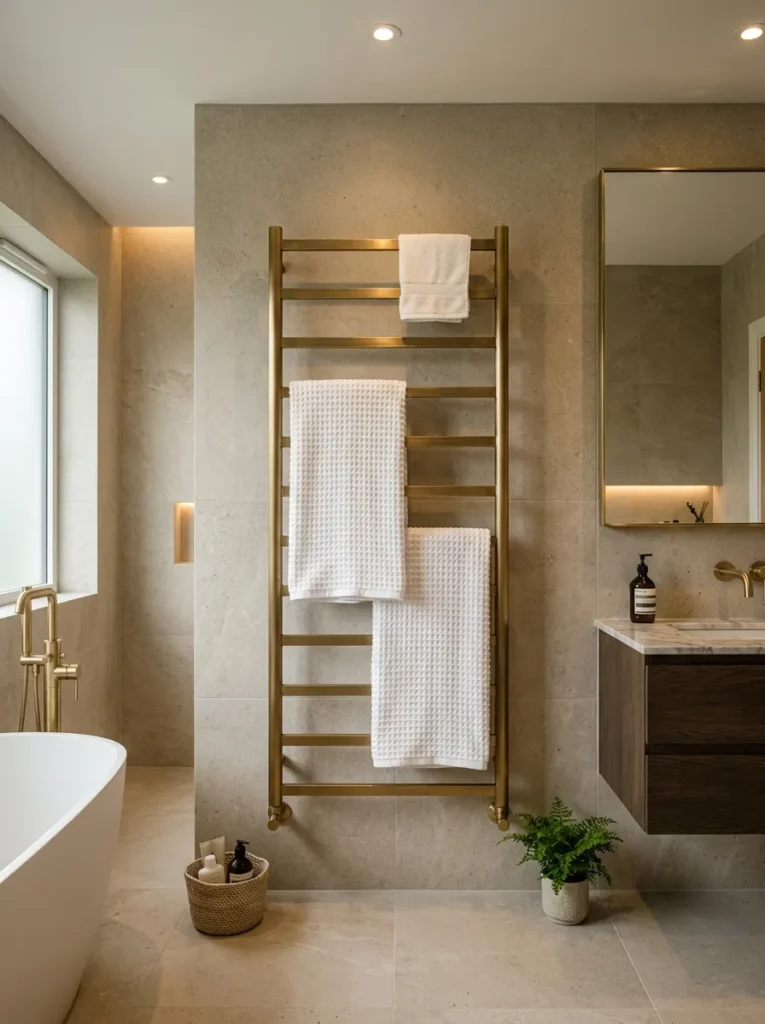
Vibe: The statement heated towel rail feels like a bathroom that understood its most functional object was also its most sculptural one — the ladder rail’s scale and position on the primary wall converting a utility fixture into the bathroom’s defining visual element.
Why it works: A large sculptural heated towel rail positioned on the bathroom’s primary visible wall applies the functional object as focal point principle — the heated towel rail is one of the bathroom’s guaranteed functional objects (it provides warm, dry towels regardless of how it looks) and one of the bathroom’s largest vertical wall elements. A ladder rail specified at generous scale (110cm tall, 55cm wide) in a premium metallic finish (brushed brass or brushed charcoal steel) and positioned on the primary wall creates a focal point of genuine material quality that doubles as complete towel provision. The position on the primary visible wall (the wall seen immediately on entering the bathroom) rather than on a secondary side wall is the specific placement decision that converts the towel rail from a background functional element to the room’s primary visual destination.
Electrical specification: An electric heated towel rail (with a built-in heating element, independent of the central heating system) provides warm towels year-round regardless of heating season and can be timer-controlled to warm only during the hours when the bathroom is in use (reducing running costs significantly). Install on a dedicated circuit with a separate switch or timer — the towel rail should not share a circuit with other bathroom appliances.
Budget: Large sculptural heated towel rail (brushed brass): $200–600. Electrical installation: $150–300. Total: $350–900.
Shop The Look
| Product |
|---|
| Heated ladder rail 110cm brass |
| Heated ladder rail charcoal option |
| White waffle-weave towel set |
| Towel rail timer thermostat |
| Towel rail wall fixing set |
5. Mirror with Integrated LED Lighting — The Grooming Station
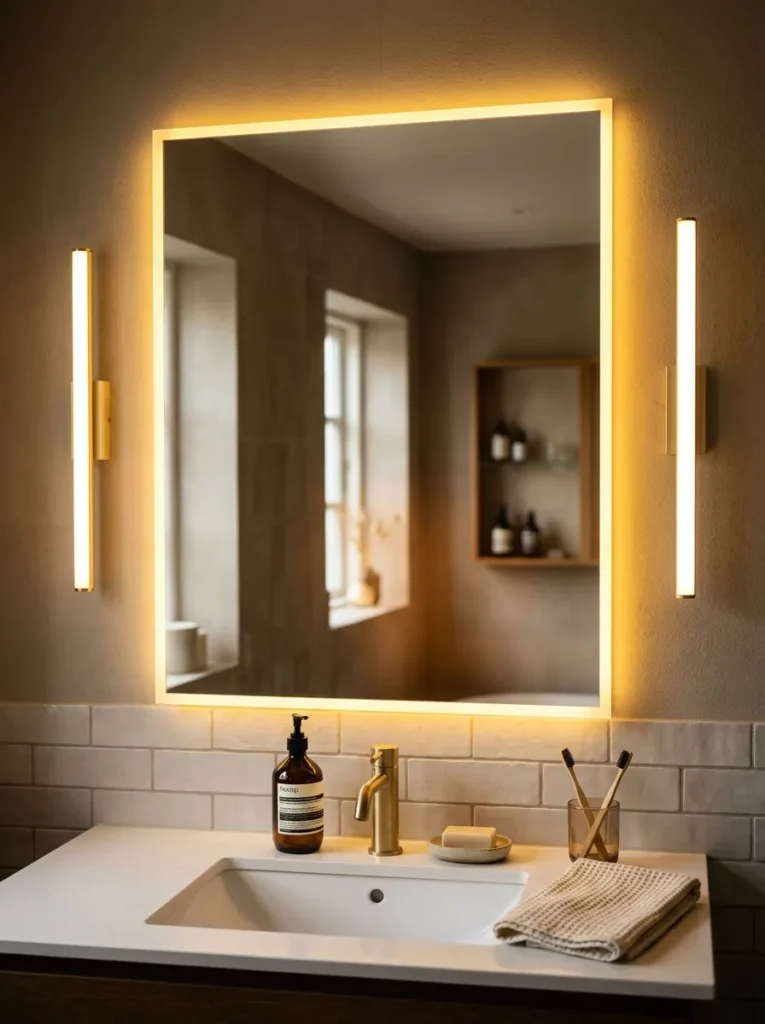
Vibe: The three-source LED mirror bathroom feels like a professional grooming studio that agreed to become a bathroom — the even, shadow-free warm light from three angles creating the illumination quality that makes the bathroom mirror genuinely useful rather than merely present.
Why it works: A three-source mirror lighting system (backlit halo plus two vertical side bars) at 2700K applies the professional facial illumination principle established in the elegant modern bathroom article — a single overhead light source creates the most unflattering possible facial illumination (strong downward shadows, particularly under the nose, chin, and eyes) because it illuminates exclusively from above. The three-source system (halo providing ambient fill, vertical bars providing horizontal fill from both sides simultaneously) eliminates all directional shadows and creates the specific even, warm illumination that makes grooming tasks accurate and the mirror experience genuinely pleasant rather than functionally adequate.
The 2700K specification: Mirror lighting at 2700K produces the warm, skin-tone enhancing light quality that makes the user appear at their most natural in the bathroom’s own light rather than in the cooler, harsher light of most bathroom environments. The skin-tone rendering of 2700K warm LED is specifically better than 3000K or 4000K alternatives because it does not cool or blue the skin’s natural warm tones.
Budget: LED backlit mirror 90×70cm: $80–250. Two vertical LED bar lights: $30–80 each. Total: $140–410.
Shop The Look
| Product |
|---|
| LED backlit mirror 90×70cm warm |
| Vertical LED bar light 55cm pair |
| 2700K warm LED mirror lighting |
| Mirror mounting bracket wall |
| LED dimmer mirror compatible |
6. Natural Stone Basin — The Material Statement at the Vanity
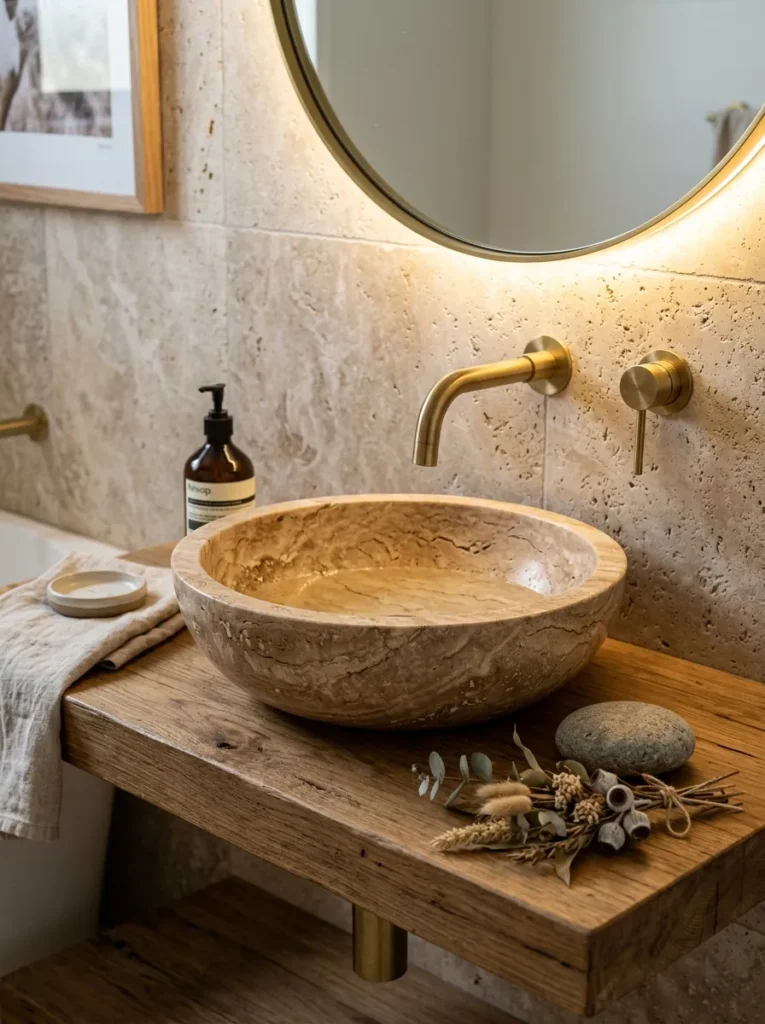
Vibe: The natural stone vessel basin feels like the bathroom received a piece of genuinely geological material as its primary fixture — the travertine’s specific warmth, veining, and surface texture creating a basin that is both the bathroom’s most functional object and its most beautiful.
Why it works: A hand-carved natural stone vessel basin applies the authentic material statement principle established throughout this series — the basin is the bathroom’s most-used and most-touched fixture, experienced hundreds of times daily through hand washing and face washing, and the material quality of the basin is experienced through touch (the specific temperature and texture of natural stone against the hands) as much as through sight. A stone vessel basin in travertine or limestone provides the specific tactile quality of genuine natural stone (cool, slightly rough, thermally stable) that ceramic and manufactured composite cannot replicate, while the stone’s natural veining creates a visual interest that is specific to this geological material and to no manufactured equivalent.
Gooseneck tap specification: A vessel basin requires a wall-mounted tap positioned high enough above the basin rim to allow comfortable hand washing — the standard specification is the tap’s outlet at 15–20cm above the basin’s rim height, which a wall-mounted gooseneck tap provides through its tall curved arm without the tap body sitting on the limited basin shelf.
Budget: Natural travertine vessel basin: $150–600. Wall-mounted brass gooseneck tap: $150–500. Total: $300–1,100.
Shop The Look
| Product |
|---|
| Travertine vessel basin hand-carved |
| Limestone vessel basin alternative |
| Wall-mounted brass gooseneck tap |
| Stone basin sealant penetrating |
| Smooth river stone basin side |
7. Above-Toilet Shelving — The Overlooked Storage Zone
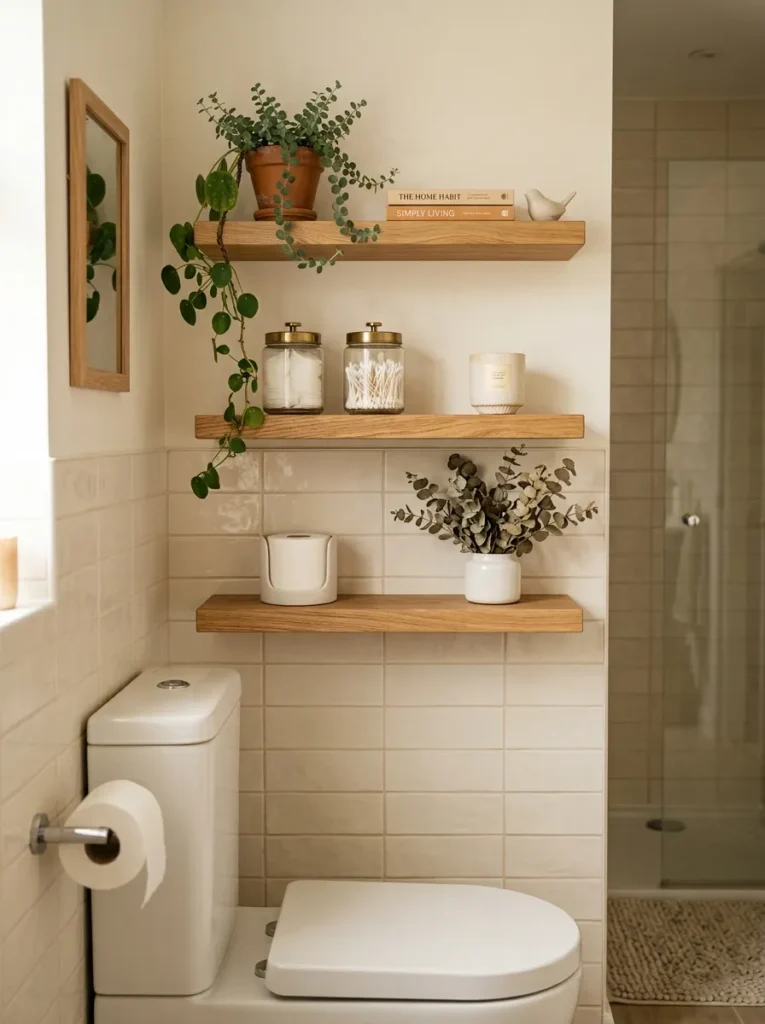
Vibe: The above-toilet shelving feels like the bathroom discovered a room’s worth of storage in the wall space it had always overlooked — the three composed shelves converting the most consistently wasted bathroom wall into the room’s most organized and most beautiful storage zone.
Why it works: Three solid oak floating shelves above the toilet with composed, organized contents applies the dormant vertical zone principle established in the small bathroom article — the wall above the toilet is the bathroom’s most consistently wasted surface (accessible, visually prominent, structurally sound for shelf mounting) and the zone that most immediately benefits from organized shelving. The three-tier organization (function decreasing with height: most-used items lowest, least-used items highest) combined with the composed display approach (each shelf styled as a still life rather than a storage position) creates shelving that contributes to the bathroom’s visual quality rather than simply adding storage.
The 25cm depth specification: Shelf depth above a toilet should not exceed 25cm — deeper shelves create a visual overhang that reads as uncomfortable from the toilet position and reduces the cistern access clearance needed for lid removal. 20–25cm is the functional and visual optimum.
Budget: Three solid oak shelves 25cm depth: $60–150. Concealed brackets: $15–30 per shelf pair. Total: $105–240.
Shop The Look
| Product |
|---|
| Solid oak floating shelf 25cm depth |
| Concealed shelf bracket pair |
| White ceramic tissue roll holder |
| Glass jar set cotton pads buds |
| Trailing plant terracotta top |
8. Warm Tonal Bathroom — The Single Color Family Done Well
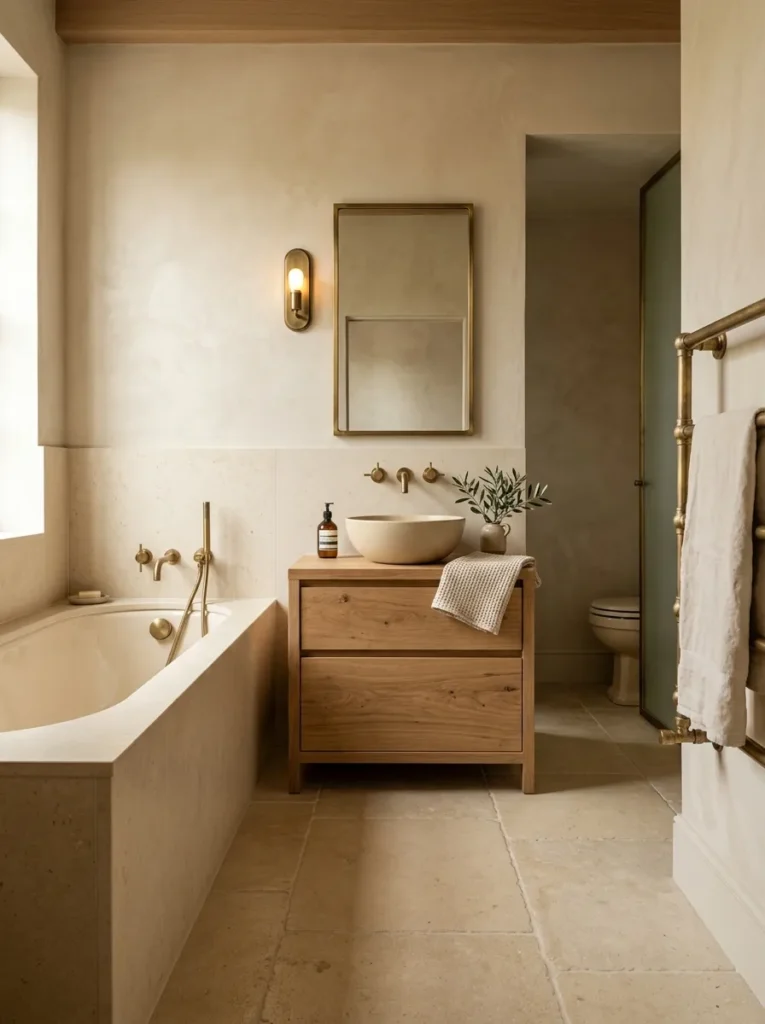
Vibe: The tonal warm bathroom feels like the room was designed to demonstrate how many different materials can all be warm cream simultaneously — the material variety within the single color family creating a bathroom of extraordinary depth and warmth.
Why it works: A single warm tonal palette applied across varied bathroom materials applies the monochromatic material richness principle — when a bathroom uses a restricted color palette (warm cream, warm putty, and aged brass as the only three tones in the room), the visual interest must come entirely from material variety (the specific texture of the limewash plaster versus the ceramic’s smooth reflective surface versus the oak’s warm grain versus the tile’s cool stone quality). This material variety within a tonal unity creates the specific quality of a room that rewards close looking — the cream plaster and the cream ceramic are clearly the same color family but completely different in surface quality, and this distinction becomes more interesting and more beautiful the closer one looks.
The brass-as-only-metallic rule: In a tonal warm bathroom, the aged brass hardware (tap, towel rail, shower fitting, mirror frame, toilet flush button) should be the only metallic material visible — a single metallic family throughout. Mixing brass with chrome or nickel in the same bathroom’s fixtures destroys the chromatic coherence of the tonal palette.
Budget: This approach has no specific budget — it is a material palette decision that can be applied at any investment level from basic ceramic tile and painted walls through premium stone and custom oak cabinetry.
Shop The Look
| Product |
|---|
| Warm cream large format tile |
| Limewash warm putty wall paint |
| Cream ceramic basin matching tone |
| Natural oak vanity warm |
| Aged brass fixture full set |
9. Freestanding Bath — The Focal Object Approach
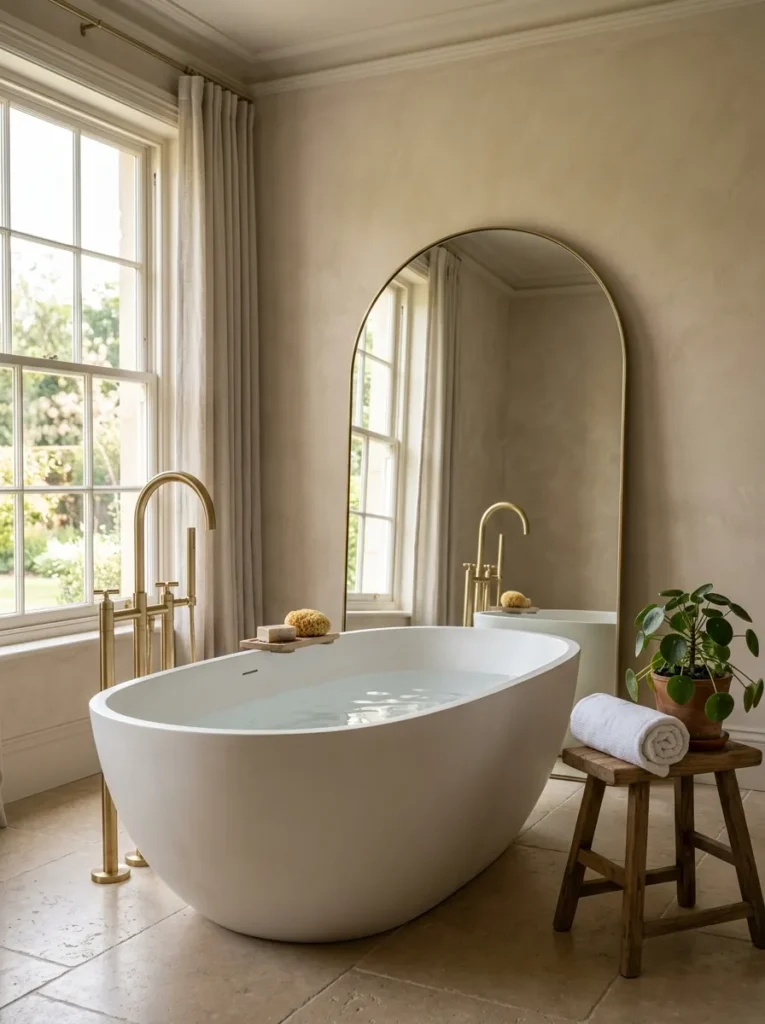
Vibe: The freestanding bath feels like the bathroom organized itself around the object most worth organizing around — the bath as the room’s primary sculptural statement, the limestone floor, the brass fittings, and the arched mirror all in service of its simple white form.
Why it works: A freestanding bath positioned as the bathroom’s focal object applies the single sculptural statement principle established in the elegant modern bathroom article — when a bathroom contains one object of genuine formal quality (the smooth, organically formed freestanding bath), all other elements should serve the presentation of that object rather than competing with it. The floor-mounted tap (which provides the tall, sculptural brass form beside the bath without attaching to it), the arched mirror (which reflects and amplifies the bath’s relationship to the natural light), and the single timber stool with towel and plant (which provides the human-scale accessory that contextualizes the bath’s scale) are all elements specifically chosen for their service of the bath’s focal reading rather than their individual significance.
Composite stone versus acrylic: Composite stone baths (a mixture of natural stone mineral and resin) provide the specific material qualities that make the premium freestanding bath worth its cost premium over acrylic: they retain water temperature significantly longer (typically 4–6°C warmer after 30 minutes than equivalent acrylic), they have greater apparent visual weight (the material appears denser, creating the sculptural gravity appropriate to the bath’s focal object role), and they provide the matte surface quality that the warm bathroom palette requires.
Budget: Freestanding composite stone bath: $1,500–5,000. Freestanding acrylic alternative: $400–1,500. Floor-mounted brass fittings: $400–1,200.
Shop The Look
| Product |
|---|
| Freestanding composite stone bath |
| Matte acrylic freestanding alternative |
| Floor-mounted brass gooseneck tap |
| Large arched mirror leaning |
| Small timber bath stool |
10. Bathroom Niche with Accent Tile — The Detail That Defines
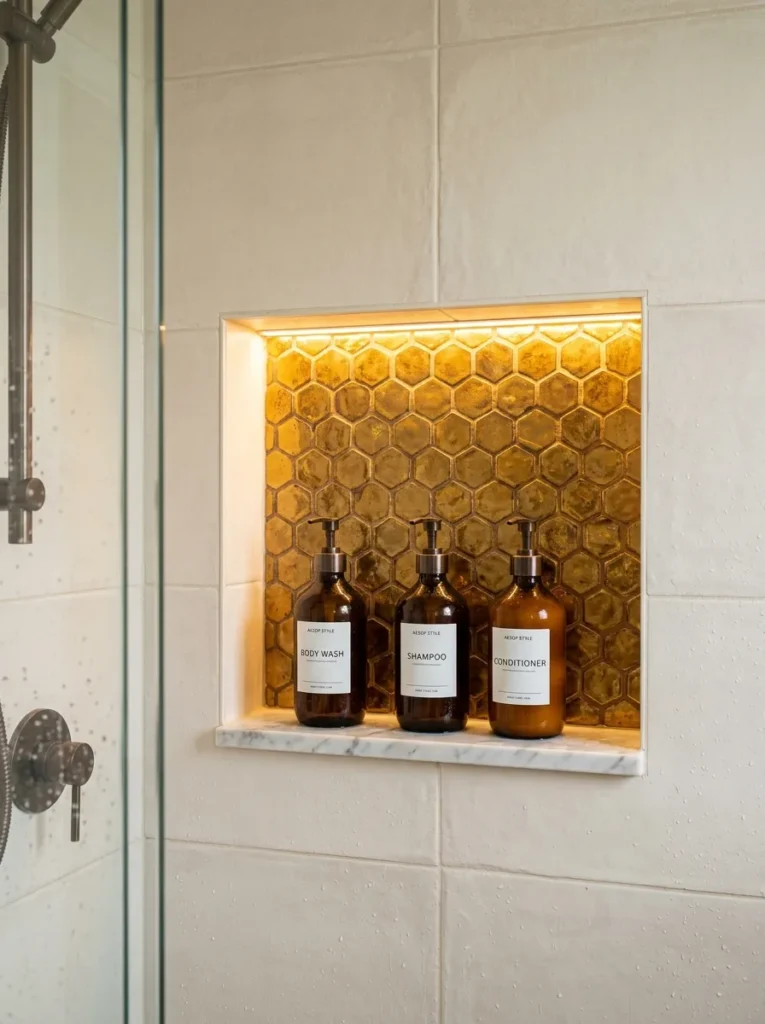
Vibe: The illuminated accent tile niche feels like a small jewel box built into the shower wall — the warm mosaic interior, the concealed LED glow, and the matching dispensers creating a shower detail of genuine craftsmanship quality from one carefully considered recess.
Why it works: A shower niche with a contrasting accent tile interior and concealed LED illumination applies the architectural detail as bathroom character principle — the shower niche is a standard bathroom element (built into the shower wall for product storage) that in most bathrooms reads as a plain utilitarian recess. The three specific modifications (contrasting warm mosaic tile on the niche interior, concealed LED strip above creating the specific warm glow of an illuminated architectural detail, matched dispenser set converting random product placement to composed organization) convert the niche from a utilitarian recess to the shower’s defining detail and the bathroom’s most carefully considered small-scale element.
Construction timing: As established in multiple previous articles, niches must be planned and constructed before waterproofing and tiling. Add the LED strip channel (a small timber or aluminium batten concealing the strip behind the niche’s upper inner edge) at the tiling stage, with the LED cable routed through the wall before plastering.
Budget: Niche construction: $100–300 (included in renovation). Warm mosaic accent tile per niche: $30–80. LED strip concealed: $15–30. Total additional cost over plain niche: $45–110.
Shop The Look
| Product |
|---|
| Warm gold hexagonal mosaic tile |
| Bronze mosaic alternative niche |
| LED strip niche concealed warm |
| Matching soap dispenser set three |
| Marble shelf niche insert |
11. Black Grout with White Tile — The High-Contrast Classic
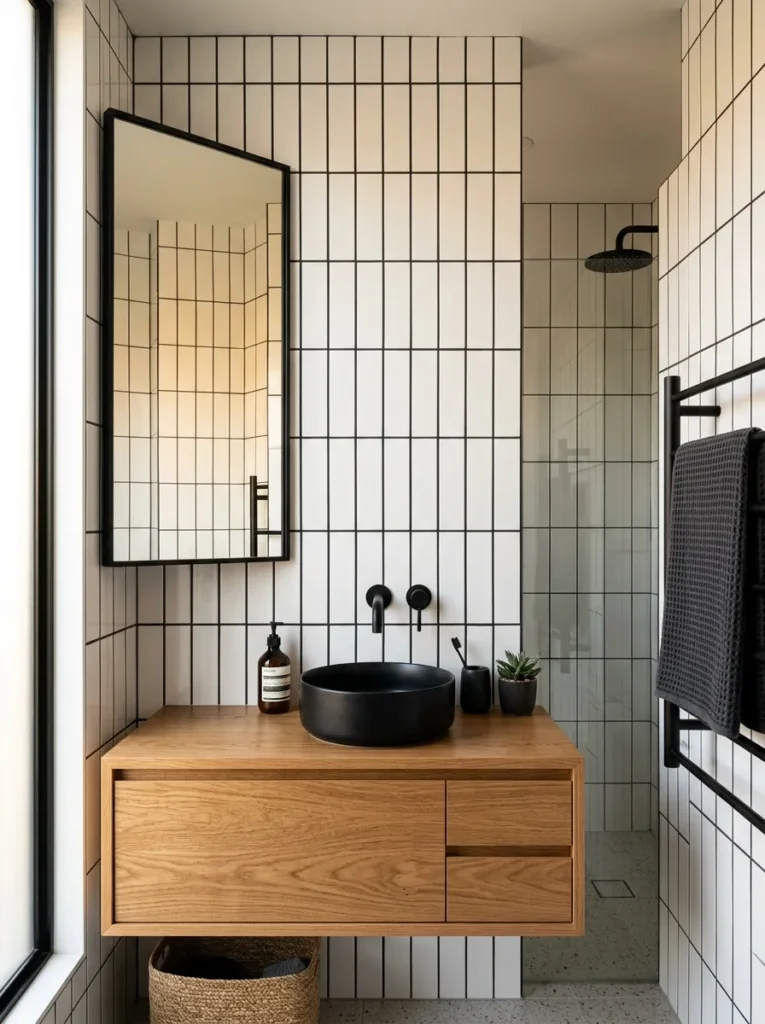
Vibe: The white tile and black grout bathroom feels like a room that committed completely to a high-contrast graphic decision and let it define everything else — the bold grid pattern, the coordinating matte black hardware, and the warm timber vanity creating a bathroom with the specific quality of a considered design statement rather than a default material choice.
Why it works: White subway tile in vertical stack bond with deep charcoal grout and coordinating matte black hardware applies the graphic contrast design language principle — the conventional white subway tile with white or off-white grout reads as a default bathroom material choice whose neutrality is a form of design abstention; the same white subway tile with deep charcoal grout reads as a deliberate design decision whose graphic quality is assertively contemporary. The vertical stack bond (tiles stacked vertically in columns rather than offset in the conventional brick pattern) amplifies the graphic quality by creating strong vertical grid lines that draw the eye upward, increasing the room’s apparent height. The matte black hardware (tap, towel rail, mirror frame) coordinates with the dark grout to create a consistent two-tone palette, while the warm timber vanity provides the warm material counterpoint that prevents the high-contrast palette from reading as cold.
Budget: White subway tile per square metre: $15–50. Charcoal grout: $15–25 per bag. Matte black tap: $80–300. Matte black towel rail: $100–350.
Shop The Look
| Product |
|---|
| White subway tile 75×150mm |
| Charcoal matte black grout |
| Matte black bathroom tap |
| Matte black towel rail |
| Warm timber floating vanity |
12. Bathroom Plants — The Living Layer
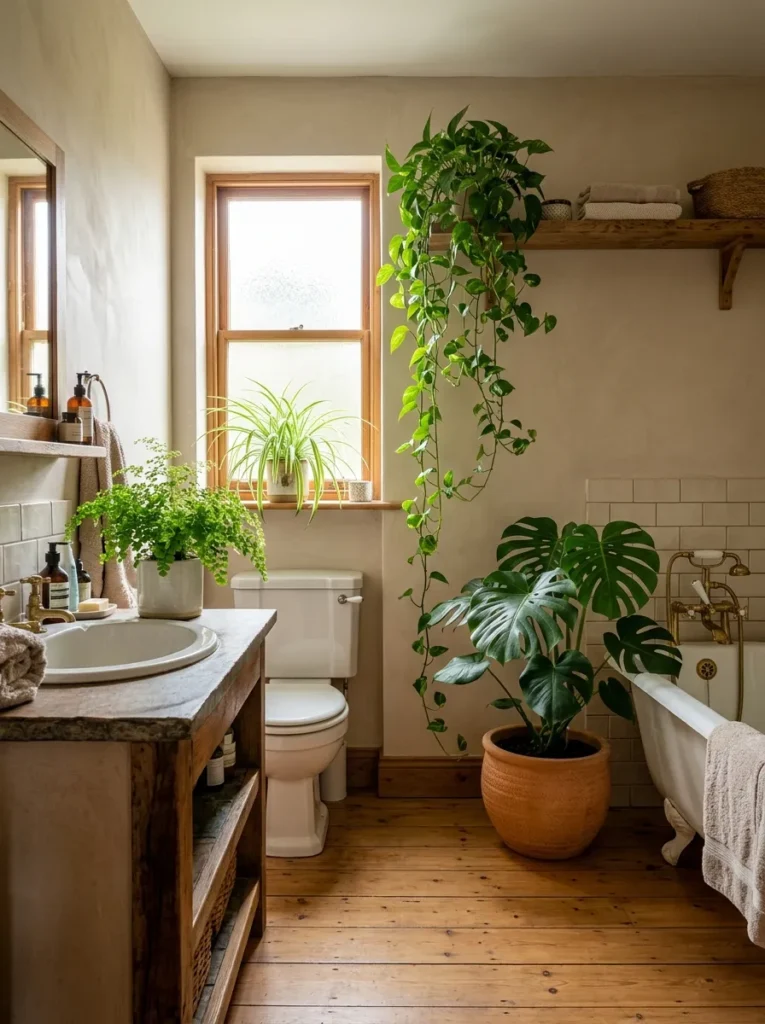
Vibe: The multi-height planted bathroom feels like a botanical installation that also functions as a bathroom — the four plants at four heights creating a genuinely lush botanical environment rather than the single token plant that most bathrooms settle for.
Why it works: Four plants at four different heights in a bathroom applies the botanical layering principle — a single plant in a bathroom reads as a decorative gesture; four plants at varied heights (floor, mid, vanity surface, window) create a genuinely botanical environment whose layering reads as the considered design decision it is. The specific species choices for each position are made on the basis of each position’s light and humidity conditions: the window sill plant receives the most light (spider plant, which grows well in moderate to bright indirect light), the vanity plant receives moderate light and high humidity (peace lily and fern both thrive in humid, moderate-light bathroom conditions), the high shelf plant needs to trail to use its position effectively (pothos is the most appropriate trailing species for lower light), and the floor specimen needs sufficient scale to anchor the room (Monstera or fiddle-leaf at a mature size).
Budget: Four bathroom plants and pots: $40–120.
Shop The Look
| Product |
|---|
| Monstera or fiddle-leaf floor pot |
| Trailing pothos high shelf |
| Peace lily fern vanity pot |
| Spider plant window sill |
| Terracotta pot set bathroom |
13. Underfloor Heating — The Invisible Luxury
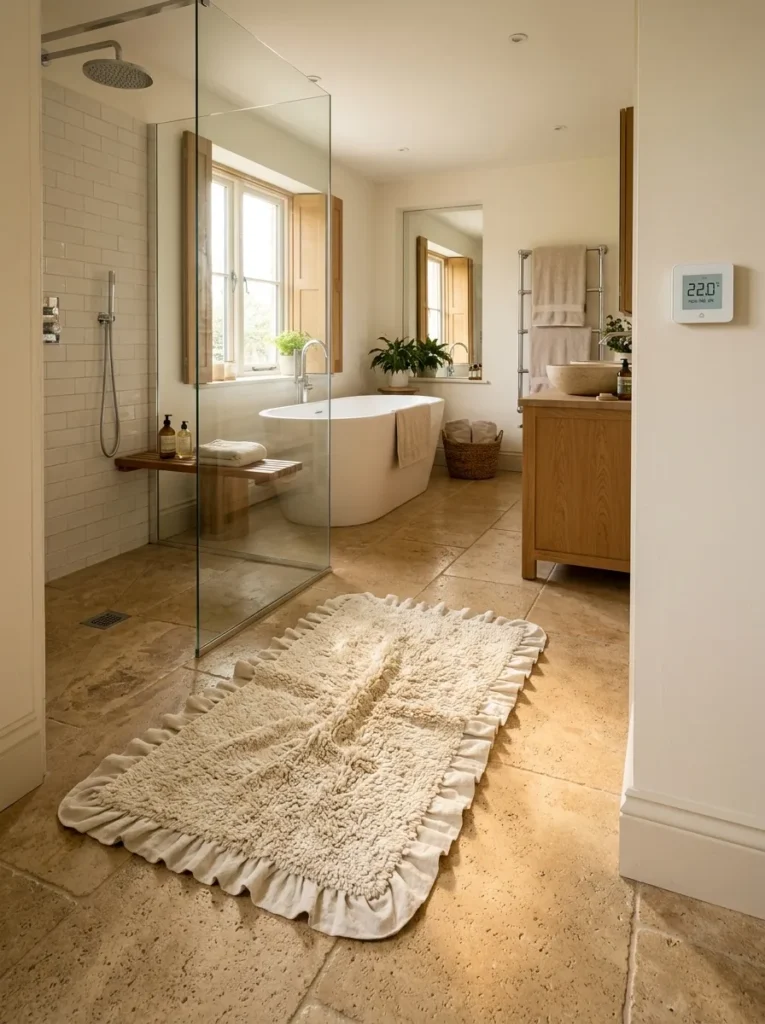
Vibe: The underfloor heated bathroom feels like a room that understood that the most important surface in a bathroom is the one your bare feet touch first — the warm stone floor and the deep-pile mat creating a physical warmth that the nervous system registers before any aesthetic quality is consciously perceived.
Why it works: Electric underfloor heating beneath a natural stone tile floor applies the embodied comfort principle — the bathroom’s most consistently experienced quality is the temperature of its floor surfaces, experienced through bare feet during every bathroom visit. A cold bathroom floor (regardless of how beautifully the tiles are specified or how warmly the walls are painted) creates the specific physiological stress response of cold underfoot that prevents the bathroom from ever feeling genuinely comfortable. Underfloor heating beneath natural stone (the tile material with the highest thermal mass and the best heat retention of any common bathroom floor material) converts the cold stone’s specific disadvantage into its greatest advantage — heated stone retains warmth longer than any other tile type and radiates it more evenly, creating a floor that remains warm for a significant period after the heating element switches off.
Budget: Electric underfloor heating mat (per square metre): $30–60. Programmable thermostat: $40–80. Installation (electrician, Building Regulations compliance): $150–400. Total per bathroom: $300–700 typically.
Shop The Look
| Product |
|---|
| Electric underfloor heating mat |
| UFH programmable thermostat |
| Deep-pile linen bath mat natural |
| White cotton waffle towel large |
| Natural stone tile heated |
14. Timber Ceiling or Timber Accent — The Natural Material at Ceiling Height
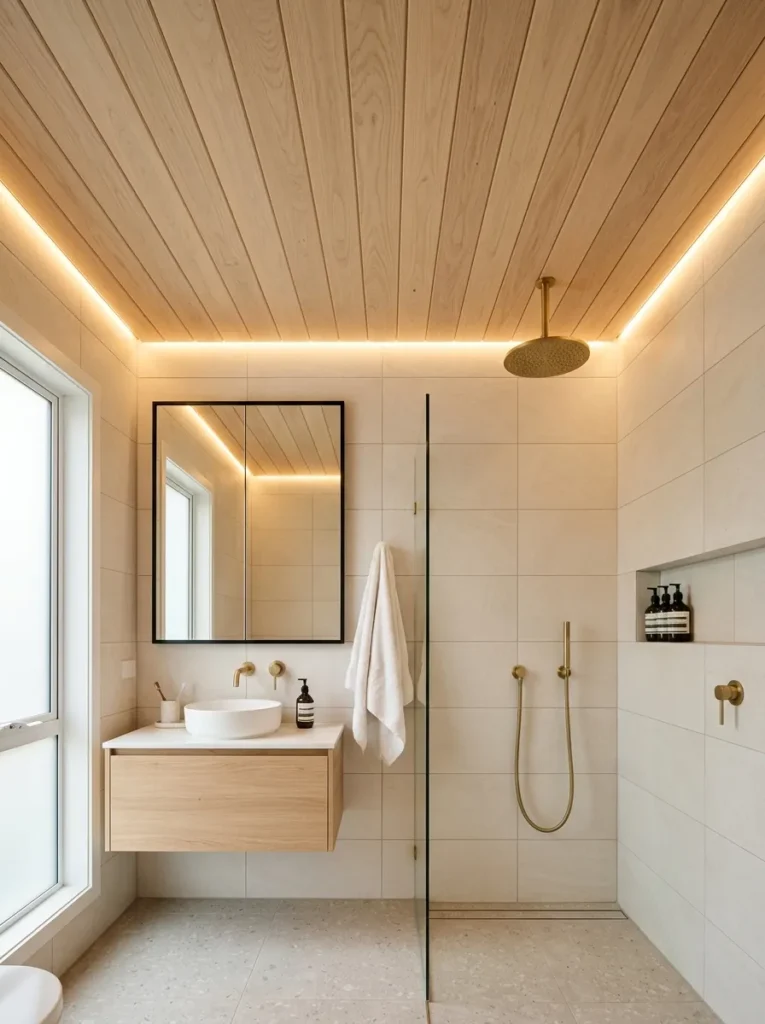
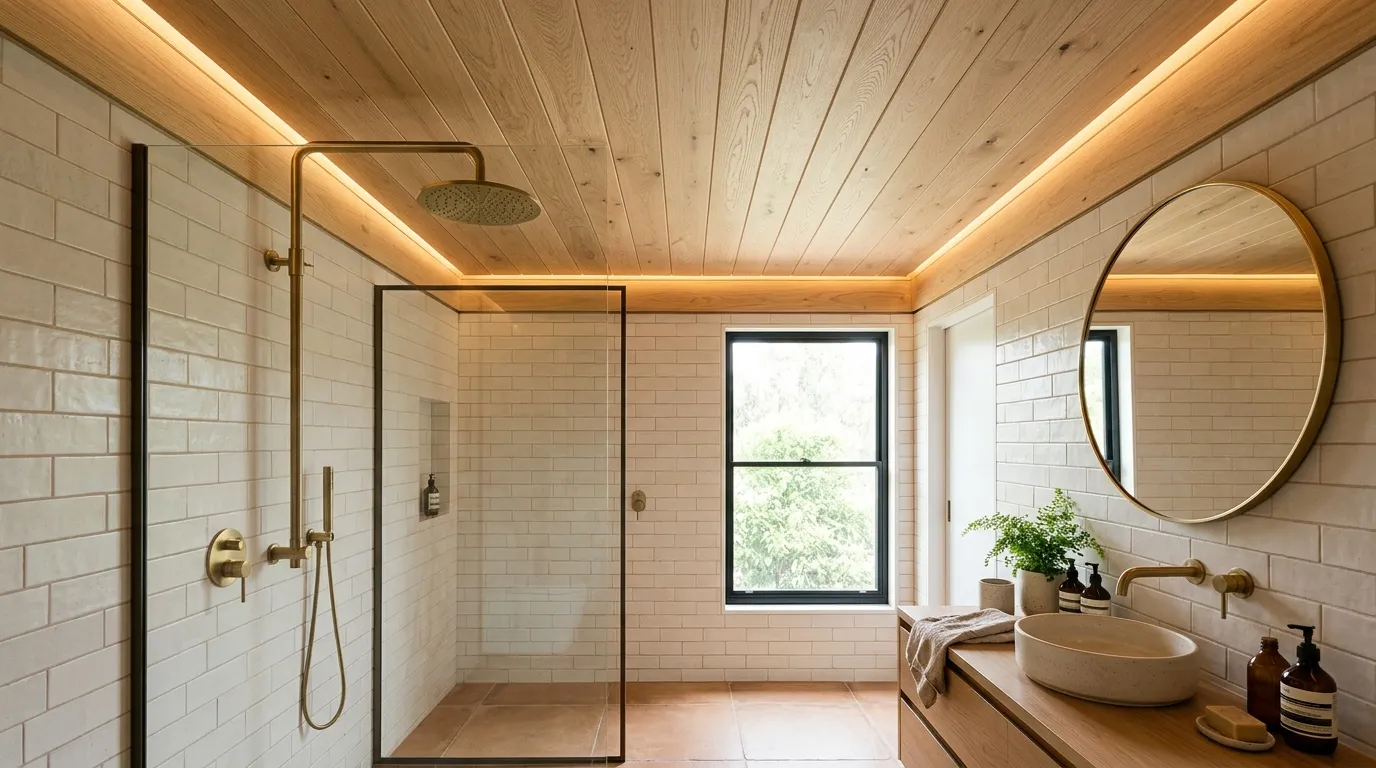
Vibe: The timber ceiling bathroom feels like a Finnish sauna that decided to become a bathroom but kept the best element — the natural pale timber ceiling above the tiled walls creating the specific warm organic quality of natural wood in a steamy, warm, restorative environment.
Why it works: A timber-boarded bathroom ceiling applies the natural material at unexpected height principle — ceilings in domestic bathrooms are almost universally in painted plasterboard, creating a cool white surface at the one height the eye naturally rests on when bathing. A timber-boarded ceiling (pale oak or clear pine in tongue-and-groove, sealed with hard wax oil) introduces the natural warmth of wood at the ceiling plane — the warm grain, the reflected amber quality of wood under warm light, and the material association with saunas, Nordic bathing culture, and natural spa environments. The timber must be sealed with a specific moisture-resistant finish (hard wax oil formulated for humid environments) and the boards must be installed with micro-ventilation gaps (3–5mm between boards) to allow movement and prevent cupping in the bathroom’s humidity cycles.
Budget: Tongue-and-groove pale oak ceiling boards per square metre: $30–80. Moisture-resistant hard wax oil: $20–40. Installation: $30–60 per square metre. Total: $80–180 per square metre.
Shop The Look
| Product |
|---|
| Tongue-and-groove oak ceiling board |
| Pine ceiling alternative board |
| Hard wax oil humid environment |
| LED strip perimeter ceiling |
| Brushed brass ceiling shower head |
15. Bathroom Scent and Sensory Layer — The Final 10%
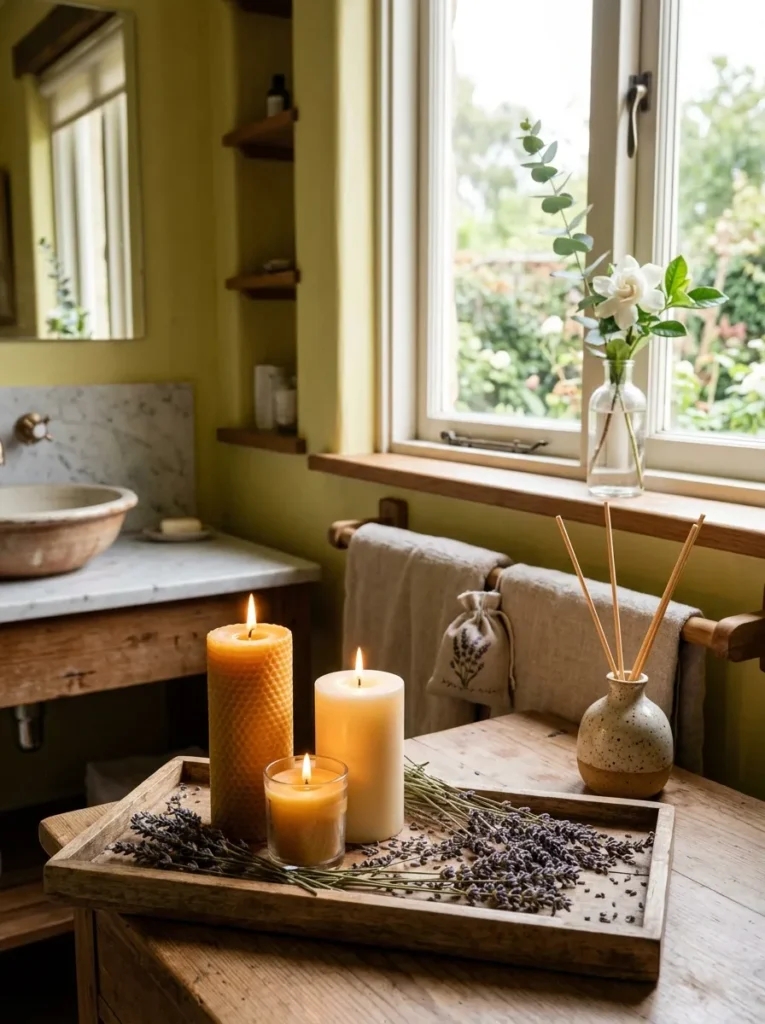
Vibe: The sensory bathroom layer feels like the room was completed by someone who understood that smell is experienced before sight on entering a space — the distributed botanical scent presence creating a bathroom that is experienced as warm and restorative before any visual quality is consciously registered.
Why it works: A distributed natural botanical scent system at three heights in the bathroom applies the olfactory environment completion principle — the bathroom is the domestic room where scent has the greatest atmospheric impact because the warm, humid air carries aromatic compounds more effectively than the cooler, drier air of other rooms, and because the bathroom’s purpose (bodily hygiene and restoration) makes fragrance a specifically appropriate environmental quality rather than merely a decorative one. The three-height distribution (candle tray at vanity level, reed diffuser at vanity height, stem at window height) creates the ambient scent environment described in the dreamy bedroom article — a gentle, distributed olfactory presence rather than a concentrated single point source.
Natural scent specification: Use only natural essential oils in reed diffusers (not synthetic fragrance oils, which lack the botanical complexity of genuine essential oil) and genuine beeswax or soy wax candles (not paraffin, which produces significantly more soot and releases petroleum-derived compounds on burning in an enclosed bathroom).
Budget: Three natural candles: $20–45. Reed diffuser natural essential oil: $20–50. Fresh botanical stem and glass bottle: $5–15. Total: $45–110.
Shop The Look
| Product |
|---|
| Natural beeswax pillar candle set |
| Reed diffuser natural essential oil |
| Dried lavender bundle towels |
| Fresh botanical stem glass bottle |
| Timber tray candle display |
16. Cohesive Hardware Throughout — The Finishing Material System
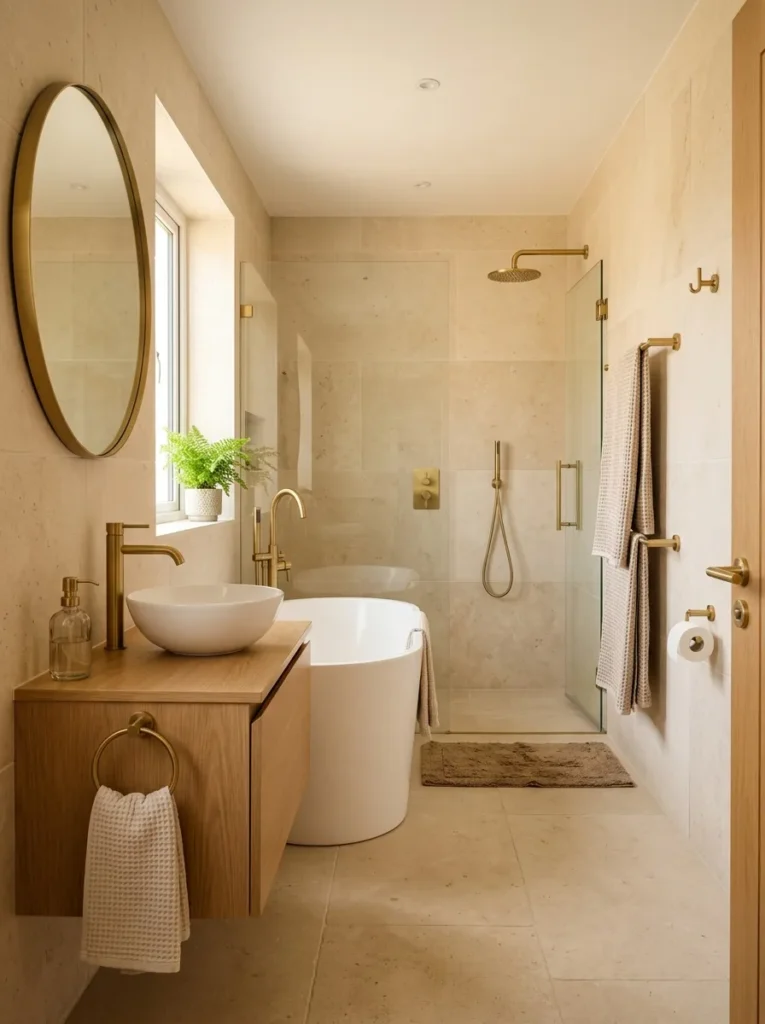
Vibe: The consistent hardware bathroom feels like every decision was made at the same time by the same person with the same material in mind — the unified brushed brass across every metallic element creating the specific quality of a room designed as a whole rather than assembled from parts.
Why it works: Consistent brushed brass hardware throughout every bathroom fitting applies the hardware language principle established in the elegant modern bathroom article — the most common bathroom quality failure is not in the primary material choices (tile, basin, bath) but in the accumulated metallic hardware, where multiple different finishes create the visual noise of inconsistent decision-making. Specifying one metallic finish — brushed brass — for every hardware element (from the largest, the towel rail, to the smallest, the toilet roll holder and robe hook) creates the unified design language that reads as professional specification rather than accumulated purchasing. The brushed finish specifically (rather than polished) reduces fingerprint and water spot visibility while maintaining the warm metallic quality.
Supplier coordination: Specifying all bathroom hardware from a single manufacturer’s coordinated range provides the most reliable finish consistency across all fixture categories — brands including Perrin & Rowe, Crosswater, Samuel Heath, and Watermarks produce complete bathroom hardware ranges in brushed brass covering every fixture from tap to robe hook within the same production process and finish specification.
Budget: Brushed brass tap: $200–600. Brushed brass shower set: $300–900. Brushed brass accessory set (rail, holder, hooks): $150–400. Total hardware: $650–1,900.
Shop The Look
| Product |
|---|
| Brushed brass basin tap |
| Brushed brass shower system |
| Brushed brass towel rail |
| Brushed brass accessory set |
| Brushed brass door handle bathroom |
How to Start Your Style and Function Bathroom Project
The single most important first move before beginning any bathroom renovation or refresh is conducting a thorough needs audit — an honest assessment of everything the bathroom must do for the specific household rather than everything a generically beautiful bathroom might contain. This audit documents: the number and ages of the household members who use the bathroom (which determines storage volume requirements, fixture height specifications, and safety provision needs), the primary use mode of the bathroom (quick functional daily use versus extended therapeutic bathing versus grooming-intensive preparation), the specific storage items that need accommodation (the actual count of toiletries, the number of towels, the specific grooming equipment), and the specific spatial constraints (the actual room dimensions, the positions of existing plumbing, the window position and natural light direction). This needs audit, conducted before any product is selected or any design direction chosen, prevents the most common bathroom renovation failure: the beautiful bathroom that doesn’t work for the specific household because its storage is insufficient, its fixture positions are inconvenient, or its lighting is inadequate for the grooming use the household actually requires.
The most common mistake in bathroom renovation planning is making material and aesthetic decisions before layout and storage decisions. A bathroom that looks beautiful but has insufficient storage for its household’s actual product count will be perpetually visually cluttered, because the household’s possessions will always overflow the available storage onto the countertops and edges. A bathroom with generous, well-organized storage that is finished in modest materials reads as organized and calm; a bathroom with exquisite materials and insufficient storage reads as perpetually messy regardless of its material quality. Establish the storage requirement, design the storage system, then specify the materials.
Three specific investments under $150 that most immediately improve any bathroom’s style and function simultaneously: replacing all existing chrome bathroom accessories (towel ring, toilet roll holder, robe hook) with a consistent brushed brass set ($40–80 for a three-piece set — the hardware consistency improvement that most immediately converts a bathroom from assembled to designed); adding one or two above-toilet floating shelves in natural timber ($30–60 for two solid oak shelves and concealed brackets — the storage addition that most immediately converts the bathroom’s most wasted wall into its most useful storage zone); and introducing a natural botanical element at the vanity (a small plant in a terracotta or ceramic pot, $10–25 — the living warmth that makes any bathroom feel genuinely inhabited rather than merely decorated). These three investments combined for under $150 address hardware consistency, additional storage, and botanical warmth — the three bathroom improvements that provide the highest immediate return on investment regardless of the bathroom’s existing material quality or renovation level.
Frequently Asked Questions About Bathroom Ideas That Blend Style and Function
How do you make a small bathroom feel stylish without sacrificing function?
The bathroom ideas that most effectively deliver both style and function in a small space are those that provide multiple benefits from a single decision. Large format tile (delivering spatial expansion and easy cleaning from one material choice), a floating vanity (delivering floor-space revelation, under-vanity storage, and visual lightness from one fixture decision), frameless glass (delivering visual openness and water containment from one shower solution), and tone-matching grout (delivering a minimal-grid appearance from a single specification decision) all provide style and function simultaneously rather than trading one for the other. The small bathroom’s specific constraint is floor space — every decision that provides storage, style, and function without consuming additional floor area (above-toilet shelving, ceiling-height storage, wall-mounted fixtures, floating furniture) is specifically appropriate.
What is the most cost-effective bathroom upgrade for maximum style improvement?
The most cost-effective bathroom upgrades for maximum style improvement, in order of return per pound of investment: replacing hardware finishes (towel rail, toilet roll holder, robe hook, tap) with a consistent brushed brass or matte black set ($80–200 for a complete bathroom hardware replacement — the single modification that most immediately changes the room’s design language); regrouting with a contrasting or tone-matching grout color over existing white grout ($30–60 in materials for a standard bathroom — the modification that most dramatically changes an existing tile’s visual character); adding a new mirror (replacing a plain utilitarian mirror with an LED backlit mirror or a mirrored cabinet — $80–250 for a quality LED mirror — the improvement that addresses lighting quality, storage, and visual expansion simultaneously); and introducing consistent bathroom accessories (matching soap dispenser, matching tissue holder, matching candle holder in a single material — $40–80 for a coordinated set — the organization detail that converts accumulated objects into a composed still life).
How do you choose between a walk-in shower and a bathtub for a bathroom renovation?
The walk-in shower versus bathtub decision is primarily a usage and household need decision rather than an aesthetic one. A walk-in shower with a ceiling rain head is the more space-efficient option (a standard shower zone requires approximately 90×90cm minimum; a standard bath requires approximately 170×75cm) and the more daily-use-appropriate option for households where bathing is a morning routine. A freestanding bath is the more visually dramatic option and the more appropriate for households where therapeutic bathing (long soaks, weekend recovery bathing) is a priority. In a bathroom large enough to accommodate both, the combination (a walk-in shower plus a freestanding bath) creates the specific bathroom quality of a complete bathing experience — the shower for daily efficiency, the bath for weekly or occasional therapeutic use. In a small bathroom where only one is possible, the shower is typically the more functionally appropriate choice for most households, with the bath reserved for larger bathrooms where its spatial and visual demands can be fully accommodated.
What bathroom tile is easiest to keep clean while looking beautiful?
The easiest-to-clean bathroom tiles that also look beautiful share three properties: large format (fewer grout lines means less grout surface for soap scum and mildew to colonize), smooth surface (textured tiles trap soap and mineral deposits in their surface irregularities), and dark or tone-matching grout (dark or tone-matching grout shows staining less than white grout even when not perfectly clean). The specific tile types that most effectively balance easy cleaning and aesthetic quality: large format porcelain in a stone-effect finish (polished porcelain is the easiest to clean of all tile surfaces, wipes clean with a damp cloth, does not require sealing); large format rectified porcelain with a honed or matte finish (slightly more difficult to clean than polished but significantly more aesthetically natural-looking); and natural stone tile (travertine, limestone, marble) sealed with a penetrating impregnator sealer reapplied annually (the most beautiful but the most maintenance-demanding cleaning requirement of the three options).
How important is bathroom ventilation to both style and function?
Bathroom ventilation is the most important single provision for the long-term maintenance of both the bathroom’s functional hygiene performance and its visual quality — insufficient ventilation is the primary cause of mold growth, grout staining, paint peeling, mirror fogging, and the persistent humidity that accelerates the deterioration of all bathroom surfaces and fixtures. A bathroom that appears impeccably finished on completion but has inadequate mechanical extraction will develop mold on grout lines, on silicone sealants, and on painted ceiling surfaces within 6–18 months, permanently undermining both the bathroom’s hygiene performance and its visual quality. Specify mechanical extraction ventilation at a minimum rate of 15 litres per second for continuous-run fans or 30 litres per second for intermittent fans, ducted externally (not recirculating through a charcoal filter), positioned at the highest point in the room, with the fan housing specified in the bathroom’s hardware finish where possible. Ventilation is the unsexy specification that makes every other bathroom specification worth making.
Ready to Create Your Style and Function Bathroom?
These 16 ideas move through every dimension of where bathroom style and function genuinely converge — from the storage intelligence of the floating vanity and the above-toilet shelving, through the spatial quality of the large format tile and the frameless glass shower, to the material richness of the natural stone basin and the tonal warm palette, to the sensory completeness of the botanical layer, the underfloor heating, and the distributed scent system, to the design discipline of the consistent hardware language and the graphic tile-and-grout contrast. Starting with the needs audit — the specific household’s storage volume, primary use mode, and fixture requirements documented before any product is chosen — is the beginning that ensures every subsequent decision serves the actual bathroom rather than an idealized one. Establish what the bathroom must do. Design the storage and layout that serves those requirements. Then specify the materials, fixtures, lighting, and sensory elements that make those functional decisions as beautiful as they are practical. And let the finished bathroom — the one that stores everything efficiently, performs every function well, and reads as warm and considered from the moment of entry — be the evidence that style and function were never actually in opposition.