15 Smart Bathroom Design Tips for Every Home
A smart bathroom design tip is a specific, actionable decision about space planning, material selection, lighting, storage, fixture specification, or finishing detail that produces a measurable improvement in the bathroom’s function, visual quality, or daily experience — a decision grounded in design intelligence rather than personal taste, and applicable across bathroom types, sizes, and budgets. This article gives you 15 smart bathroom design tips across layout optimization, lighting strategy, material selection, storage integration, fixture specification, and finishing detail so every bathroom in your home functions better, looks more considered, and feels more genuinely pleasurable to use.
A bathroom that works well is not the result of expensive materials or a large footprint. It is the result of a series of specific decisions — about where the light falls, how the storage is integrated, which materials are placed where, and how the fixtures relate to each other and to the room’s architecture — that produce a spatial and experiential quality that good materials alone cannot achieve and that mediocre planning cannot be corrected by any budget. Here are 15 tips worth learning — and applying.
Why Smart Bathroom Design Transforms Daily Experience
Bathroom design draws from the convergence of ergonomic research, materials science, architectural planning, and the hospitality design tradition that has systematically studied and optimized the bathing experience at the highest level of investment and intention. The spa and boutique hotel bathroom — the environment where designers are commissioned to create the most pleasurable possible bathing and grooming experience within a defined footprint — has produced a body of design knowledge about light quality, material layering, storage integration, and spatial sequencing that has gradually transferred into residential bathroom design practice. The smart bathroom design tips in this article represent the application of this professional design knowledge to everyday residential bathrooms at every scale and budget.
The daily use frequency of the bathroom makes its design quality unusually consequential — most people use their primary bathroom two to four times per day, making it one of the most consistently experienced spaces in the home. A bathroom with poor lighting that makes morning grooming difficult, insufficient storage that creates clutter on every horizontal surface, inadequate ventilation that produces persistent humidity and mold, or a shower with poor water pressure and an awkward temperature control creates a daily friction that accumulates into a genuinely significant quality-of-life deficit. Conversely, a bathroom with warm, well-positioned lighting, integrated storage that keeps every surface clear, quality fixtures that perform reliably, and materials that are genuinely beautiful at close range creates a daily ritual of genuine pleasure — the morning shower and the evening wind-down as restorative experiences rather than functional obligations.
Small bathrooms — which constitute the majority of bathrooms in most homes and apartments — respond most dramatically to smart design decisions because every square foot of floor area is consequential and every design error is visible from every position in the room. A poorly placed vanity light that creates shadow on the face rather than illuminating it is an error visible every morning. An undersized mirror that shows only the top half of the face is a daily frustration. A door that swings into the toilet or the shower is a physical obstacle that must be navigated multiple times per day. Smart design eliminates these frictions systematically, creating a room that works with its user rather than against them.
What to Prioritize
| Priority | Detail |
|---|---|
| Lighting | Position, color temperature, and level control before fixture aesthetics |
| Storage | Integration before addition — built-in over surface-placed |
| Materials | Durability and moisture resistance before visual quality |
| Fixtures | Function and water efficiency before finish and styling |
15 Smart Bathroom Design Tips for Every Home
1. Position Vanity Lighting at Face Level, Not Overhead
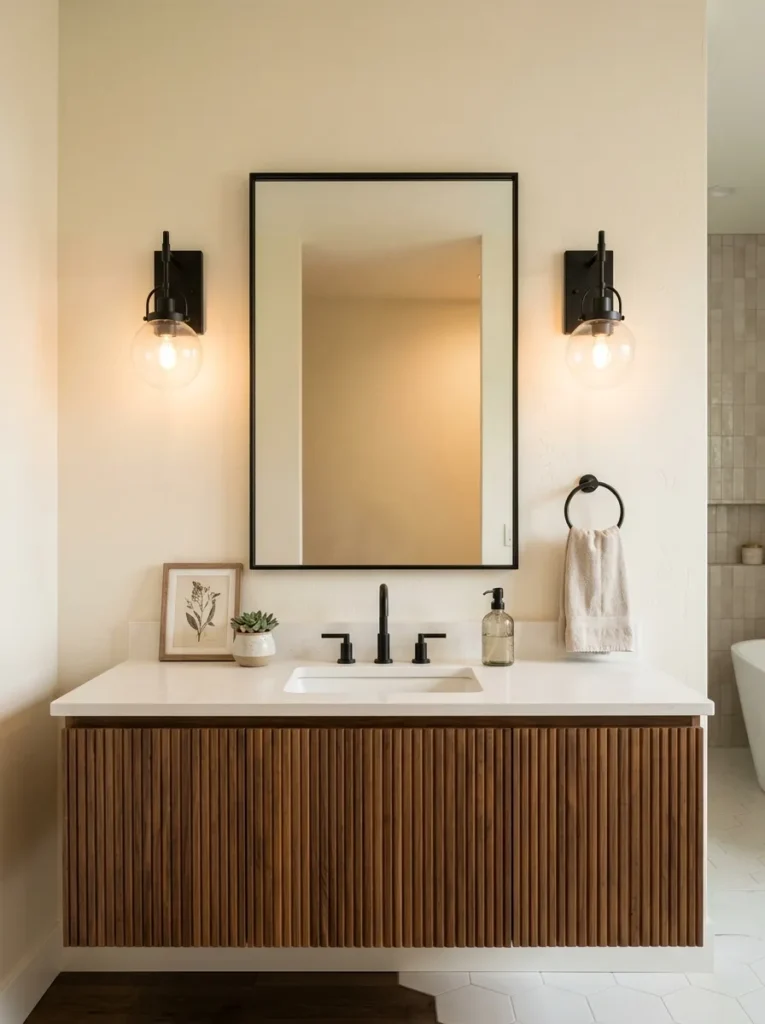
Vibe: The vanity is well-lit — bilateral sconce lighting at face height creates the most flattering and most functionally effective vanity illumination available, where the light comes from the sides rather than from above and eliminates the unflattering downward shadows that overhead lighting produces on the face.
Why it works: Overhead vanity lighting — the single light bar mounted above the mirror that most bathrooms receive as a default — produces the worst possible light for face grooming. Light from directly above casts shadows downward into the eye sockets, under the nose, and beneath the chin, creating the same unflattering directional light that a flashlight pointed upward at a face produces. Bilateral lighting (one sconce on each side of the mirror, at approximately eye height) illuminates the face from the sides, which is the directional light that most closely replicates natural outdoor light at mid-morning — the light condition under which makeup, grooming, and skin assessment are most accurately performed. The position should place the center of each sconce at approximately 60 inches from the floor, which centers the light at the eye level of a standing adult.
How to get it: Install two wall sconces flanking the mirror, spaced so they are positioned at the mirror’s outer edges — typically 28–36 inches apart for a standard vanity mirror, or wider for a double-sink vanity. If retrofitting into an existing bathroom where bilateral electrical positions are not available, a single overhead fixture can be improved by choosing a fixture that distributes light forward (toward the face) rather than downward, and by installing a dimmer to control intensity.
Quick Win: Adding a small plug-in wall sconce beside an existing vanity mirror (available in cordless battery versions that require no electrical work, $25–$60) immediately improves face lighting quality without any electrical installation.
Shop The Look
- Bathroom wall sconce bilateral vanity
- Matte black sconce pair bathroom
- Brushed brass vanity sconce set
- Warm LED vanity bulb 2700K G25
- Dimmer switch bathroom compatible
Also view: 14 Modern Bathroom Designs That Look Luxurious
2. Install a Mirror That Fills the Full Vanity Width
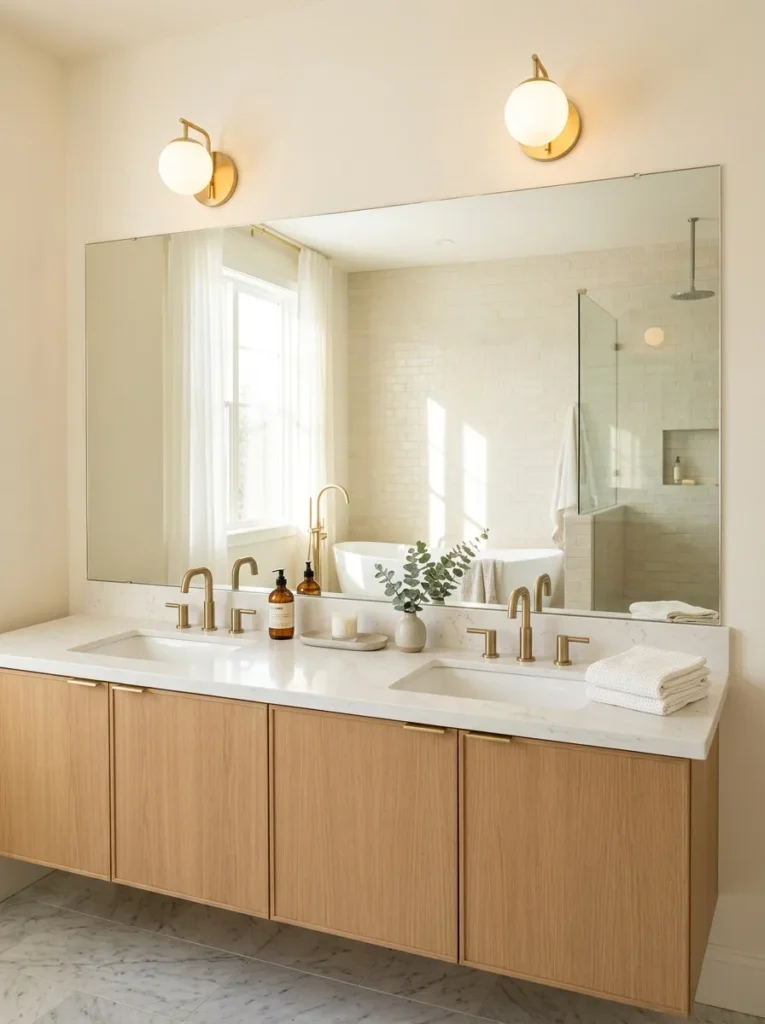
Vibe: The bathroom is open — a mirror spanning the full vanity width effectively doubles the perceived width of the bathroom and amplifies natural light throughout the space in a way that a standard centered mirror, however beautiful, cannot approach.
Why it works: The bathroom mirror size decision is the single most spatially impactful small bathroom intervention available. A standard bathroom receives a mirror that is 24–30 inches wide centered above a 36–48-inch vanity, leaving 6–12 inches of wall visible on each side. A full-width mirror that matches the vanity cabinet’s width (typically 36–60 inches) eliminates this wasted wall space, creates the optical illusion that the bathroom continues beyond its physical boundary, and reflects natural light from the window across the full width of the bathroom rather than only at the mirror’s limited width. In small bathrooms specifically, the full-width mirror is the most cost-effective spatial upgrade available.
How to get it: Measure the vanity cabinet width precisely. Source a mirror in exactly the same width — custom mirror cutting at a local glass shop ($1.50–$3.00 per square inch, typically $60–$200 for a standard bathroom vanity size) provides the most precise fit. Alternatively, two mirrors mounted side by side (frameless bathroom mirrors at $30–$80 each) create a full-width mirror installation without custom cutting. For maximum impact, the mirror height should extend from 4–6 inches above the backsplash to within 4–6 inches of the ceiling — filling the vertical space as well as the horizontal.
Shop The Look
- Full width bathroom mirror frameless
- Custom cut mirror glass local
- Wide rectangular bathroom mirror simple
- Mirror mounting clip set frameless
- Mirror adhesive mounting construction
Also view: 16 Modern Small Bathroom Designs for Every Home
3. Use Large Format Tile to Visually Expand Small Spaces
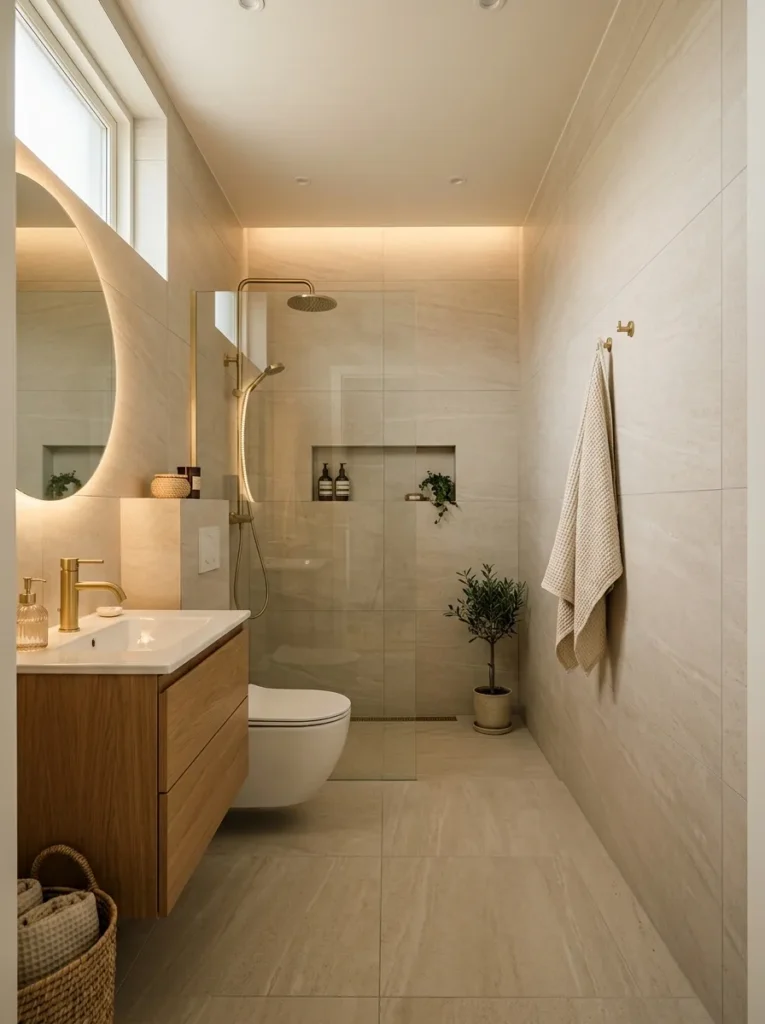
Vibe: The bathroom is expansive — large format tiles with minimal grout lines on both floor and walls create the most spatially generous small bathroom available, where the visual continuity of few grout lines and consistent surface material makes the room read as significantly larger than its physical dimensions.
Why it works: Tile grout lines are visual boundaries — the more grout lines in a tiled space, the more the eye processes the space as divided into small units, which makes the space read as small. Large format tiles (24×24-inch minimum, with 24×48-inch or even 32×32-inch tiles providing more dramatic effect) reduce the number of grout lines in proportion to the tiled area, creating a surface that reads as more continuous and therefore more spatially generous. Using the same large format tile on both the floor and the walls to ceiling height eliminates the visual boundary between the horizontal and vertical surfaces, further enhancing the spatial expansion effect. Warm cream or warm grey tones in the tile (rather than pure white or cool grey) maintain the spatial openness while adding the material warmth that prevents a large tiled surface from reading as clinical.
How to get it: Specify 24×24-inch minimum tile size in bathroom renovations — the tile cost difference between 12×12 and 24×24-inch format is modest (typically $1–$3 per square foot additional) while the spatial impact is significant. Use the same tile on floor and walls for maximum continuity, adjusting the grout color to match the tile (same-color grout further reduces the visual prominence of grout lines). For floors, specify a slightly textured or matte tile surface for slip resistance — glossy large format tiles are slip hazards on wet bathroom floors regardless of their visual appeal.
Shop The Look
- Large format tile 24×24 warm cream
- Large format tile 24×48 warm grey
- Same color grout tile matching
- Large tile floor adhesive mortar
- Large format tile leveling system
4. Install a Recessed Medicine Cabinet for Hidden Storage
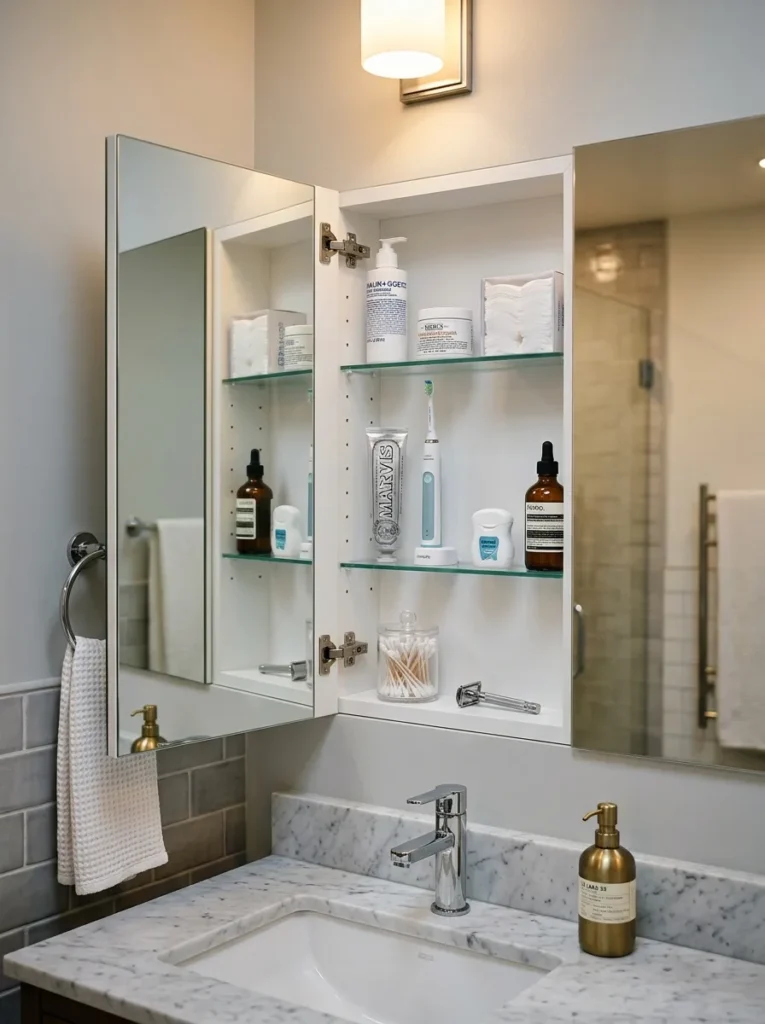
Vibe: The storage is hidden — a recessed medicine cabinet that fits flush with the wall surface stores all daily bathroom essentials out of sight while appearing as a standard bathroom mirror when closed, creating the clutter-free vanity surface that is the primary visual quality marker of a well-designed bathroom.
Why it works: The recessed medicine cabinet is the most storage-efficient bathroom intervention available per square inch of space — it uses the dead space within the wall cavity (the 3.5 inches between wall studs in a standard framed wall) to create 3–4 inches of usable storage depth without projecting into the room’s limited floor area. A surface-mounted cabinet projects 4–6 inches into the room, which in a small bathroom creates a significant obstacle; a recessed cabinet occupies zero additional floor space and zero additional visual space when the mirrored door is closed. The mirror-fronted door serves double duty as the bathroom’s primary mirror and as the storage enclosure, eliminating the need for a separate mirror purchase.
How to get it: Recessed medicine cabinets require installation between wall studs — the standard 14.5-inch interior stud spacing accommodates cabinets up to 14 inches wide. For wider installations, a stud can be removed and the opening reinforced with a header — this requires a licensed contractor if the wall is load-bearing. Recessed medicine cabinets in a range of sizes and finishes are available from American Standard, Kohler, Robern, and specialty bathroom retailers at $80–$600 depending on size, mirror quality, and interior features (adjustable shelves, electrical outlets, integrated lighting).
Shop The Look
- Recessed medicine cabinet mirrored door
- Flush mount medicine cabinet single
- Recessed cabinet double door wide
- Medicine cabinet interior organizer
- Recessed cabinet installation kit
5. Specify a Thermostatic Shower Valve for Temperature Precision
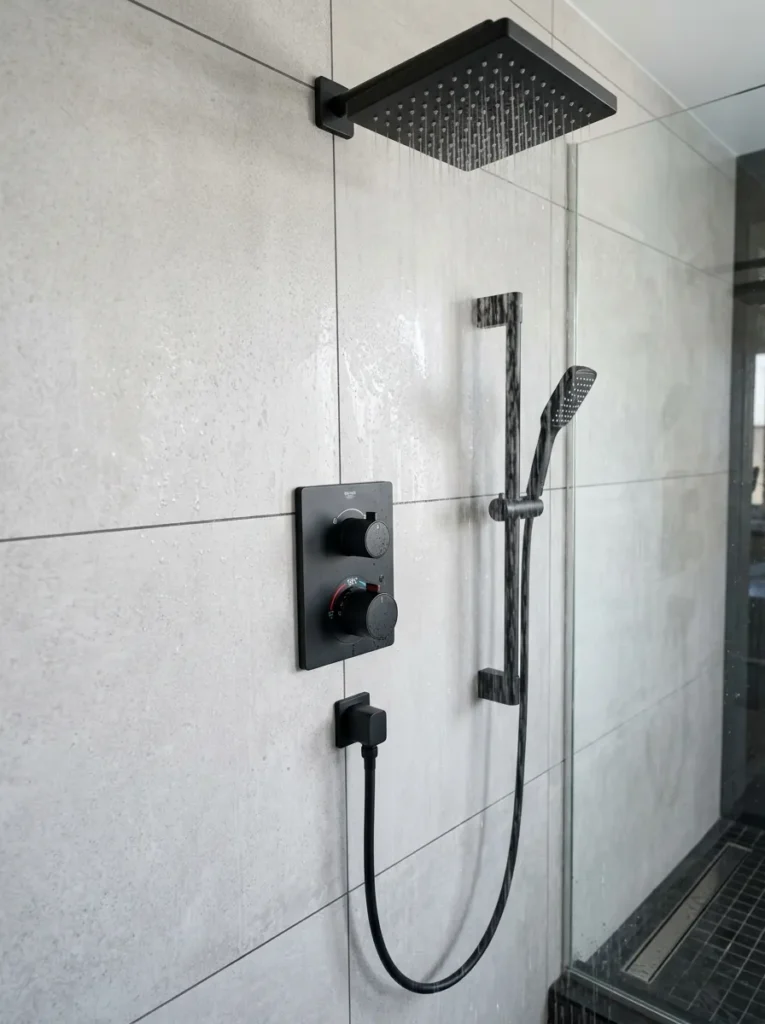
Vibe: The shower is precise — a thermostatic shower valve that maintains a set temperature regardless of water pressure changes elsewhere in the house eliminates the daily frustration of temperature adjustment and the safety risk of scalding from sudden pressure drops, replacing the standard shower’s uncertainty with genuine control.
Why it works: Standard pressure-balance shower valves maintain a fixed ratio of hot to cold water but allow the temperature to change whenever pressure changes elsewhere in the plumbing system — flushing a toilet, running a dishwasher, or opening another faucet causes a momentary temperature spike or drop. Thermostatic valves maintain the water temperature at the set point regardless of system pressure changes, delivering water at exactly the set temperature every time the shower is turned on. The separate temperature and volume controls allow the water to be pre-heated to the set temperature before entry (by turning on the volume at the already-set temperature) and allow precise volume control during the shower without affecting the temperature. These functional advantages make thermostatic valves the correct specification for every new shower installation regardless of budget level.
How to get it: Thermostatic shower valves are available from Grohe, Hansgrohe, Moen, and Delta at $200–$800 for residential-grade quality models. Installation requires a licensed plumber in most jurisdictions — the thermostatic valve replaces the standard shower valve during rough plumbing, before tile installation. Specify the thermostatic valve at the plumbing rough-in stage of any bathroom renovation rather than attempting to add it after tile is installed, which requires opening the wall.
Shop The Look
- Thermostatic shower valve matte black
- Thermostatic valve brushed brass
- Shower head rain style ceiling
- Hand shower slide bar kit
- Shower control plate cover trim
6. Extend Tile Into the Shower Niche for Integrated Storage
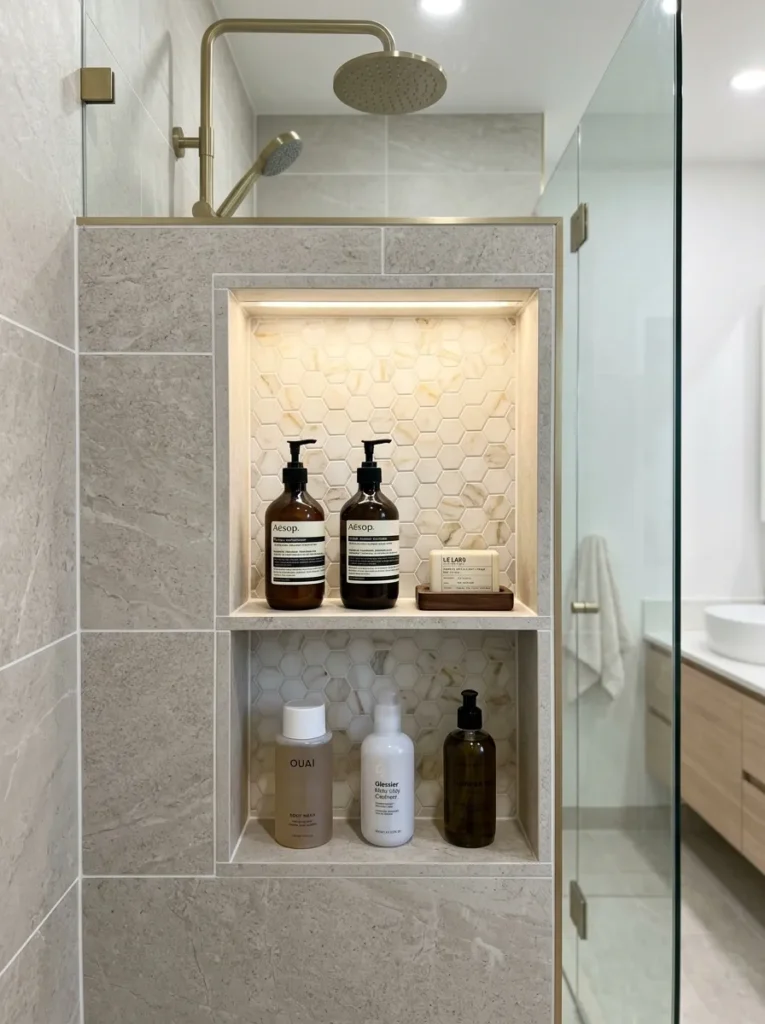
Vibe: The niche is integrated — a recessed shower niche with a contrasting accent tile on the back wall eliminates surface-mounted shower caddies, keeps products organized at accessible heights, and creates a designed architectural detail that improves the shower’s appearance and function simultaneously.
Why it works: The shower niche is the bathroom storage decision with the highest design impact per dollar invested — it replaces a $15–$40 surface-mounted shower caddy (which reads as a utilitarian addition rather than a designed element) with a built-in architectural feature that stores the same products while appearing as an intentional part of the shower’s design. A contrasting tile on the niche’s back wall — a warm marble strip tile, a warm gold mosaic, or even a single contrasting colored tile — elevates the niche from a functional opening to a designed feature element, creating the specific detail that makes a shower feel custom-designed rather than standard-specified. The niche should be built during rough-in construction (between studs or with a framed opening) before tile installation.
How to get it: Specify the shower niche location and size during bathroom framing — the standard size is 12 inches wide and 24–36 inches tall, positioned at a height that serves the primary user (typically with the bottom of the niche at elbow height when standing in the shower, approximately 48 inches from the floor). Select the accent tile for the back wall before ordering the main shower tile to ensure color coordination. Install a continuous waterproofing membrane across all niche surfaces before tiling — the niche’s interior corners are the most vulnerable points for water infiltration if not properly waterproofed.
Shop The Look
- Shower niche pre-formed waterproof insert
- Mosaic tile accent niche back wall
- Marble strip tile niche accent
- Waterproof membrane niche installation
- Tile niche corner trim piece
7. Install a Heated Towel Rail Instead of a Standard Towel Bar
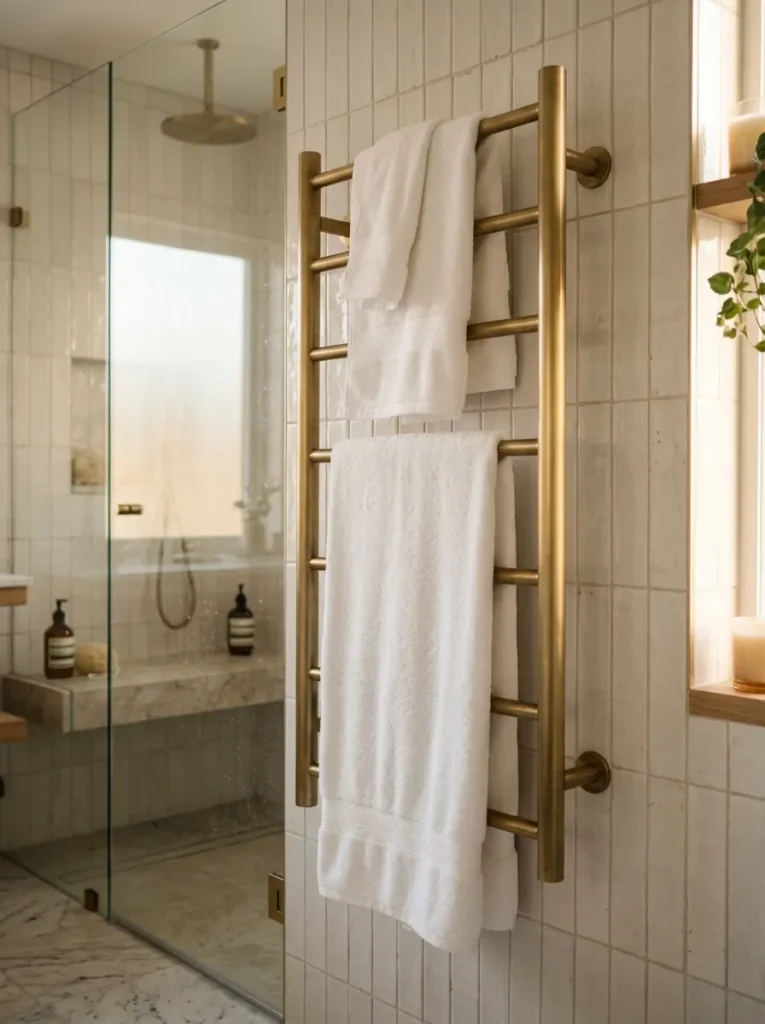
Vibe: The bathroom is spa-like — a heated towel rail that delivers a warm, dry towel at every shower creates the specific daily luxury of the hotel and spa bathroom experience, where the warm towel is the sensory detail that most consistently elevates a bathroom from functional to genuinely pleasurable.
Why it works: A heated towel rail serves three functions simultaneously that a standard towel bar cannot: it warms towels for use (providing the warm-towel sensation that is among the most universally pleasurable small daily luxuries available), it dries towels between uses (reducing the bacterial and mold growth that cold, slowly-drying towels in humid bathrooms consistently develop), and it provides supplemental space heating in the bathroom during winter months (a 150-watt electric towel rail generates meaningful warmth in a small bathroom). The rail’s ladder-style form is also more visually refined than the standard single or double towel bar, and in brushed brass or matte black finish it serves as a styled bathroom accessory rather than a purely utilitarian fixture.
How to get it: Electric heated towel rails (which require only a standard 110V electrical connection rather than a hydronic plumbing connection) are the most accessible installation option for most homerooms — they are available in hardwired versions (installed by an electrician, $150–$400 for quality options from Warmup, Myson, or Jeeves) and plug-in versions that require no electrical work ($80–$200 from specialty retailers). Specify the rail size proportionate to the bathroom’s wall space — a 20×28-inch rail is appropriate for a powder room or small bathroom, while a 24×48-inch rail provides more usable drying area for a full bathroom.
Shop The Look
- Electric heated towel rail matte black
- Heated towel rail brushed brass
- Plug in heated towel rail bathroom
- White hotel towel set cotton
- Towel rail installation kit electric
8. Choose a Wall-Hung Toilet for Space and Cleanability
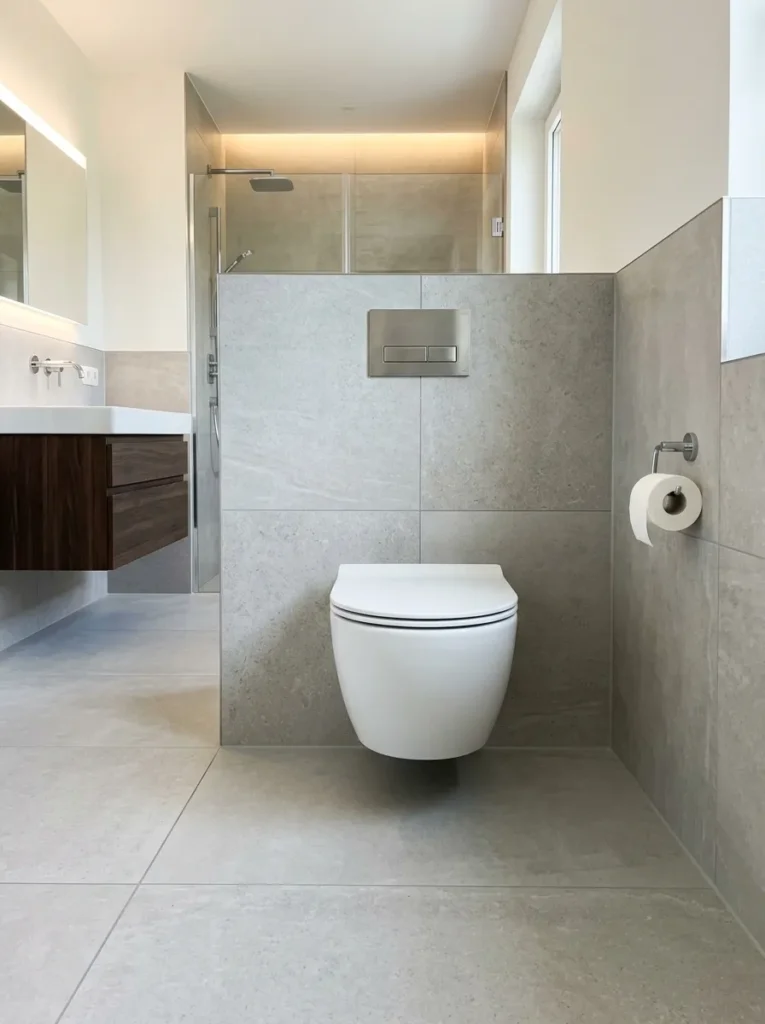
Vibe: The bathroom is clean — a wall-hung toilet with a concealed cistern and completely clear floor beneath is the most visually and practically clean toilet specification available, where the continuous floor from front to back makes both cleaning and spatial perception dramatically better than any floor-mounted toilet.
Why it works: The wall-hung toilet solves two simultaneous problems that floor-mounted toilets create in every bathroom they occupy. The first is cleaning — the floor beneath and around a floor-mounted toilet is the most difficult cleaning zone in any bathroom, requiring specific tools and frequent attention to prevent buildup in the gap between the toilet base and the floor. A wall-hung toilet eliminates this zone entirely: the floor is continuous and unobstructed from the front of the toilet bowl all the way to the back wall, and can be cleaned with the same mop or cloth used on the rest of the floor. The second is spatial perception — the continuous visible floor beneath a wall-hung toilet makes the bathroom read as approximately 30% larger than a floor-mounted toilet in the same position, because the unobstructed floor plane extends the perceived floor area.
How to get it: Wall-hung toilets require a carrier frame (a structural steel frame installed within the wall that supports the toilet’s cantilevered load and houses the concealed cistern) installed during bathroom construction or renovation. The carrier frame (from Geberit, Duravit, or TOTO, $250–$500 for the frame alone) is installed at the rough plumbing stage before drywall. The toilet bowl mounts to the carrier frame’s two support bolts after wall finishing. Total installed cost for a wall-hung toilet system (frame, toilet, in-wall cistern, flush plate): $800–$2,000 for most residential installations.
Shop The Look
- Wall-hung toilet bowl white modern
- In-wall toilet carrier frame Geberit
- Flush actuator plate matte black
- Wall-hung toilet seat soft close
- In-wall cistern installation kit
9. Waterproof the Entire Shower Enclosure, Not Just the Base
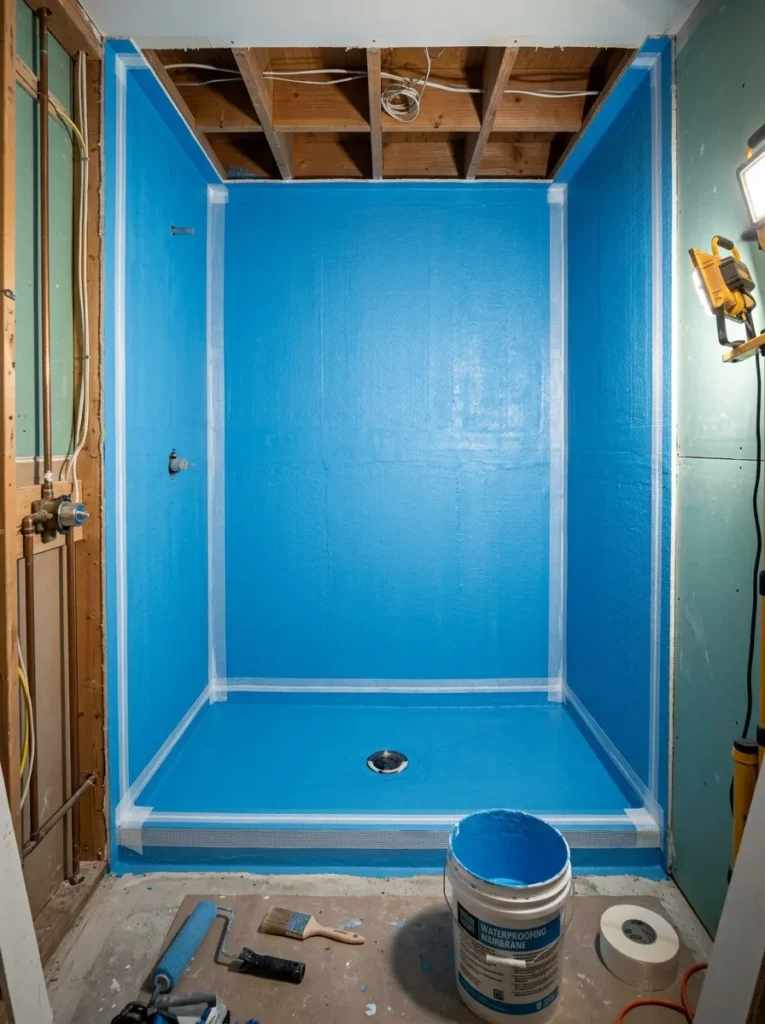
Vibe: The installation is professional — a comprehensive waterproofing membrane system applied to all shower surfaces before tile installation is the single most important structural decision in any bathroom renovation, creating the moisture barrier that prevents the wall and floor damage that inadequate waterproofing consistently produces.
Why it works: Shower water penetration behind tile — caused by inadequate waterproofing of the shower enclosure — is the most common and most expensive bathroom construction failure in residential renovation. Water that penetrates grout or tile edges and contacts unprotected wall substrate causes structural deterioration, mold growth within walls, and eventual complete wall failure that requires full tile removal and rebuilding — a $3,000–$8,000 correction of a problem preventable for $200–$400 in proper waterproofing materials during original construction. The critical mistake is waterproofing only the shower floor pan (which most contractors do correctly) while leaving the shower walls inadequately protected — water that runs down the shower walls and contacts any grout joint penetrates eventually to the wall substrate regardless of the quality of the tile or the grout.
How to get it: Specify a continuous waterproofing membrane system on all shower surfaces — floor and walls to the full height of the tile — using a sheet membrane (Schluter KERDI, Wedi board) or liquid membrane (Laticrete Hydro Ban, RedGard) system. Apply additional reinforcing mesh tape to all corners and junctions before membrane application. Allow the membrane to cure fully before tile installation. The material cost of comprehensive shower waterproofing for a standard 36×36-inch shower enclosure: $100–$250 — the most cost-effective investment available in bathroom renovation.
Shop The Look
- Schluter KERDI waterproof membrane sheet
- RedGard liquid waterproofing membrane
- Waterproof corner tape reinforcement
- Wedi board waterproof backer
- Waterproofing membrane application roller
10. Install a Humidity-Sensing Exhaust Fan
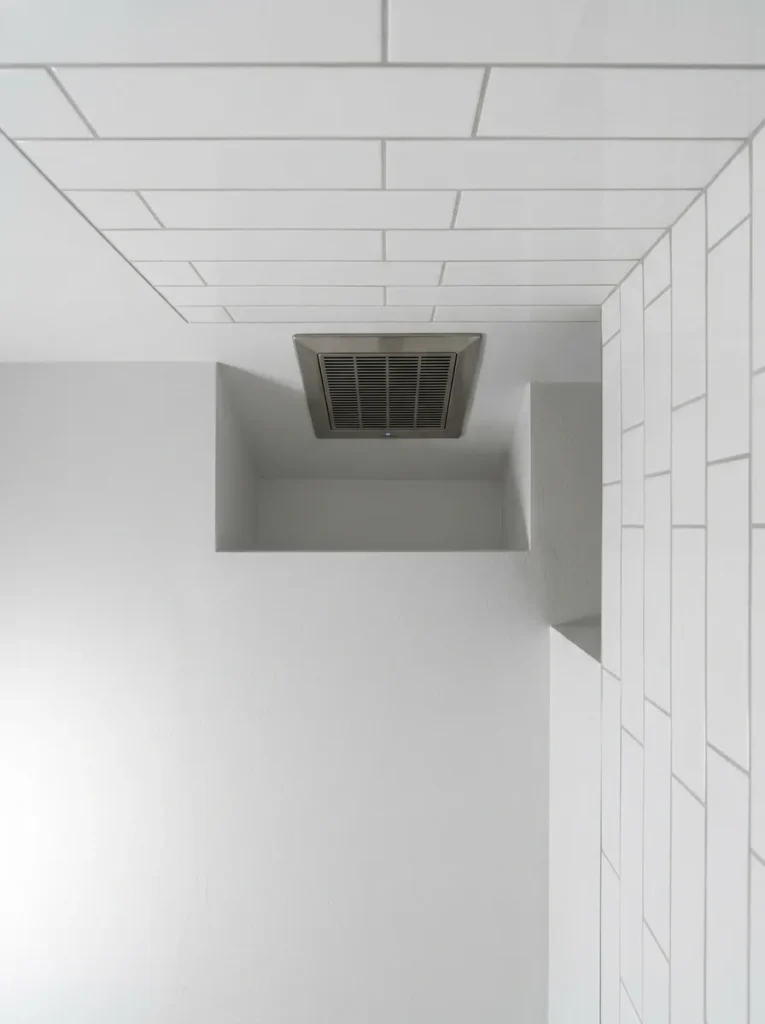
Vibe: The fan is intelligent — a humidity-sensing exhaust fan that activates automatically when bathroom humidity exceeds the set threshold and runs until humidity returns to ambient levels eliminates the persistent bathroom moisture problems (mold, mildew, paint peeling, grout deterioration) that manual-switch fans fail to address because users forget to run them long enough.
Why it works: Standard bathroom exhaust fans operated by a manual switch are functionally inadequate in most residential bathrooms because they depend on user behavior that consistently fails — most users turn the fan off when they leave the bathroom, which is typically before the humidity generated by a shower has been exhausted from the space. The residual humidity (often 70–90% relative humidity immediately after a shower) requires 15–30 minutes of fan operation to reduce to ambient levels, but the fan is typically switched off within 5–10 minutes. A humidity-sensing fan (with an integrated RH sensor that activates the fan at 60–70% relative humidity and runs it until humidity drops below 50%) provides automatic, correctly timed operation that eliminates the user behavior requirement and ensures effective humidity management regardless of whether the occupant remembers to run the fan.
How to get it: Humidity-sensing bathroom exhaust fans are available from Broan-NuTone, Panasonic, and Delta at $40–$150 for residential quality models. The Panasonic WhisperSense (FV-0511VKS2) is consistently rated among the most effective humidity-sensing fans in independent testing — it activates on both motion sensing and humidity sensing, ensuring operation whether the humidity sensor is triggered or not. Installation is a direct swap for an existing ceiling fan location in most cases; a licensed electrician should perform the installation to ensure proper connection to the bathroom’s electrical circuit.
Shop The Look
- Humidity sensing exhaust fan Panasonic
- Low profile exhaust fan bathroom
- Quiet exhaust fan 0.3 sone rated
- Exhaust fan timer humidity sensor
- Bathroom fan duct kit installation
11. Use Vertical Tile Stacking to Make Ceilings Appear Higher
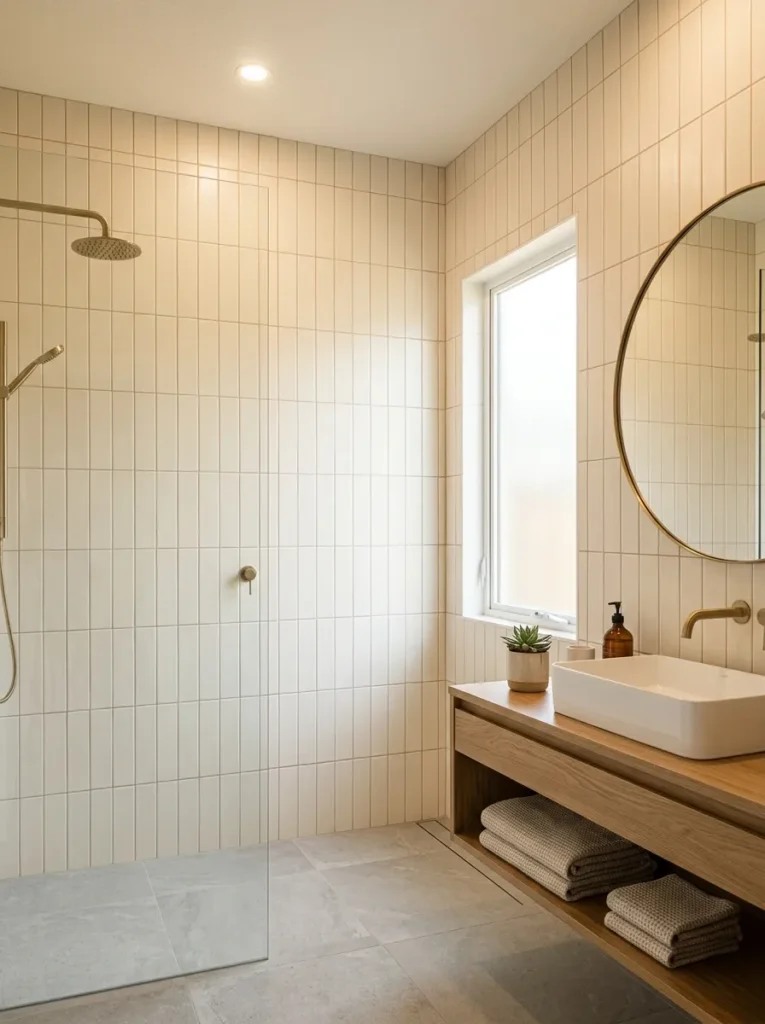
Vibe: The bathroom is tall — vertically oriented rectangular tiles with strong upward grout lines draw the eye toward the ceiling in a way that horizontal tile stacking cannot achieve, making the bathroom feel significantly more architecturally generous than its physical ceiling height.
Why it works: Tile orientation creates directional visual lines that the eye follows — horizontal tile stacking creates horizontal lines that emphasize the room’s width and make ceilings feel lower; vertical tile stacking creates vertical lines that emphasize the room’s height and make ceilings appear higher. In bathrooms with standard 8-foot ceilings — where additional perceived height would improve the spatial quality — vertical tile orientation is the correct choice for wall tile installation. The elongated tile format (3×12, 4×12, or 2×16-inch tiles in vertical orientation) creates the strongest upward visual line effect, though even standard subway tiles (3×6) rotated to vertical orientation produce a measurable apparent-height improvement compared to the conventional horizontal installation.
How to get it: Specify vertical tile orientation in any bathroom tile installation — this is purely an installation decision that costs no additional material but requires the tile installer to plan the layout from vertical reference lines rather than horizontal ones. The tile selection should favor elongated rectangular tiles over square tiles for maximum vertical line effect — 4×12-inch or 4×16-inch elongated tile formats produce the most dramatic vertical line effect. Grout the installation in a color closely matching the tile to minimize the visual prominence of horizontal grout lines while emphasizing the vertical ones.
Shop The Look
- Elongated subway tile 4×12 cream
- Elongated tile 3×12 white bathroom
- Tile spacer 1/16 inch vertical installation
- Matching grout color tile coordinate
- Tile trim piece edge finishing
12. Install Floating Vanity for Visual Floor Space
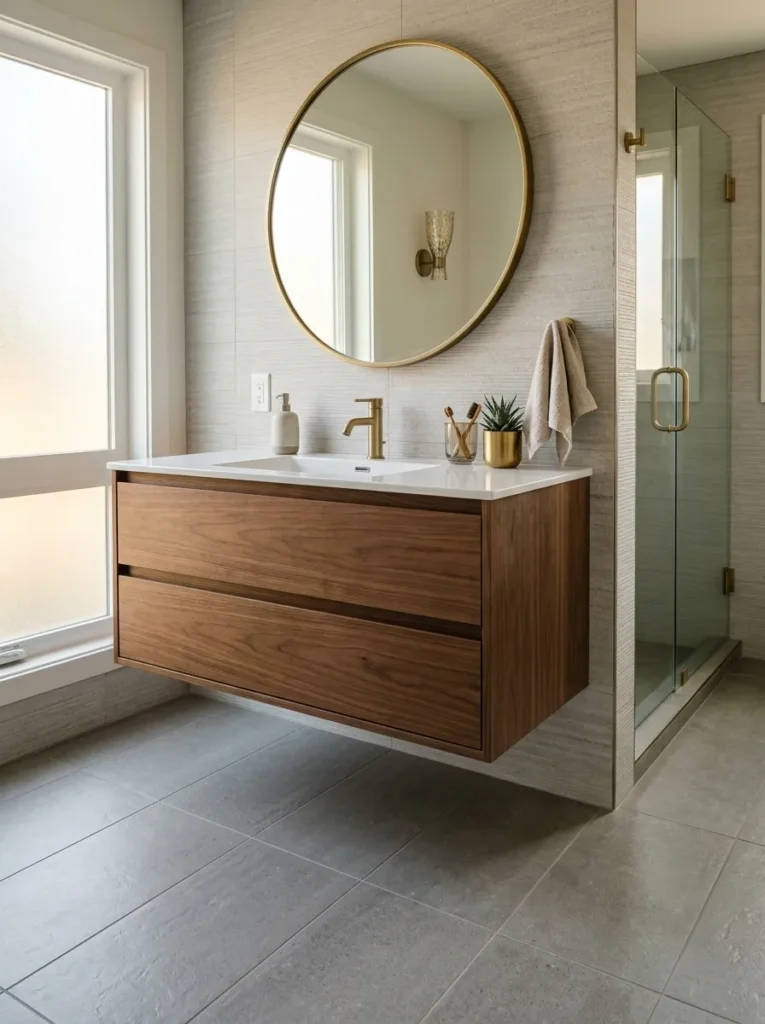
Vibe: The bathroom is modern — a floating wall-mounted vanity with clear floor space beneath creates the specific quality of spatial openness that floor-contact vanities permanently deny, making the bathroom read as larger and more contemporary regardless of its actual dimensions.
Why it works: A floating vanity creates spatial openness in a bathroom through the same mechanism as a wall-hung toilet — the continuous visible floor beneath the cabinet extends the perceived floor area and eliminates the visual mass of floor-contact furniture at the room’s most used horizontal surface. The floating vanity’s additional functional advantage is cleanability: the floor beneath a floating vanity is as accessible for mopping and cleaning as any other section of the bathroom floor, eliminating the difficult-to-clean zone beneath and around traditional floor-contact vanities. The installation height (typically 18–21 inches from finished floor to vanity cabinet bottom) should provide comfortable working height at the sink while maximizing the visible floor clearance beneath.
How to get it: Floating vanities require a carrier system within the wall (a structural backer of 3/4-inch plywood anchored to wall studs) to support the cantilevered cabinet load. Install the backer during bathroom framing or renovation. Floating bathroom vanities are widely available from IKEA (GODMORGON series), Kohler, American Standard, and specialty bathroom retailers at $300–$2,000 depending on size and material. The vanity should be mounted to the wall backer using the manufacturer’s specified hardware, anchoring into the backer material for the necessary load support.
Shop The Look
- Floating bathroom vanity white modern
- Wall mount vanity wood warm
- Floating vanity backer board installation
- Undermount sink vanity integrated
- Floating vanity soft close drawer
13. Add a Window or Skylight for Natural Light and Ventilation
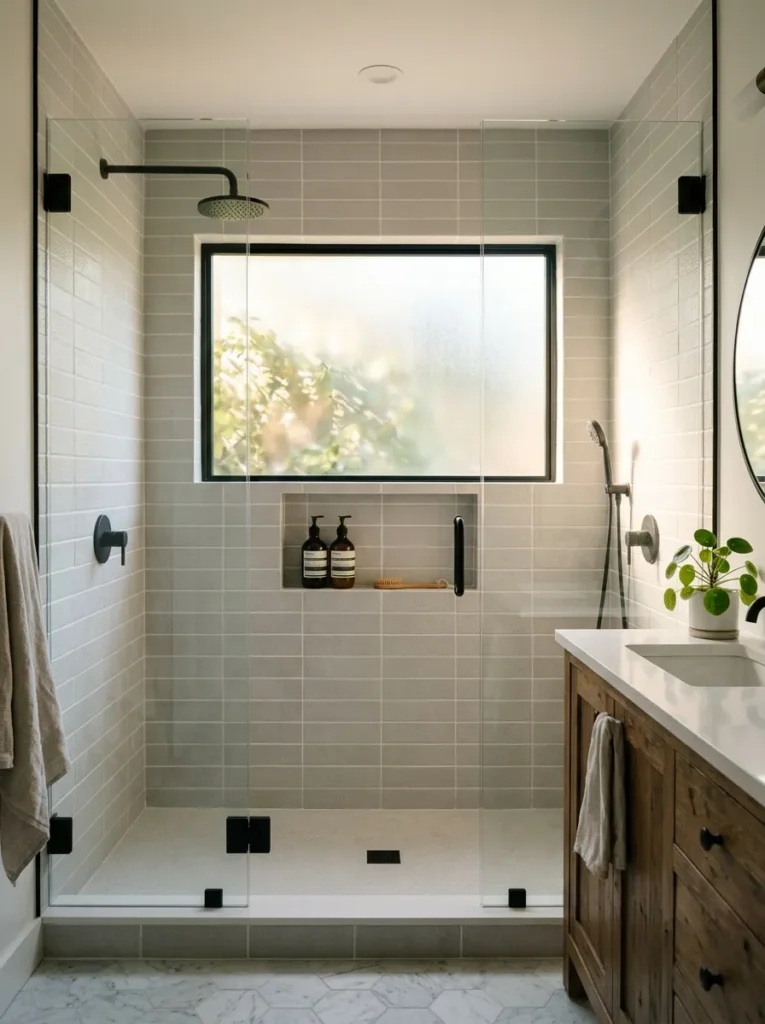
Vibe: The shower is naturally lit — a frosted glass window in the shower wall brings the quality of natural daylight into the shower enclosure, creating the most pleasant possible shower light environment while providing privacy through the frosted glazing.
Why it works: Natural light in a bathroom — and specifically in the shower enclosure — provides a light quality that no artificial source can fully replicate. The full-spectrum quality of natural daylight makes skin tones, hair color, and grooming accuracy assessable in a way that warm artificial light cannot, and the psychological quality of showering in natural light (particularly in morning showers that catch the cool, blue-toned quality of morning sun) creates a genuinely different experiential quality from the same space lit artificially. A frosted glass window in the shower wall provides these natural light benefits while maintaining privacy — the frosted glazing allows light transmission while preventing clear visibility from outside. In bathrooms adjacent to exterior walls, a frosted glass shower window is among the most impactful single upgrades available.
How to get it: A frosted glass window in a shower wall is installed in the same manner as any exterior window — framed opening in the wall, waterproofed rough opening, window unit installation, interior waterproofing extended to the window frame perimeter. Specify tempered safety glass as required by building codes for windows in wet areas. For bathrooms without exterior wall access, a solar tube or tubular skylight ($200–$400 for the unit plus installation) routes natural light from the roof through a reflective tube to a ceiling diffuser in the bathroom, providing significant natural light improvement without any wall modification.
Shop The Look
- Frosted glass window bathroom exterior
- Tempered frosted glass window horizontal
- Solar tube skylight bathroom installation
- Tubular daylight device ceiling kit
- Frosted glass privacy film window
14. Choose Matte Finish Fixtures to Minimize Maintenance
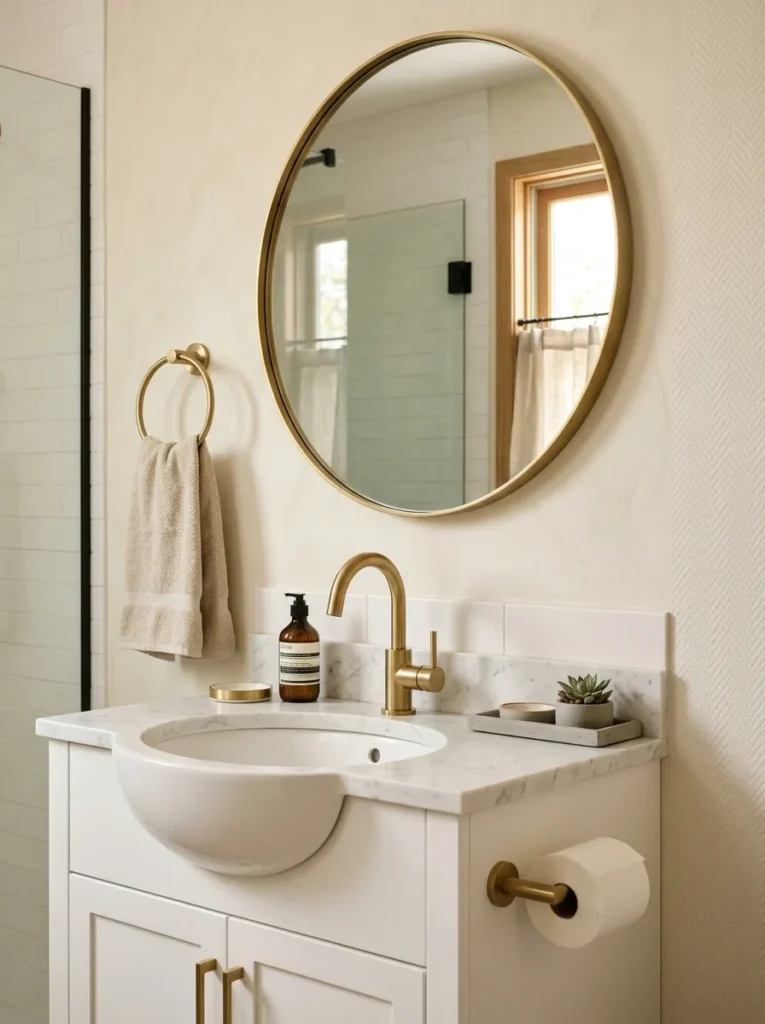
Vibe: The bathroom is clean — matte finish fixtures that do not show water spots or fingerprints maintain the bathroom’s clean appearance between cleanings, reducing the maintenance frequency required to keep the space looking considered rather than spotted and smeared.
Why it works: Polished chrome — the default bathroom fixture finish in most residential construction — requires daily wiping to remove water spots, which form immediately when hard water droplets dry on the reflective surface. In a high-use bathroom, the polished chrome faucet and fixtures that read as bright and clean when installed will show water spots within hours of the first use, and maintaining a spot-free appearance requires wiping after every use. Matte finish fixtures (matte black, matte brass, matte brushed nickel) have a micro-textured surface that disperses reflected light rather than concentrating it in the specular reflection that makes water spots visible — water spots that form on matte surfaces are not visible to the eye at normal viewing distance. The same physics that make matte surfaces less shiny also make them dramatically less demanding of maintenance.
How to get it: Specify matte finish fixtures — faucet, towel bars, toilet paper holder, robe hook, mirror frame — from a single manufacturer and finish family to ensure consistent finish matching. Matte black and matte white are the two most durable matte finishes (the finish is applied over a base metal rather than being the metal itself, and its durability depends on the quality of the finish application). Major fixture manufacturers (Moen, Delta, Kohler, Brizo) all offer their fixture lines in matte black, and the finish quality from major manufacturers is significantly more durable than from budget alternatives.
Shop The Look
- Matte black bathroom faucet single hole
- Matte black bathroom accessory set
- Matte brass faucet bathroom warm
- Matte finish towel bar bathroom
- Matte black toilet paper holder
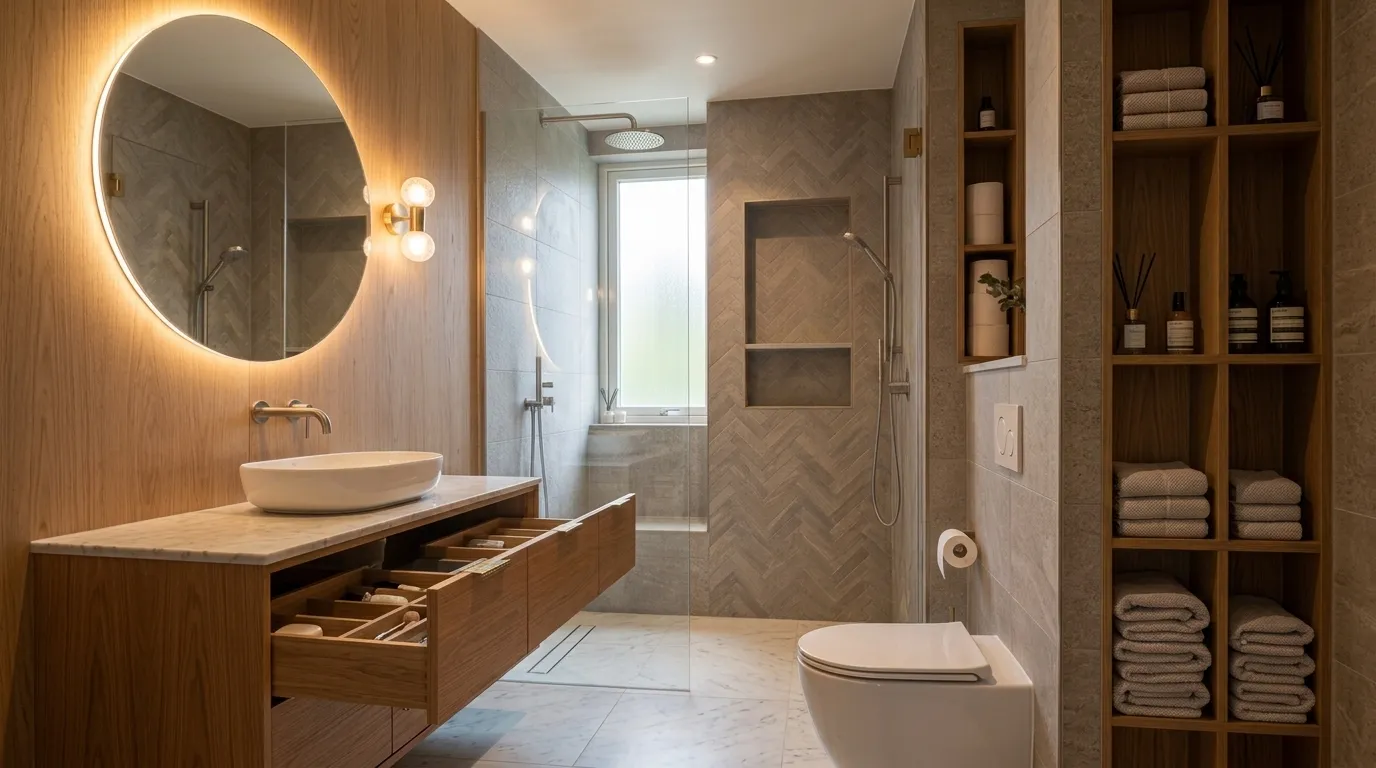
15. Design Storage for Every Zone: Vanity, Shower, and WC
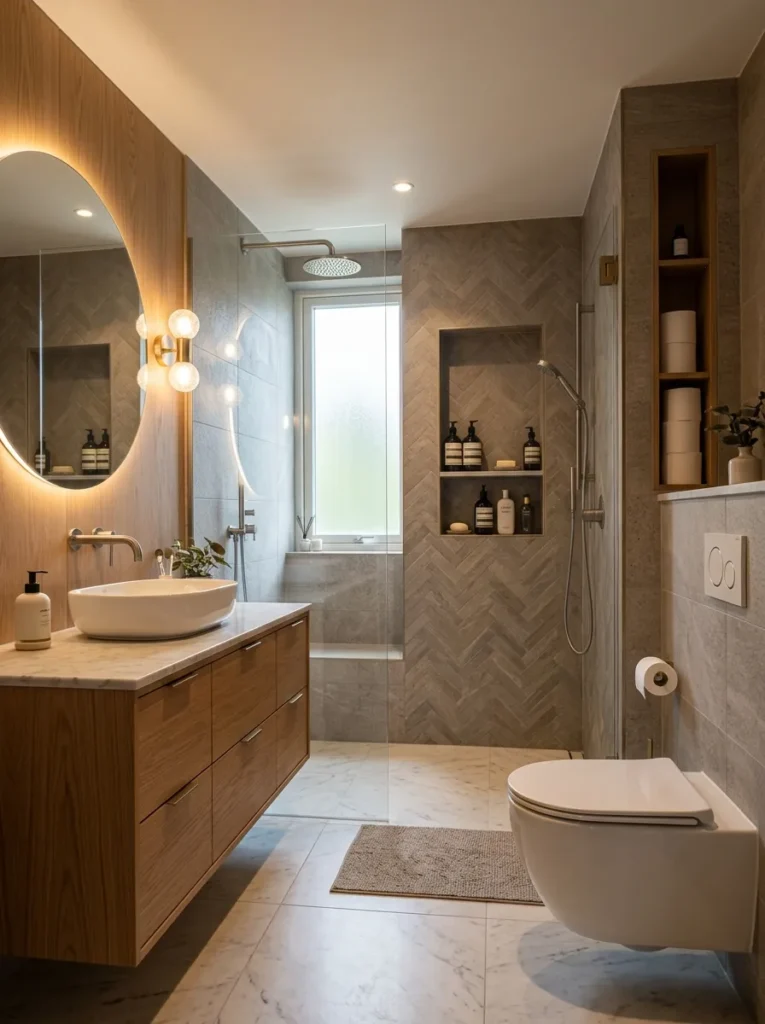
Vibe: The bathroom is organized — zone-specific storage integrated at each of the bathroom’s three primary use areas eliminates every horizontal surface from clutter, creating the clean, considered appearance of a hotel bathroom where every product is stored rather than displayed.
Why it works: Most bathroom storage failures occur not because total storage is insufficient but because the storage that exists is not positioned where the products are used — a medicine cabinet at the vanity does not help with shower product storage, and a vanity drawer does not help with toilet paper and cleaning product organization at the WC. Zone-specific storage design addresses each use zone independently: the vanity zone needs drawers and a recessed medicine cabinet for grooming products, skincare, and toothbrushes; the shower zone needs a recessed niche for shampoo, conditioner, and body wash at usable height; and the WC zone needs nearby storage for toilet paper, cleaning products, and hand towels. When each product has storage designated at the point of use, the bathroom’s horizontal surfaces remain clear because there is no need to place products on them for accessibility.
How to get it: Map the bathroom’s three use zones (vanity, shower, WC) and designate specific storage for each before any renovation or purchase. Vanity zone: floating cabinet with interior drawers plus recessed medicine cabinet above sink. Shower zone: one or two recessed niches at appropriate heights for products used (higher niche for shampoo and conditioner at shoulder height, lower niche for body wash and razor at hip height). WC zone: a slim open shelf unit beside the toilet (available in narrow profiles as shallow as 6 inches, $30–$80) for toilet paper, a small plant, and cleaning supplies. Implementing all three zones simultaneously creates the complete zone-storage system that keeps every bathroom surface clear.
Shop The Look
- Slim bathroom shelf beside toilet narrow
- Recessed shower niche tile ready
- Floating vanity drawer integrated storage
- Medicine cabinet recessed mirror
- Bathroom organizer drawer insert
How to Apply These Bathroom Design Tips
The most important sequencing principle in bathroom design improvement is to address the structural decisions first and the surface decisions last — in exactly the reverse order that most people approach bathroom renovation. Lighting position, waterproofing quality, ventilation specification, and storage zone planning are structural decisions that must be made before any tile is purchased or any fixture is specified, because they determine the physical locations of electrical boxes, plumbing rough-ins, and wall openings that cannot be changed after tile is installed without significant demolition cost. Surface decisions — tile selection, fixture finish, paint color — are best made after all structural decisions are locked, because the surface palette should respond to the fixed structural framework rather than the other way around.
The most common bathroom design mistake is prioritizing visual decisions (tile pattern, fixture finish, vanity style) over functional decisions (lighting placement, storage integration, ventilation performance), which produces bathrooms that photograph beautifully but perform poorly in daily use. A bathroom with beautiful tile and poor lighting will be a frustrating morning experience every day. A bathroom with a stunning freestanding bathtub and inadequate shower storage will have products cluttered on the tub deck every day. The correct design priority is always function first, material quality second, and visual styling third — a sequence that produces bathrooms that are genuinely pleasurable to use rather than merely pleasant to look at.
Three bathroom upgrades under $100 that produce immediate, significant daily improvement without any construction: replacing the existing bathroom light bulb with a warm 2700K version ($5–$12) and adding a plug-in vanity sconce beside the mirror for bilateral face lighting ($25–$60); replacing a floor-mounted shower caddy with a properly installed adhesive-mounted niche organizer ($15–$35) that provides the same product storage without the surface-mounted visual clutter; and replacing standard bathroom fixtures with a matched matte-finish set ($30–$80 for a towel bar, toilet paper holder, and robe hook set in matte black or matte brass) that immediately improves the bathroom’s visual cohesion and reduces the maintenance required to keep it looking clean.
A complete smart bathroom — correct vanity lighting, full-width mirror, large format tile, integrated storage in all three zones, thermostatic shower valve, humidity-sensing fan, matte finish fixtures, and a heated towel rail — represents the standard of a genuinely well-designed residential bathroom at any budget level. The total investment for a new bathroom built to this standard ranges from $8,000–$20,000 for a full renovation to $500–$2,000 for upgrading an existing bathroom through the subset of improvements achievable without major construction. The return on this investment — in daily quality of life, in reduced maintenance burden, in prevention of moisture damage, and in home value — makes bathroom design one of the highest-return improvement categories available in residential property.
Frequently Asked Questions About Bathroom Design
What is the most important design decision in a small bathroom?
The mirror and lighting combination is the most impactful design decision in a small bathroom — specifically, installing a mirror that fills the full vanity width combined with bilateral sconce lighting at face height. These two interventions simultaneously solve the small bathroom’s three most persistent problems: inadequate face illumination (solved by bilateral sconce placement), perceived spatial limitation (solved by the full-width mirror’s spatial doubling effect), and the disconnected, visually incomplete appearance of a standard small mirror centered above a wider vanity. Total investment for both interventions: $80–$250 for the mirror and $50–$150 for the sconces. The spatial and functional improvement is immediate and permanent.
How do I make a bathroom look more expensive without spending much?
The three specific interventions that most cost-effectively shift a bathroom’s perceived quality upward are fixture finish replacement, vanity hardware upgrading, and surface organization. Replacing existing polished chrome faucet and accessories with a matched matte black or brushed brass set ($80–$200 for a complete set from major manufacturers) is the most impactful single visual change available in a bathroom without any construction. Replacing existing builder-grade vanity hardware (the small round knobs typically installed on builder-grade vanities) with elongated bar pulls in a warm metal finish ($5–$12 per pull) immediately improves the vanity’s visual quality. Clearing all horizontal surfaces to zero objects (or to the three-object rule maximum) and purchasing quality matching containers for products that must be stored on the vanity surface ($15–$30 for a cohesive set) creates the hotel-bathroom appearance of considered organization that reads as expensive regardless of the underlying material quality.
What tile should I choose for a timeless bathroom?
The most consistently timeless bathroom tile choices share three properties: neutral warm tone (cream, warm white, warm grey, or travertine — not trendy color or pattern), simple geometric form (rectangular, square, or hexagonal — not complex pattern), and natural or natural-reference material (stone, terracotta, cement, or high-quality ceramic that references natural stone). Within these parameters, the specific tile choices that have demonstrated the greatest design longevity are: warm white or cream subway tile in a vertical stack installation, large format warm grey or cream porcelain tile (24×24 inch or larger), natural travertine or travertine-look porcelain tile, and white or cream hexagonal mosaic floor tile. All of these choices have been in continuous design use for over 50 years and show no signs of dated-ness — a reliable indicator of genuine timelessness.
How do I improve bathroom ventilation without replacing the fan?
If replacing the fan is not immediately possible, bathroom ventilation can be improved by three behavioral and environmental modifications: running the existing fan for 20–30 minutes after every shower rather than stopping it when you leave the bathroom (a simple plug-in timer, $10–$15, on the fan’s electrical circuit can automate this); opening the bathroom door as wide as possible immediately after showering to allow the room’s humid air to mix with the drier air of the adjacent space; and using a squeegee to remove water from shower walls after each use, which reduces the surface water available for evaporation and extends the time before the room returns to high humidity. These three modifications together can reduce persistent bathroom humidity by 30–40% without any fan replacement, which is meaningful moisture damage prevention even if it does not achieve the performance of a correctly specified humidity-sensing fan.
What flooring is best for a wet bathroom environment?
The three criteria for optimal bathroom flooring are slip resistance (the most safety-critical criterion — the floor must provide adequate traction when wet), moisture resistance (the floor must not absorb water or be damaged by standing water), and cleanability (the floor must be maintainable without specialized products or equipment). The flooring types that best satisfy all three criteria are: unglazed porcelain tile with a micro-textured surface (excellent slip resistance, 0 water absorption, easy cleaning), natural stone with a honed or brushed finish (excellent slip resistance when properly finished, near-zero water absorption in dense stones like granite and slate, requires periodic sealing), and luxury vinyl plank or tile in a bathroom-rated product (good slip resistance in quality products, 100% waterproof, easy cleaning — the best option for renovation on a tight budget). Avoid polished or glossy tile on bathroom floors (wet slip hazard regardless of beauty), wood flooring in full bathrooms (moisture damage over time in high-humidity environments), and low-cost vinyl without bathroom rating (can delaminate in sustained wet environments).
Ready to Design Your Smarter Bathroom?
These 15 tips cover the full spectrum of what a genuinely smart bathroom design achieves — from the daily comfort of bilateral vanity lighting and a thermostatic shower valve that maintains perfect temperature, to the spatial intelligence of large format tile and full-width mirrors that make small bathrooms feel genuinely generous, from the moisture protection of comprehensive waterproofing and humidity-sensing ventilation that prevent the damage that inadequate specification consistently produces, to the organizational clarity of zone-specific storage that keeps every horizontal surface in the bathroom permanently clear. You do not need to implement all 15 simultaneously — the smartest approach to bathroom design improvement is to identify the specific daily friction that most reduces the quality of your bathroom experience (poor lighting, clutter, cold towels, temperature variability, persistent humidity) and address that specific problem first with the tip most directly applicable to it. A bathroom that works well for the person who uses it every morning and every evening is worth more in daily quality of life than any bathroom that photographs beautifully but performs poorly. Start with the problem that bothers you most — the answer is probably in this list.