14 Budget Backyard Ideas for Small Outdoor Spaces
A budget backyard transformation is a deliberate, design-led approach to improving a small outdoor space using low-cost materials, DIY techniques, and strategic purchasing — achieving the visual quality and functional richness of a professionally landscaped garden at a fraction of the cost. This article gives you 14 genuinely creative, buildable budget backyard ideas that maximize impact in compact outdoor spaces without the expense of a landscape architect or a full renovation budget.
Most small backyards stay unrealized not because the space is too small but because the gap between inspiration and a realistic starting point feels too wide. The yards in this list close that gap — they use inexpensive materials with intention, borrow design principles from spaces ten times their budget, and prove that a considered small backyard is almost always more satisfying than a sprawling one that was never properly designed. Here are 14 ideas worth saving — and stealing.
Why Budget Backyard Design Works So Well
The budget backyard as a serious design category has its roots in the cottage garden tradition — the English working-class garden aesthetic of the 17th and 18th centuries that produced dense, layered, visually rich outdoor spaces from seed-grown plants, salvaged materials, and found objects rather than expensive nursery stock and professional installation. That tradition established the core principle that budget backyard design still operates from today: the quality of a garden is determined by the care and intention invested in it, not by the monetary value of its components. A $50 raised bed built from reclaimed timber and filled with home-composted soil can outperform a $500 professionally installed planter in both plant health and visual character.
The materials that define a well-executed budget backyard are those that deliver high visual quality at low cost through honest material character rather than imitation of expensive alternatives. Decomposed granite and pea gravel are the premier low-cost surfacing materials — both cost $8–15 per bag at landscape supply yards, install without professional equipment, and develop a natural, considered character over time. Reclaimed timber sleepers and pallet boards provide structure, raised bed walls, and seating at near-zero cost when sourced from demolition yards, online marketplaces, or local construction sites. Native and drought-tolerant plants — sourced as seeds or small plugs rather than established nursery specimens — cost a fraction of feature plants and establish quickly in conditions suited to their natural range.
The trend has genuine cultural depth driven by economic and environmental pressures that have converged since 2020. Rising cost-of-living conditions globally have made budget-conscious home improvement a mainstream rather than niche pursuit, with Pinterest searches for “budget backyard ideas” growing over 380% between 2020 and 2024. Simultaneously, the sustainability design movement has rehabilitated reclaimed, salvaged, and low-cost natural materials as the most environmentally responsible outdoor design choice — reclaimed timber that would have gone to landfill, locally sourced gravel that requires no manufacturing, and seed-grown native plants that support local ecosystems all represent better environmental outcomes than their expensive manufactured equivalents.
Small backyards are specifically advantaged in the budget design context because the cost of every material is proportional to the area covered — a 20-square-meter small backyard requires a fraction of the gravel, turf, decking, or paving that a large yard demands, which means the per-square-meter budget that feels inadequate for a large space can be genuinely sufficient for a small one. The design principles that make small spaces feel larger — vertical planting, defined zones, strong focal points, consistent materials — are all achievable at low cost and are, in many cases, more effectively executed with inexpensive natural materials than with premium manufactured ones.
Style at a Glance
| Element | Detail |
|---|---|
| Philosophy | Design intention and material honesty deliver more visual quality than budget alone — small spaces reward care more than cost |
| Key Materials | Decomposed granite, pea gravel, reclaimed timber, pallet boards, native plants, seed-grown groundcovers, concrete blocks |
| Color Palette | Warm sand, natural timber grey, deep garden green, terracotta, raw concrete, weathered rust |
1. Decomposed Granite Patio with Reclaimed Timber Border
Vibe: Warm and resolved — a patio that looks like it cost ten times what it did.
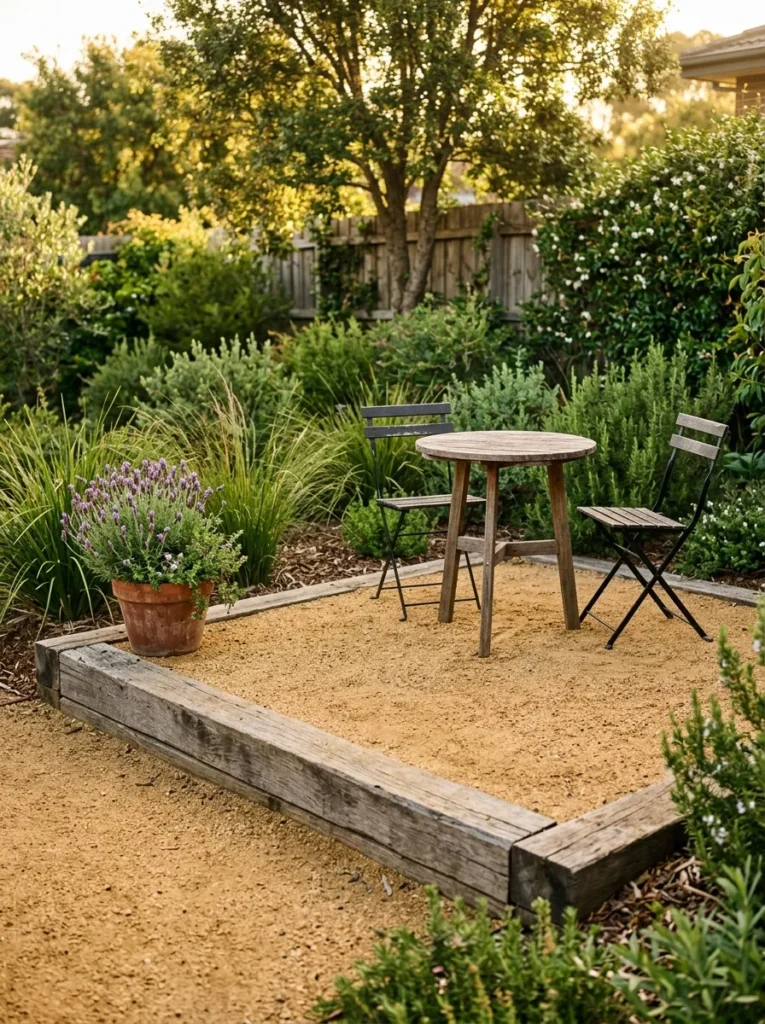
Why it works: Decomposed granite is the single highest-value-per-dollar surfacing material available for small backyard patios because it installs without professional equipment, drains freely without requiring a sub-base engineering, compacts to a firm, stable surface that handles outdoor furniture and foot traffic comfortably, and develops a warm, natural character that premium pavers and concrete cannot replicate. The reclaimed timber sleeper border performs two functions simultaneously: it retains the DG surface and prevents lateral spread onto adjacent lawn or garden areas, and it provides informal seating at the patio edge — a design bonus that a manufactured edging product cannot offer. At $8–14 per bag for DG and free-to-$20 per sleeper from demolition yards or online marketplaces, a 15-square-meter small backyard patio can be completed for $150–350 in materials.
How to get it: Excavate the patio area to 100mm depth, compact the base soil with a hand tamper, lay geotextile weed fabric, and add DG in two 50mm layers, compacting each layer before adding the next. Set the reclaimed sleeper border on a 50mm gravel drainage bed at the perimeter before filling with DG — the sleeper base must be level and firm before the DG fill is added or the border will shift over the first wet season.
Quick Win: A hand tamper ($25–40 at any hardware store) is the only tool required to compact decomposed granite to a stable, furniture-ready surface — no plate compactor hire, no professional equipment, and one afternoon of physical work produces a patio surface that holds its compaction for years.
Shop the Look
| Product |
|---|
| Decomposed granite landscape gravel bag |
| Geotextile weed fabric landscape roll |
| Hand tamper compaction tool |
| Metal folding outdoor chair set |
| Terracotta planter pot large |
Also view: 13 Elegant Master Bedroom Ideas for Ultimate Comfort
2. Pallet Timber Raised Garden Bed with Trellis Back Panel
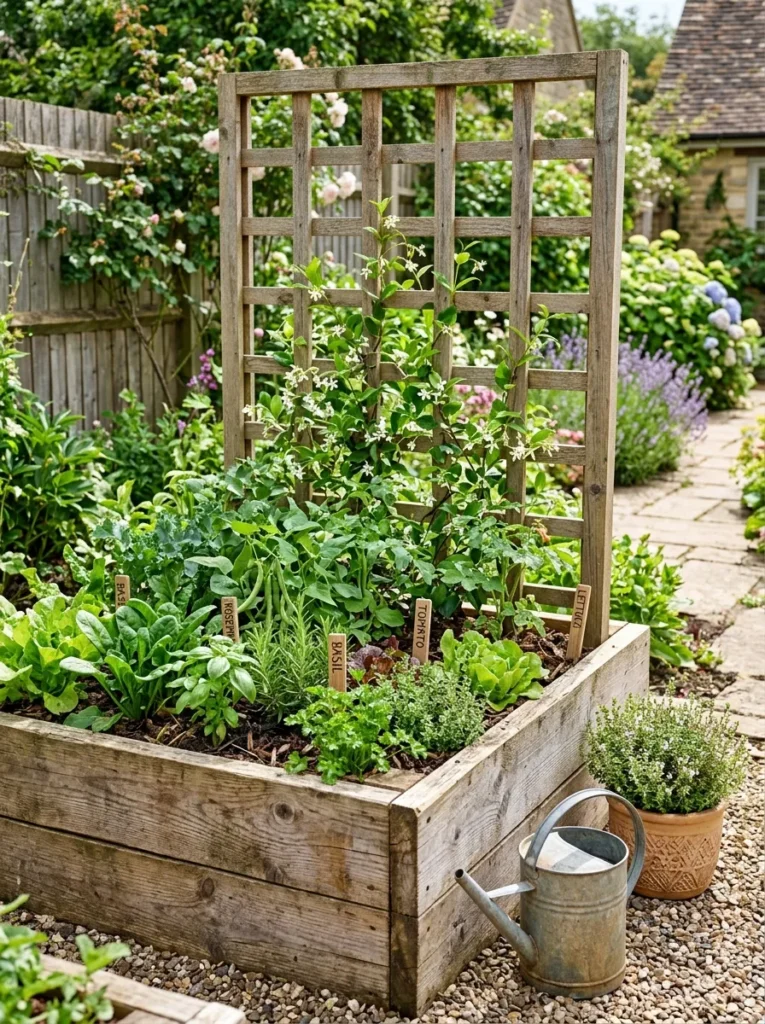
Vibe: Productive and warm — a raised bed that earns its place in the garden twice over.
Why it works: The pallet timber raised bed with an integrated trellis back panel is the most space-efficient planting structure available for a small backyard because it uses the vertical plane above the bed — which most raised beds leave empty — as a second growing surface for climbing plants. This vertical layering doubles the productive and visual density of a single bed footprint: vegetables and herbs at the lower level, climbing beans, peas, jasmine, or roses at the upper level, creating a planted composition that fills the corner of a small yard with richness and depth. The pallet timber construction is the correct budget material choice because heat-treated (HT-stamped) pallet boards are structurally sound, weather-resistant when sealed, and available free or near-free from most industrial and retail businesses who are required to dispose of them.
How to get it: Disassemble HT-stamped pallets (never MB-stamped, which contain methyl bromide residue) using a pallet buster tool. Build the raised bed box from double-thickness boards for the long sides — single boards bow under soil pressure within one season. Seal the interior faces with a non-toxic timber sealant before filling with a 60:40 blend of quality garden soil and compost. Build the trellis from 25mm × 25mm timber battens in a 150mm grid pattern, attached to two 1.8-meter posts sunk into the ground behind the rear bed wall.
Shop the Look
| Product |
|---|
| Pallet buster disassembly tool |
| Non-toxic timber sealant exterior |
| Garden soil and compost blend bag |
| Climbing jasmine plant established |
| Timber plant label stake set |
Also view: 13 Wall Mirror Decor Ideas That Brighten Spaces
3. Gravel Path with Stepping Stones Through a Cottage Border
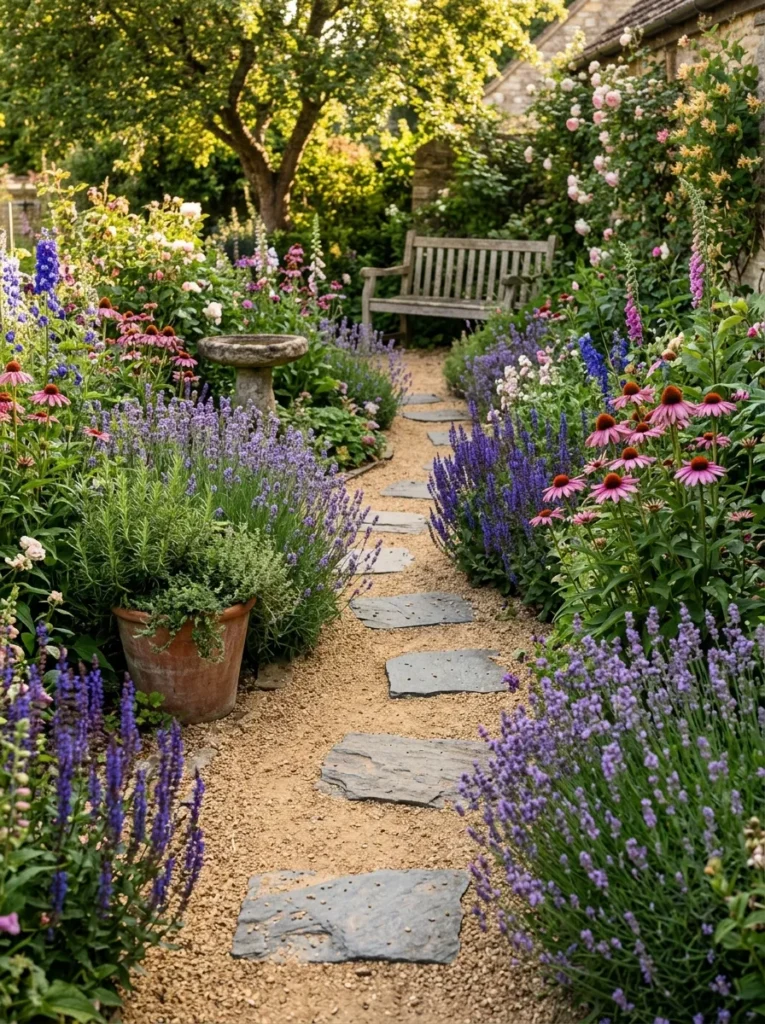
Vibe: Lush and wandering — a path that makes a small backyard feel like there is always something more to discover.
Why it works: A gravel path with stepping stones is the most cost-effective way to create the sense of journey and destination that transforms a small backyard from a viewed space into an experienced one. The design principle at work is sequential revelation: a path that curves slightly or ends at a destination (a bench, a planted corner, a water feature) implies more space beyond each visible point, creating the perception of depth and scale in a yard that may be only 6–8 meters deep. Pea gravel at $8–14 per bag and bluestone stepping stones at $3–8 each make the full path installation achievable for $80–180 for a standard small backyard path. The cottage border planting on both sides — lavender, salvia, echinacea, and rosemary all available as seed or small plugs for under $5 per plant — provides the density and fragrance that makes the path a sensory experience rather than a purely visual one.
How to get it: Set stepping stones at a comfortable walking stride — 45–55cm center to center — and bed them 20–25mm below the gravel level so the foot lands flush without tripping. Install a timber or steel edging board on both sides of the path to retain the gravel and define the path width clearly. Plant cottage border plants at high density — 200mm centers for lavender and salvia — which achieves the lush, overflowing border look within one growing season rather than waiting three years for widely spaced plants to fill in.
Quick Win: Setting stepping stones 20–25mm below the surrounding gravel level — so the foot lands on a flush, stable surface — takes an extra 10 minutes per stone and eliminates the trip hazard and rocking instability that makes most DIY stepping stone paths uncomfortable to walk on.
Shop the Look
| Product |
|---|
| Bluestone stepping stone irregular |
| Pea gravel 10mm bag landscape |
| Lavender plant established small pot |
| Salvia plant blue established |
| Timber garden edging board |
4. DIY Concrete Block Bench with Timber Seat Plank
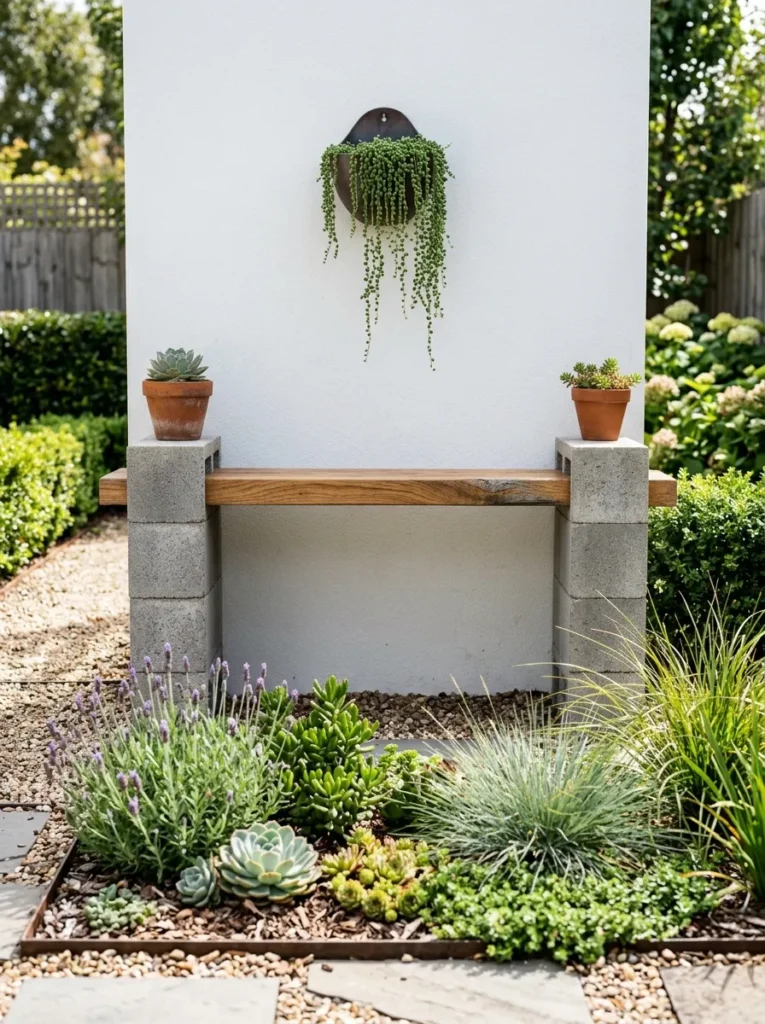
Vibe: Clean and minimal — the outdoor bench that proves constraint produces better design than unlimited budget.
Why it works: The concrete block and timber plank bench is one of the most direct expressions of honest budget design in the outdoor space — it uses two of the cheapest structural materials available (standard concrete blocks at $3–6 each, hardwood timber planks at $20–40 per length) and combines them with a simplicity that reads as deliberate minimalism rather than budget limitation. The design principle at work is material honesty: raw concrete and natural timber are both visually complete materials in their unfinished state — they do not need paint, cladding, or embellishment to read as considered design choices. The white render wall backdrop is the design context that elevates the bench from utilitarian to editorial: the same bench against a timber fence reads as makeshift; against a rendered wall it reads as designed.
How to get it: Stack three standard 390mm × 190mm × 190mm concrete blocks per leg, dry-stacked without mortar — the weight of the timber plank and seated adults provides sufficient stability on a flat surface. Use a 200mm × 50mm hardwood plank (treated pine, spotted gum, or recycled hardwood all work) at 1.8–2 meters length for a two-person bench. Sand the timber seat to 120-grit and apply two coats of exterior decking oil before installation to protect against moisture and UV.
Shop the Look
| Product |
|---|
| Standard concrete block 390x190x190mm |
| Hardwood timber plank 200x50mm |
| Exterior decking oil natural finish |
| Terracotta pot small set |
| Trailing succulent wall planter |
5. Budget Vertical Garden with Repurposed Pallet Planter
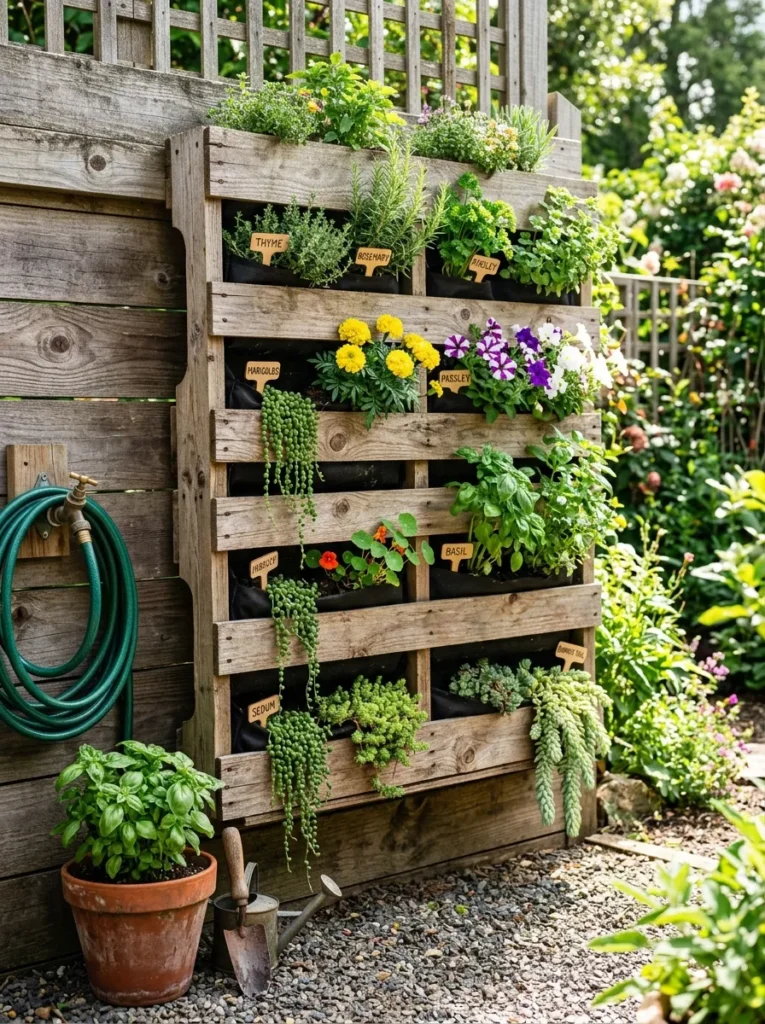
Vibe: Lush and resourceful — a vertical garden that makes a fence into a growing wall.
Why it works: The vertical pallet planter converts the most consistently wasted surface in a small backyard — the fence face — into a productive growing wall without consuming any floor area. In a small backyard where every square meter of ground matters, vertical growing space is the highest-value expansion available, and the pallet planter is the most cost-efficient way to access it. The horizontal board spacing of a standard pallet (typically 80–100mm gaps) creates natural planting pockets of the correct depth and width for herbs, trailing succulents, and compact annuals when landscape fabric is stapled across the rear and base of each gap. A full 1.2-meter × 1-meter pallet planted with herbs, succulents, and annuals provides more visual density and growing capacity than a $300 purpose-built vertical planter at a material cost of near-zero.
How to get it: Stand the HT-stamped pallet upright and secure it to the fence with two 100mm coach bolts through the pallet frame — it must be structurally anchored, as the weight of damp soil in the planting pockets can exceed 40kg for a fully planted pallet. Staple heavy-duty landscape fabric across the rear face and along the inside base of each planting gap to create a soil-retaining pocket. Fill each pocket with a 70:30 mix of quality potting mix and perlite — the perlite improves drainage in the vertical orientation where gravity accelerates water loss.
Quick Win: A bag of perlite ($12–18 at any garden centre) mixed at 30% into standard potting mix creates a vertical planting medium that retains enough moisture for daily plant survival while draining freely enough to prevent root rot in the confined pallet pocket environment — without it, standard potting mix in a vertical pocket either dries too quickly or holds too much water at the base.
Shop the Look
| Product |
|---|
| Landscape fabric staple kit |
| Perlite bag garden medium |
| Quality potting mix large bag |
| Herb seedling pack assorted |
| Trailing succulent plant small pot |
6. String Light Canopy Over a Compact Dining Zone
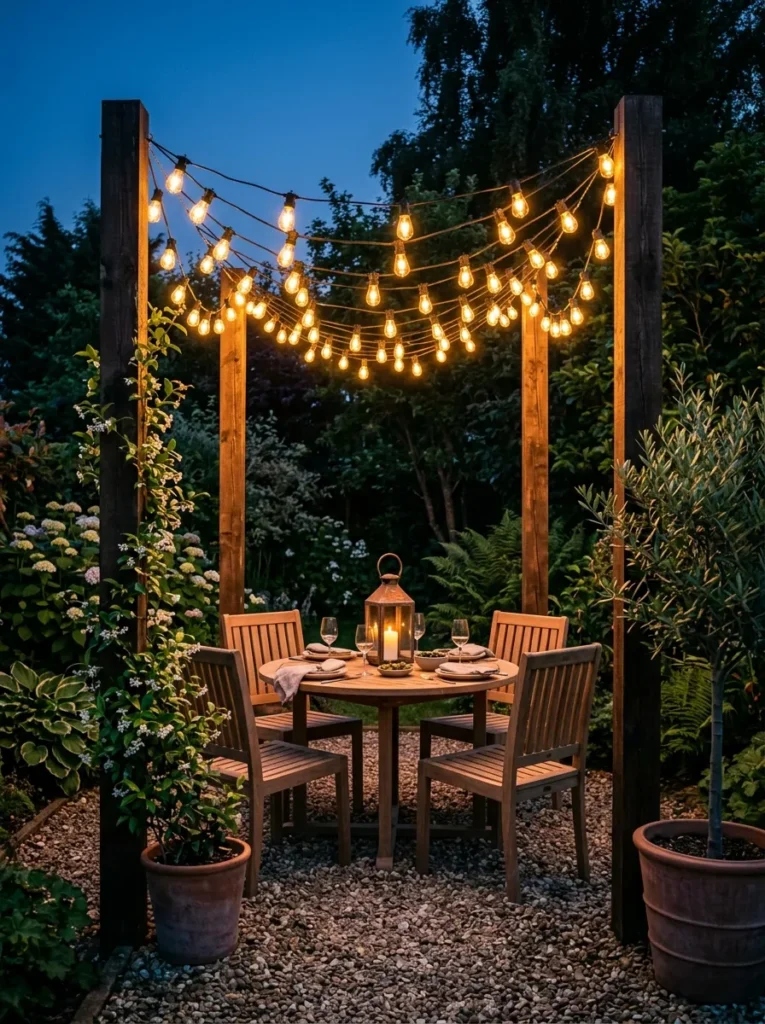
Vibe: Warm and magical — an outdoor dining zone that makes every weeknight dinner feel like a special occasion.
Why it works: String light canopies are the highest-impact-per-dollar atmospheric upgrade available in outdoor design because they transform the functional quality of a space — extending its usable hours into the evening — while simultaneously creating the warm, enclosed overhead plane that turns an outdoor area into a room. A space defined only by ground-level elements (a table, chairs, gravel) feels exposed and impermanent; adding the overhead string light plane creates the psychological sense of shelter and enclosure that makes people stay longer and return more often. The four-post timber frame is the correct structural approach for a freestanding canopy because it requires no attachment to the house structure, no council approval in most jurisdictions, and a materials cost of $60–120 for the four posts and string light wire, compared to $800–2,000 for a pergola achieving the same visual result.
How to get it: Set four 90mm × 90mm H4 treated pine posts at 2.2 meters above ground level, concreted into 400mm deep holes at the corners of the dining zone. String 10mm warm amber festoon lights (2200K, E27 bulb format) across the posts in a grid or catenary pattern, using screw-in eye hooks at each post top. Use a weatherproof outdoor extension cord with a timer to automate the lights — set to turn on at dusk and off at 11pm for a reliable evening ritual that requires no manual switching.
Shop the Look
| Product |
|---|
| Outdoor festoon string lights warm amber |
| H4 treated pine post 90x90mm |
| Outdoor timer power socket |
| Weatherproof extension cord outdoor |
| Potted olive tree standard |
7. No-Dig Native Garden Bed with Cardboard Sheet Mulching
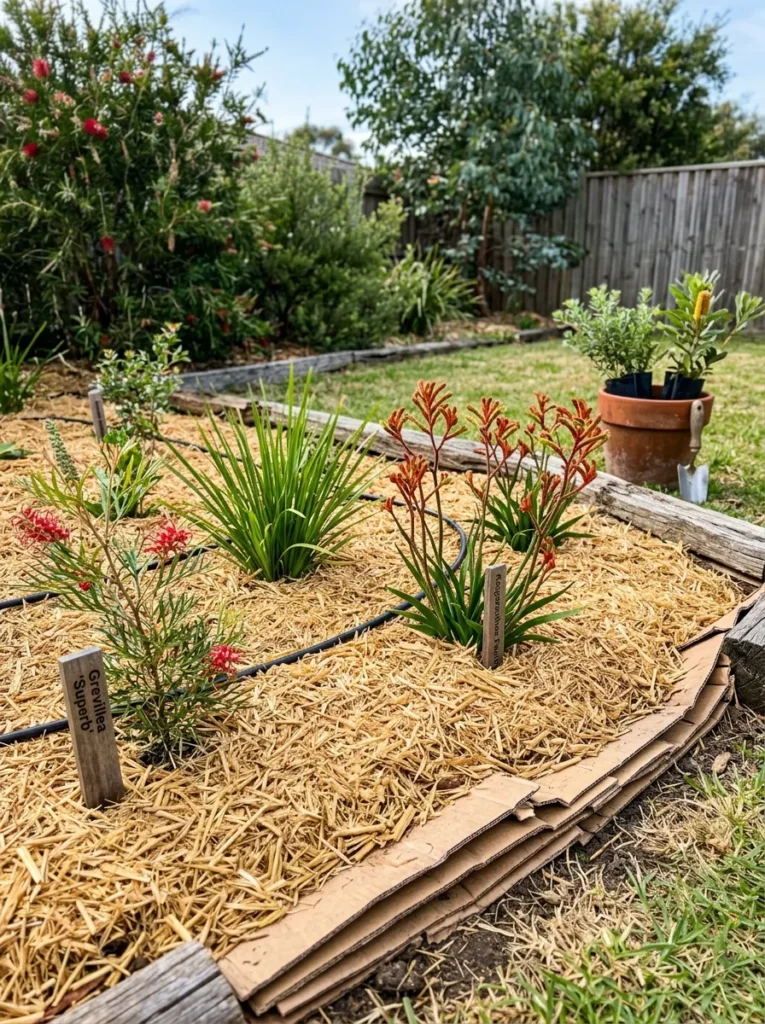
Vibe: Natural and establishing — a garden bed that looks better every week as the plants grow in.
Why it works: The no-dig cardboard sheet mulching method — laying flattened cardboard boxes directly over existing lawn or weedy soil, then covering with 150mm of organic mulch — is the most cost-effective garden bed establishment technique available for small backyards because it eliminates the two most expensive and labor-intensive aspects of traditional bed preparation: soil excavation and herbicide application. The cardboard smothers existing lawn and weeds by blocking light and gas exchange at the soil surface, breaks down within 6–8 months to add organic matter to the soil, and costs nothing beyond the mulch layer that would be needed regardless of bed preparation method. Native plants sourced as small 140mm pot specimens ($4–8 each at most nurseries) establish readily in the mulch layer, rooting through the cardboard into the existing soil within their first growing season.
How to get it: Source cardboard from supermarkets, liquor stores, or appliance retailers — free, abundant, and sized correctly for efficient bed coverage. Remove all tape and staples before laying. Overlap the cardboard edges by 200mm to prevent weed breakthrough at the seams. Water the cardboard thoroughly before adding the mulch layer — dry cardboard repels water and defeats the moisture retention purpose of the system.
Quick Win: Collecting cardboard boxes from a single large supermarket or appliance store visit provides enough material to establish a full 10–15 square meter garden bed at zero cost — call ahead to confirm they set aside flattened boxes, and collect on their delivery day for the largest available quantity.
Shop the Look
| Product |
|---|
| Sugar cane mulch garden bale |
| Native grevillea plant small pot |
| Lomandra native grass plant |
| Kangaroo paw plant established |
| Drip irrigation kit garden bed |
8. Upcycled Timber Pallet Outdoor Sofa with Cushions
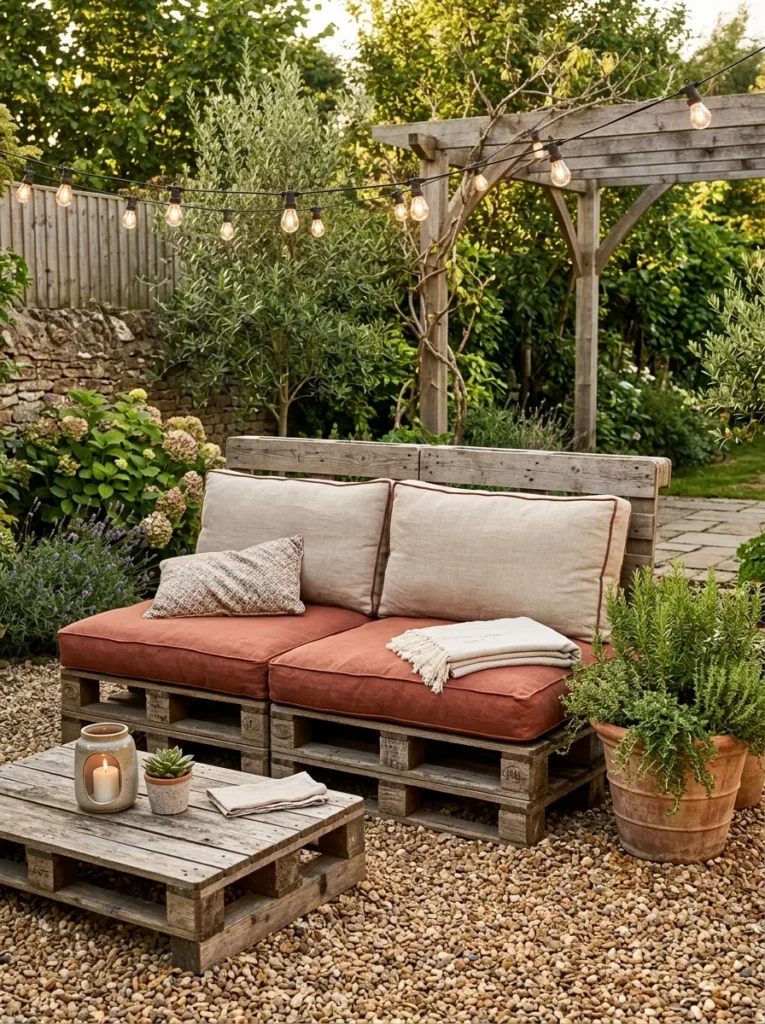
Vibe: Warm and relaxed — an outdoor living room that cost under $200 and looks like it cost ten times that.
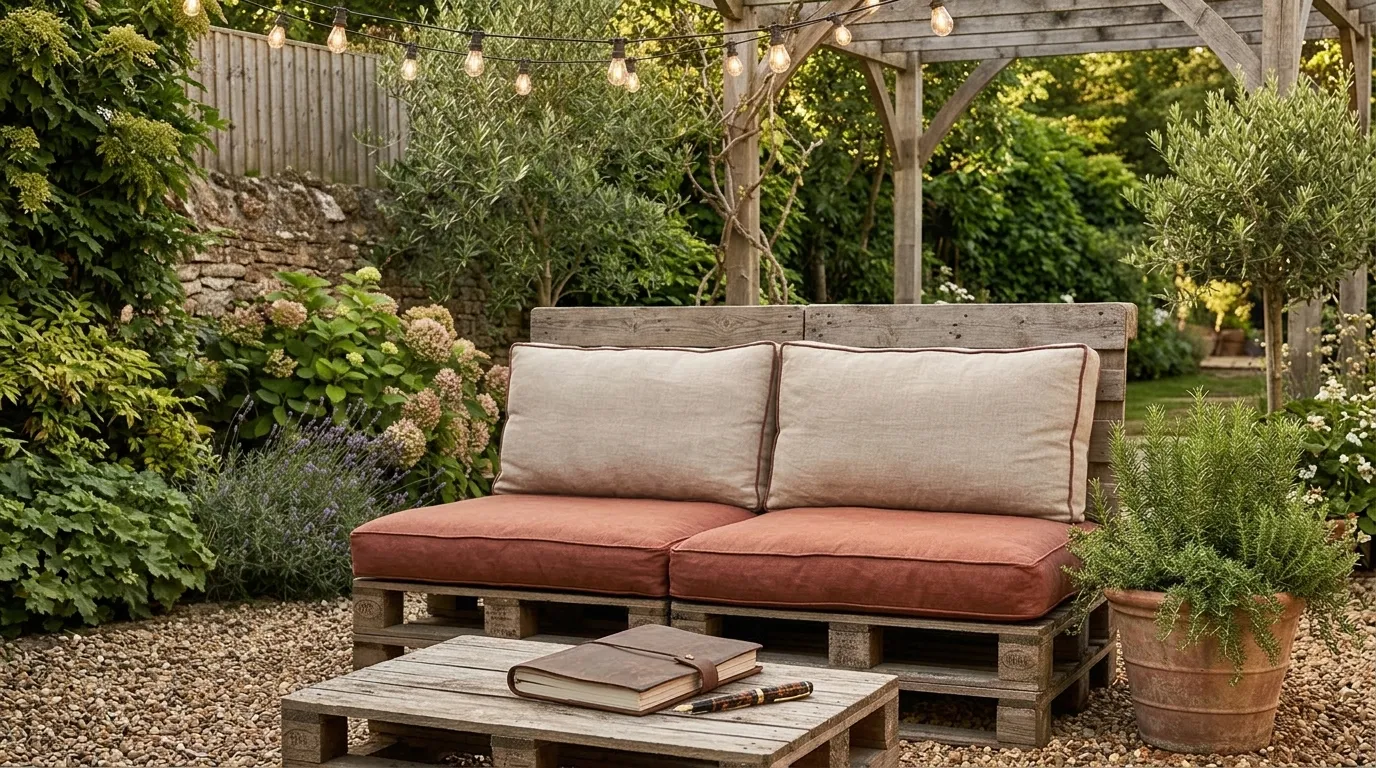
Why it works: The pallet outdoor sofa is the budget backyard furniture solution that consistently produces the most dramatic cost-to-result ratio in this list. Two standard pallets as the seat base and one as the angled backrest — assembled with four 100mm coach bolts and finished with 80-grit sandpaper to remove splinters — produce a sofa frame of the correct depth, height, and proportions for comfortable outdoor seating at a material cost of near-zero. The cushions are the investment: thick outdoor cushions (minimum 100mm foam depth) in a performance fabric are what elevate the pallet structure from rustic to considered, and the $80–150 spent on quality outdoor cushions is the most impactful budget allocation in the entire construction. The low pallet coffee table — a single pallet with four 100mm timber block legs — completes the seating zone at a cost of $10–20 in timber blocks.
How to get it: Sand all pallet surfaces to 80-grit minimum to remove splinters and rough saw marks — outdoor cushions compress against the frame surface, and sharp edges work through cushion fabric over time. Apply two coats of exterior decking oil to slow the weathering process and prevent the grey bleaching that makes untreated pallet furniture look abandoned rather than intentional. Position the backrest pallet at a 15-degree recline using two short timber wedge blocks between the seat and back frames — the recline angle is the detail that makes pallet sofa seating genuinely comfortable rather than just visually convincing.
Shop the Look
| Product |
|---|
| Outdoor cushion set terracotta performance fabric |
| Exterior decking oil natural |
| Coach bolt set 100mm galvanised |
| Ceramic outdoor lantern |
| Trailing rosemary plant pot |
9. Seedling Propagation Station from Repurposed Shelving
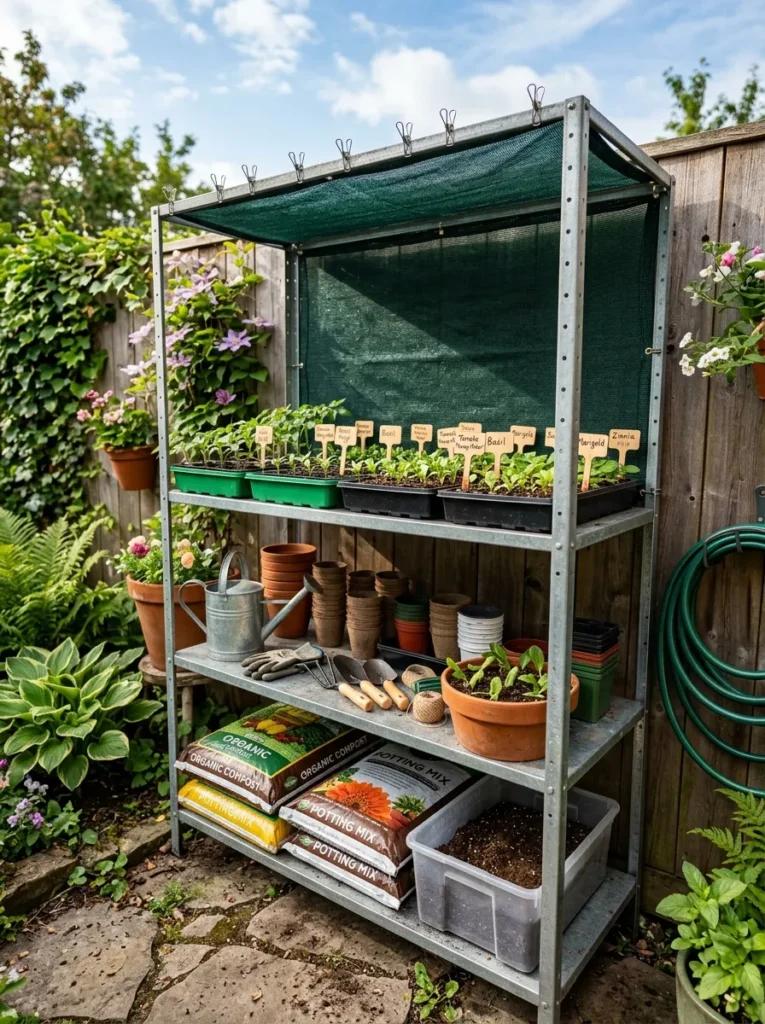
Vibe: Productive and practical — the garden station that makes growing from seed feel organised and achievable.
Why it works: A dedicated propagation station converts the most cost-effective gardening practice available — growing plants from seed rather than purchasing established specimens — into a reliable, repeatable system by giving it a designated physical location with all required tools and materials in one place. The repurposed metal shelving unit (a standard garage or warehouse shelf available second-hand for $20–50 or new for $60–100) provides the tiered surface area and structural strength that seed raising requires: multiple shelf levels allow seed trays at different growth stages to be organized by germination date, the metal construction handles the moisture exposure of daily watering without warping, and the open-frame structure provides the air circulation that prevents damping-off disease in seedling trays. Growing from seed rather than purchasing nursery specimens reduces per-plant cost from $5–15 to $0.20–0.80, which compounds significantly across a full growing season.
How to get it: Position the shelving unit against a north-facing fence (in the southern hemisphere) or south-facing fence (in the northern hemisphere) to maximize sun exposure. Clip a 30% block rate shade cloth panel to the top shelf to protect seedlings from the midday sun intensity that causes heat stress and wilting in young plants during summer. Reserve the bottom shelf for heavy items — soil bags, compost, and watering cans — which lowers the unit’s center of gravity and prevents tipping.
Shop the Look
| Product |
|---|
| Metal wire shelf unit 5 tier |
| Seed raising tray set |
| Quality seed raising mix bag |
| 30 percent shade cloth panel |
| Hand painted plant label cards |
10. Low-Cost Water Feature with a Terracotta Pot Fountain
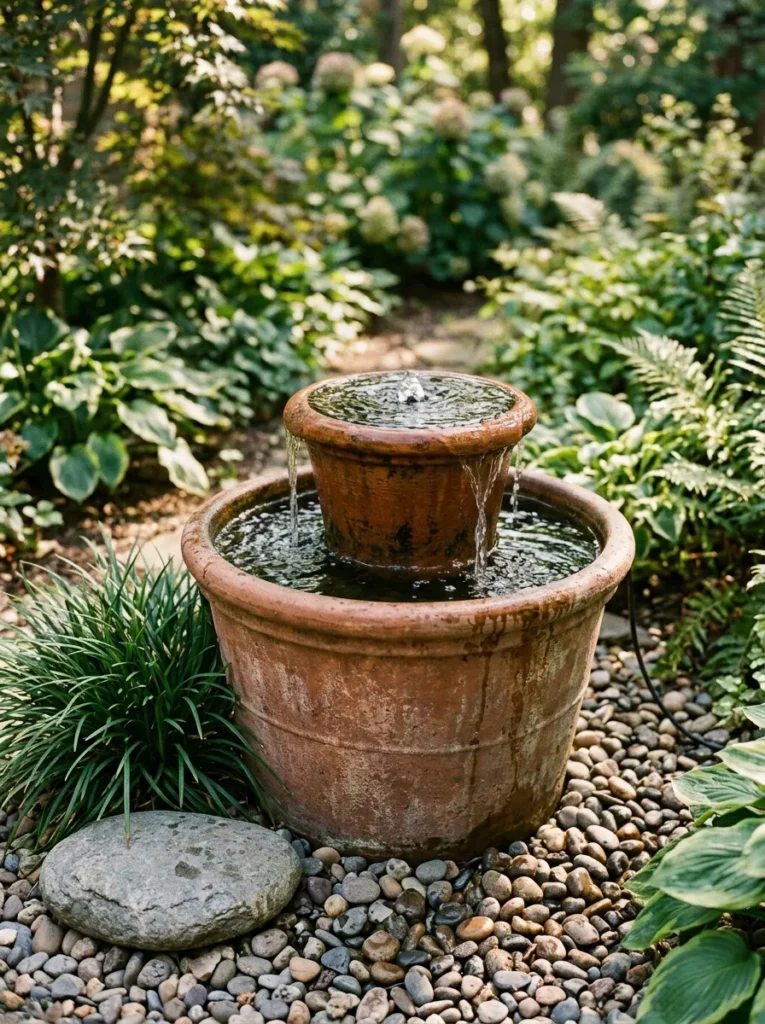
Vibe: Serene and natural — a water feature that sounds as good as it looks.
Why it works: Moving water is the single sensory element that most reliably transforms the atmosphere of a small backyard — the sound of water masks ambient urban noise, introduces a cooling effect on warm days, and provides the kind of dynamic, living quality that static garden elements cannot replicate. A purpose-built water feature costs $400–2,000 installed; a terracotta pot fountain achieves the same acoustic and visual effect for $60–120 in materials. The design principle is contained recirculation: a small submersible pump in the base of a large terracotta pot draws water up through a tube to a smaller pot resting in the center, which overflows gently back into the outer pot in a continuous cycle. No plumbing connection is required — the pump runs from a standard outdoor power outlet.
How to get it: Seal the inside of both terracotta pots with terracotta pot sealant ($12–18) to prevent water seepage through the porous clay walls. Size the submersible pump at 400–600 litres per hour — large enough to create a visible overflow from the inner pot, small enough not to create a splashing effect that loses water outside the outer pot. Fill the gap between the inner and outer pot with smooth river pebbles to conceal the pump tube and create a natural-looking base.
Quick Win: A 400L/hr submersible fountain pump ($18–30 online) is the only purchase required to convert any watertight container into a recirculating water feature — the pump, a length of clear vinyl tubing, and a standard outdoor power outlet are the complete system.
Shop the Look
| Product |
|---|
| Submersible fountain pump 400LPH |
| Terracotta pot sealant |
| River pebble smooth bag |
| Mondo grass plant pot |
| Clear vinyl tubing 12mm |
11. Lawn-Free Backyard with Groundcover Mosaic
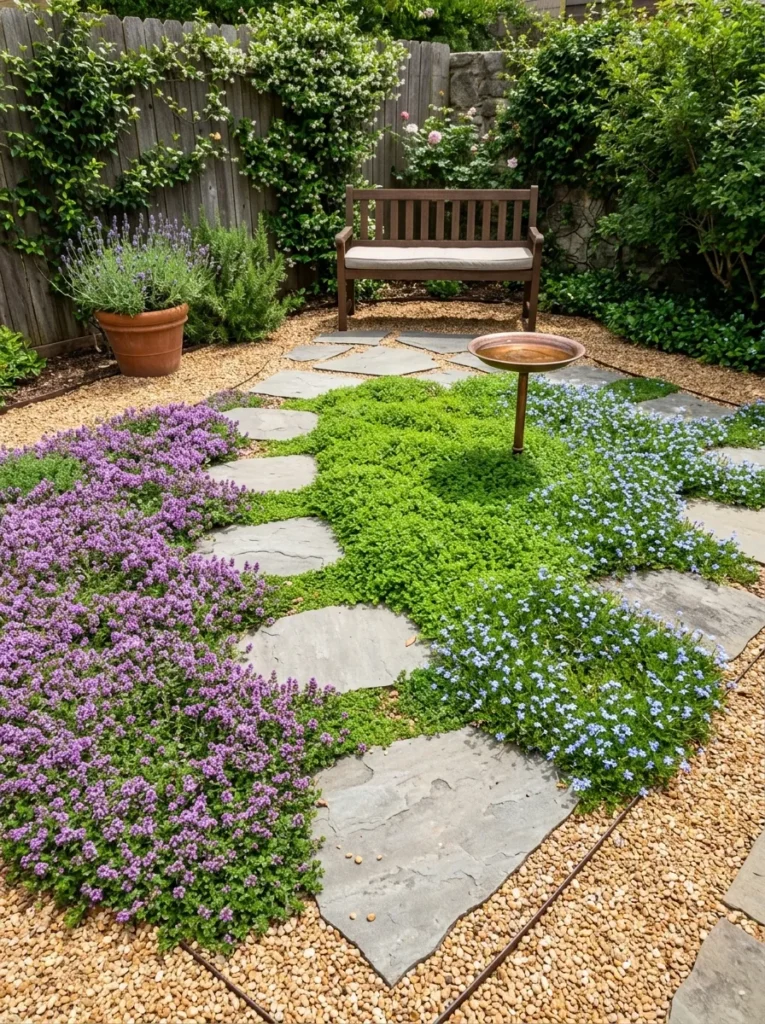
Vibe: Natural and textured — a backyard floor that makes mowing a memory.
Why it works: The lawn-free groundcover mosaic is the most maintenance-reducing budget backyard transformation available because it permanently eliminates the single most time-consuming weekly task in most backyards — mowing — while delivering more visual texture, seasonal interest, and ecological value than a monoculture lawn at a lower ongoing cost. The mosaic approach — three or four different low groundcover species planted in irregular drifts between stepping stones — creates a living tapestry effect that changes through the seasons as different species flower at different times. Creeping thyme, baby’s tears (Soleirolia soleirolii), blue star creeper (Isotoma fluviatilis), and mazus are all available as punnet seedlings for $4–8 per punnet, and a full small backyard groundcover can be established for $80–200 in plant material across two growing seasons.
How to get it: Plant groundcovers at high density — 150mm centers for creeping thyme and mazus, 200mm centers for baby’s tears and blue star creeper — to achieve full coverage within one growing season rather than waiting two years for widely spaced plants to fill in. Water daily for the first six weeks until root systems are established, then reduce to twice weekly — established groundcovers are significantly more drought-tolerant than lawn grass once their root systems are developed.
Shop the Look
| Product |
|---|
| Creeping thyme plant punnet |
| Baby’s tears ground cover punnet |
| Blue star creeper plant punnet |
| Stepping stone concrete round natural |
| Small bird bath concrete |
12. Budget Outdoor Privacy Screen with Bamboo Screening
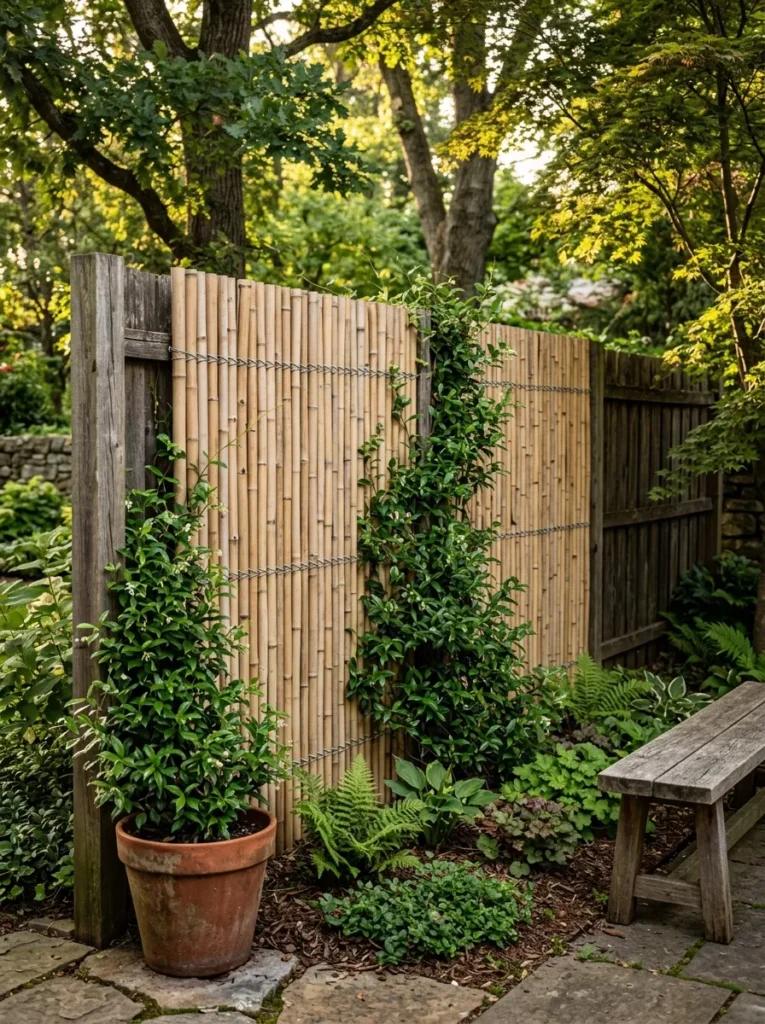
Vibe: Natural and private — a screen that makes the backyard feel enclosed and considered without feeling fenced in.
Why it works: The bamboo roll screening panel is the most cost-effective privacy solution available for small backyards because it delivers immediate, full-height visual privacy at a material cost of $15–30 per linear meter, compared to $80–200 per linear meter for timber screening panels or $150–400 per linear meter for a new fence installation. The natural bamboo material reads as organic and intentional in a garden context — it does not look like a budget solution because bamboo is a genuinely considered material in contemporary garden design. Attaching the bamboo roll to an existing fence rather than constructing a new frame eliminates the post-setting and structural work that makes privacy screens expensive: the existing fence provides the structural support, and the bamboo roll simply adds density and texture to its face.
How to get it: Unroll the bamboo screen along the fence face and attach with galvanised wire ties at 400mm vertical intervals through the bamboo poles and around the fence paling behind — the wire tie attachment is invisible from the garden side and requires only pliers to tighten. Overlap two panels by 100mm at the join if the run exceeds a single panel width. Plant climbing star jasmine (Trachelospermum jasminoides) at 1-meter intervals in front of the screen — within two seasons it will grow through and over the bamboo, creating a living green screen that gradually replaces the bamboo aesthetic entirely.
Shop the Look
| Product |
|---|
| Natural bamboo roll screening panel |
| Galvanised wire tie roll |
| Star jasmine climbing plant |
| Narrow garden bed border edging |
| Pliers long nose set |
13. Upcycled Tin Can Herb Garden for Fence or Wall
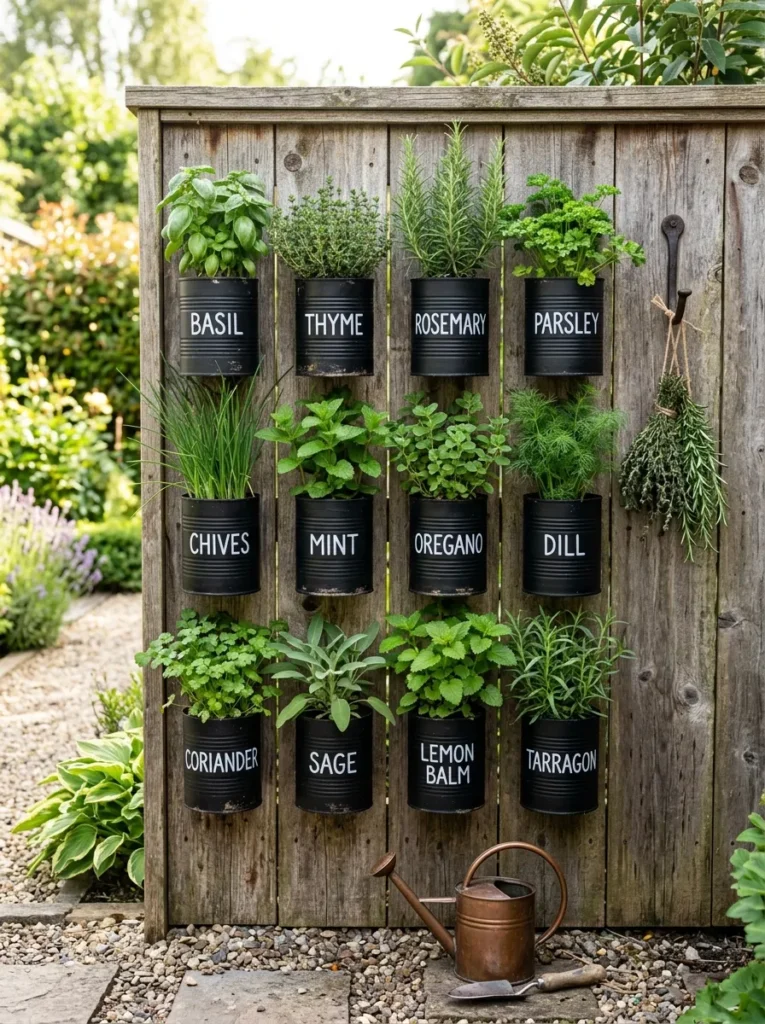
Vibe: Resourceful and warm — a herb garden that turns a fence into a kitchen wall.
Why it works: The tin can herb wall is the budget backyard idea with the highest personality-per-dollar ratio in this list — it takes materials that would otherwise be recycled (large paint tins, catering cans, institutional food tins) and converts them into a planted wall feature that reads as considered, hand-crafted design. The matte black exterior paint applied uniformly across all can sizes is the design decision that elevates this from craft project to garden feature: when every can shares the same paint color and finish, the varied sizes read as a curated collection rather than a random assortment. The hand-painted white herb labels complete the visual system — their slight imperfection is the detail that signals genuine hand-craftsmanship rather than printed decoration.
How to get it: Drill three to four 8mm drainage holes in the base of each can — herb roots rot in standing water, and drainage is non-negotiable even in a vertical planting. Paint all cans with two coats of Rust-Oleum matte black spray paint ($12–16 per can covering 8–10 tins) before planting. Mount with a single M8 bolt through the can body and the fence paling, with a 20mm timber spacer behind the can to create an air gap that prevents moisture damage to the fence face.
Quick Win: A single can of Rust-Oleum matte black spray paint ($12–16) applied to any collection of mismatched tin cans — large food tins, paint tins, coffee cans — creates a visually unified container collection in under 30 minutes that reads as a deliberate design choice from across the garden.
Shop the Look
| Product |
|---|
| Matte black spray paint exterior |
| Herb seedling pack assorted basil thyme rosemary |
| M8 bolt and washer set |
| White exterior paint pen label |
| Quality potting mix small bag |
14. Budget Backyard Fire Pit Zone with Gravel Circle and Log Seating
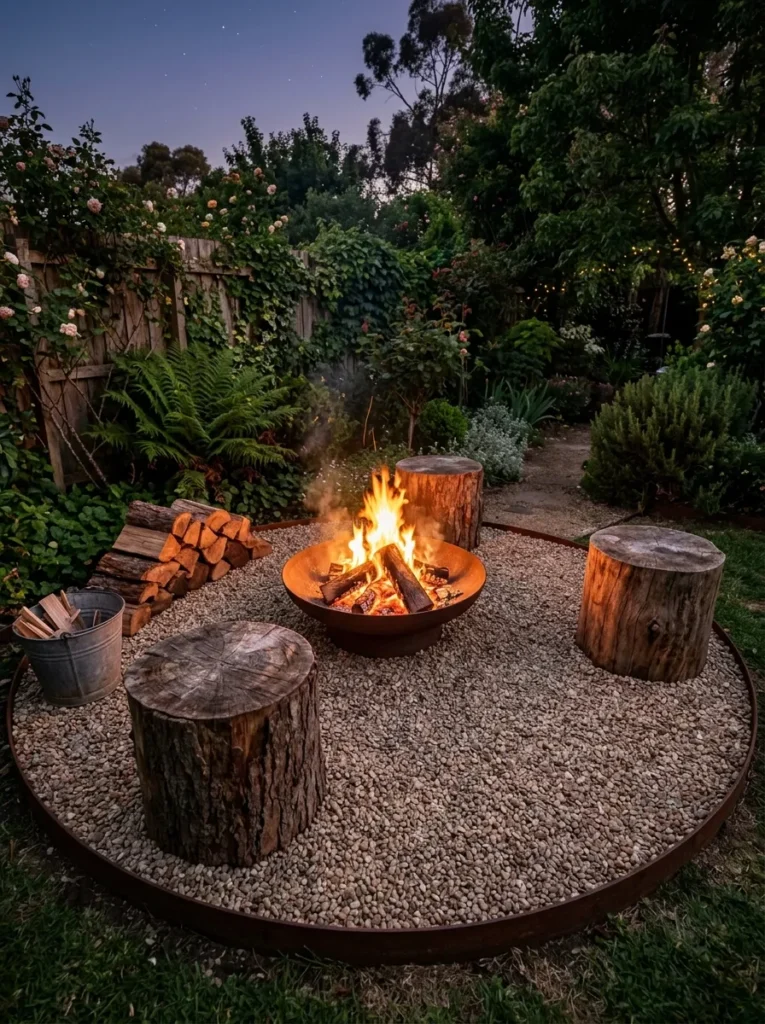
Vibe: Warm and primal — the backyard moment that makes everyone want to stay outside until midnight.
Why it works: A fire pit zone is the backyard feature with the highest social and atmospheric return on investment — it creates the outdoor living room quality that makes a small backyard a destination for gatherings, extends the usable season deep into autumn and winter, and provides the kind of primal warmth and focus that no other garden element replicates. The gravel circle with steel edge ring is the correct structural approach for a budget fire pit zone because it provides a non-combustible surface around the fire bowl, defines the zone visually from the rest of the garden, and costs $80–150 in materials (gravel plus a pre-formed steel edge ring or DIY cor-ten strip) compared to $500–2,000 for a paved or tiled fire pit surround. Log rounds as seating — sourced from a tree lopper, firewood supplier, or fallen garden tree — cost nothing or near-nothing and provide seating for 4–6 people around a standard fire bowl.
How to get it: Define the gravel circle at minimum 3-meter diameter — this is the safety clearance distance required between a fire bowl and seated users on a calm night, and the minimum diameter that reads as a designed zone rather than a patch of gravel with a fire pit in it. Set the cor-ten steel edge ring or DIY-bend cor-ten strip into the ground at 100mm depth to prevent gravel spread. Position the fire bowl at the exact center of the circle — a fire pit placed off-center in its own circle looks like a mistake, not a design decision.
Shop the Look
| Product |
|---|
| Steel bowl fire pit outdoor |
| Cor-ten steel garden edging strip |
| Pea gravel bag landscape 10mm |
| Firewood hardwood split bag |
| Metal kindling bucket outdoor |
How to Start Your Budget Backyard Transformation
Your single first move is to define your backyard’s primary purpose before spending a single dollar on materials. A backyard optimized for outdoor dining needs a flat, furniture-ready surface as its first investment. A backyard optimized for growing food needs the raised bed and propagation station first. A backyard optimized for relaxation and atmosphere needs the string light canopy and fire pit zone. The most common budget waste in small backyard transformations is purchasing materials for all purposes simultaneously — a bag of gravel, a few plants, some lights, a fire pit — and ending up with a yard that partially serves every purpose and fully serves none. Name the one primary use your backyard needs to serve reliably, invest the first $200–300 entirely in that purpose, and build the secondary functions outward from the established core.
The most common mistake is purchasing plants before the ground preparation is complete. Plants purchased and held in their nursery pots for more than two weeks before planting experience root restriction stress that sets them back 4–6 weeks of growing time after planting — they spend their establishment energy recovering from confinement rather than extending into the new soil. Prepare the bed completely — cardboard sheet mulching laid, mulch applied, soil amended where needed — before purchasing any plant material. Then purchase and plant within 48 hours of bed completion. This sequence costs no more than the reverse order and produces measurably faster establishment.
Three specific items under $50 that create immediate budget backyard impact: (1) A single bag of sugar cane mulch ($8–12 at any garden centre) applied at 100mm depth across any bare soil area in the backyard immediately covers exposed soil, suppresses weeds, retains moisture, and introduces a warm natural color that makes the whole garden look more established and considered. (2) A string of 10-meter outdoor festoon lights ($18–30 online) strung between two fence posts at 2.2 meters height transforms the evening quality of any outdoor seating area in under 30 minutes and requires only two eye-bolt screws. (3) A terracotta pot of lavender ($6–12 at any nursery or hardware store garden centre) placed at the entry point or corner of any backyard seating zone introduces fragrance, color, and the kind of considered botanical detail that makes a space feel genuinely designed.
Realistically, a single-focus budget backyard transformation — a gravel patio with reclaimed timber border, a string light canopy, and a pallet sofa with cushions — costs $250–500 in materials and one full weekend of physical work. A more complete small backyard — gravel zones, raised beds, vertical planter, groundcover mosaic, string lights, fire pit zone, and bamboo privacy screen — costs $600–1,200 across 3–4 weekends of progressive work. The transformation works best when approached as a series of completed projects rather than a single large project: finish the patio completely, use it for a month to understand how the space actually functions, and let that lived experience guide the next investment. Most people find that the first completed project — usually the seating zone with string lights — is used more than any other space in the home within a month of completion, which generates both the motivation and the clarity to invest in the next phase.
Frequently Asked Questions About Budget Backyard Ideas
What is the cheapest way to cover a small backyard with a low-maintenance surface?
Decomposed granite is the cheapest functional surfacing material for a small backyard at $8–14 per bag, covering approximately 1 square meter at 75mm depth. For a 15-square-meter backyard, the total DG cost is $120–210 in material, plus geotextile fabric at $20–40 for the full area — a complete surface installation for $140–250 with no professional equipment required. Pea gravel is the second-cheapest option at a similar price per bag, with the advantage of requiring no compaction and providing better drainage but the disadvantage of being less stable underfoot for furniture and walking. Lawn grass from seed is the lowest material cost option at $5–15 for a full seed packet, but the highest ongoing maintenance cost — weekly mowing through the growing season adds 40–60 hours of annual labor that compounds across every year of ownership.
What colors work best in a small budget backyard?
The most effective palette for a small budget backyard is anchored in natural material tones — warm sand gravel, weathered timber grey, terracotta pot orange, and deep garden green — with one accent color introduced through a single painted surface or plant grouping. Deep forest green (applied as fence paint, pot color, or planting mass) is the most versatile accent because it recedes visually, making the space feel larger rather than smaller, while providing rich contrast against natural material tones. Matte black applied to tin can planters, metal furniture, or fence hardware reads as deliberate design in any garden context. Avoid bright colors on large surfaces — a brightly colored fence or bold paving in a small space feels overwhelming because there is insufficient neutral area to balance it.
How much does a basic budget backyard transformation cost?
A focused single-zone transformation — gravel patio, reclaimed timber border, string light canopy, and pallet sofa with cushions — costs $250–500 in materials with DIY installation. A more complete small backyard transformation covering surfacing, planting, seating, lighting, privacy screening, and a water feature costs $600–1,500 across multiple weekends of progressive work. The materials in this list are specifically chosen to minimize cost without sacrificing visual quality: the total materials budget for all 14 ideas in this list — if implemented in a single backyard — would run $900–2,000 depending on material quantities required, compared to $15,000–40,000 for a professionally designed and installed landscape of equivalent visual quality.
Can I create a stylish small backyard on an apartment balcony?
Yes — with vertical-first design principles that prioritize wall and railing surfaces over floor space. The highest-impact balcony adaptations of the ideas in this list are: a vertical pallet planter mounted to the balcony railing, a string of festoon lights along the balcony ceiling or railing, a single terracotta pot fountain on a side table (the recirculating pump requires only a power outlet), a tin can herb wall mounted to the apartment wall or a freestanding timber panel, and a bamboo privacy screen along the railing face. Together these five elements — all achievable for under $300 — create a planted, lit, private outdoor room on a balcony of any size without permanent modification that might violate a lease.
What plants give the best visual impact for the lowest cost in a budget backyard?
The four highest-impact, lowest-cost plant choices for a budget backyard are: lavender (seeds or small plugs at $2–5 each, flowers in the first year, drought-tolerant once established, fragrant and long-blooming), creeping thyme (punnet seedlings at $4–8, spreads to fill ground coverage within one season, flowers in purple waves in spring), sunflowers from seed (packet cost $3–6 for 30+ seeds, reach 1.5–2 meters in a single season, provide massive visual scale at the lowest possible cost), and climbing star jasmine (established plant at $8–15, covers a fence or trellis within two seasons, flowers prolifically in white with a fragrance that fills the garden). All four are available at hardware store garden centres and nurseries, establish readily without specialist soil preparation, and deliver visual impact within their first growing season.
Ready to Create Your Dream Budget Backyard?
These 14 ideas span the full range of what a budget small backyard can become — from a decomposed granite patio with reclaimed timber edging and a string light canopy overhead, to a no-dig native garden bed, a terracotta pot fountain, a groundcover mosaic that replaces the lawn entirely, and a fire pit zone that keeps everyone outside until the wood runs out — so whether your budget is $100 for a single weekend project or $1,200 for a complete small backyard transformation, there is a genuinely buildable starting point here for your space, your climate, and your primary outdoor use. The transformation works best when it starts with one fully completed project rather than ten partially started ones — a finished gravel patio with two chairs and a string of lights used every evening is more valuable than an aspirational yard half-dug and waiting for the next phase that never quite arrives. Today’s specific action: measure your backyard’s dimensions right now, identify the one corner or zone you would use most if it were properly set up, and calculate the DG or gravel quantity needed to surface it — that single measurement starts the material order that makes the weekend project real. When the yard is finished, layered with planted density, warm in the evening light, and used more than any room inside the house, you will have built the thing that budget design always produces at its best: something that looks considered because it was, and feels generous because every dollar was spent with intention. Save the ideas that matched your climate, your primary use, and the one material you can source locally for the lowest cost — those are the ones that will be built this month rather than pinned for next year.